The rise of video calling apps has been a major trend in recent years. According to a research, the global video conferencing market size was valued at USD 6.28 billion in 2021 and is expected to expand at a compound annual growth rate (CAGR) of 12.5% from 2022 to 2030.
There are more options than ever before for managing your business on the go in the current scenario! From FaceTime and Skype to Google Meet, we have plenty of choices for staying connected with friends, family, and business associates.
But what if you want to create your own video chat app? That too on Android?
Thankfully, you don't need full-fledged app development knowledge or advanced programming skills to create your own application. You just need Dyte. It's surprisingly simple with the help of Dyte's Android SDKs.
In this blog post, we'll walk you through the steps to building your own video chat app on Android using Dyte.
Prerequisites
Before getting started with the app development, it is important to have a basic understanding of the following technologies:
If you're not already familiar with these technologies, no worries! There are plenty of resources out there to help you get up to speed. Once you have a solid grasp of the basics, do the following:
Create a Dyte Developer Account
In order to use Dyte's video chat API, you'll need to create a developer account. To do so, simply go to the Dyte website and sign up for a free account. Once you've registered and verified your email address, you'll be able to log into the Developer portal and view API Keys for your organization.
Copy the API Keys. These API Keys are unique to your organization and are required to use Dyte REST APIs such as when instantiating a meeting.
Create Presets
Create presets using the Developer portal. A preset is a set of permissions and UI configurations that would be applied to a participant.
Create a Dyte Meeting
Create a Dyte meeting using the Create Meeting API. This API returns you an unique identifier roomName for your meeting.
Add Participant to the Meeting
After you've created the meeting, add each participant to the meeting using the Add Participant API (The presetName created earlier must be passed in the body of the Add Participant API request).
The API response contains the user authentication token authToken.
roomName and authToken are required to initialize the frontend SDKs. For more information, see Getting Started With Dyte.
Set Up Android Studio and Android Emulator
Lastly, set up your Android Studio and Android Emulator.
If you don't wish to use Android Emulator, you can use two Android devices instead. The devices can be smartphones or tablets running Android Lollipop or above.
Steps to Develop a Video Chat Application in Android
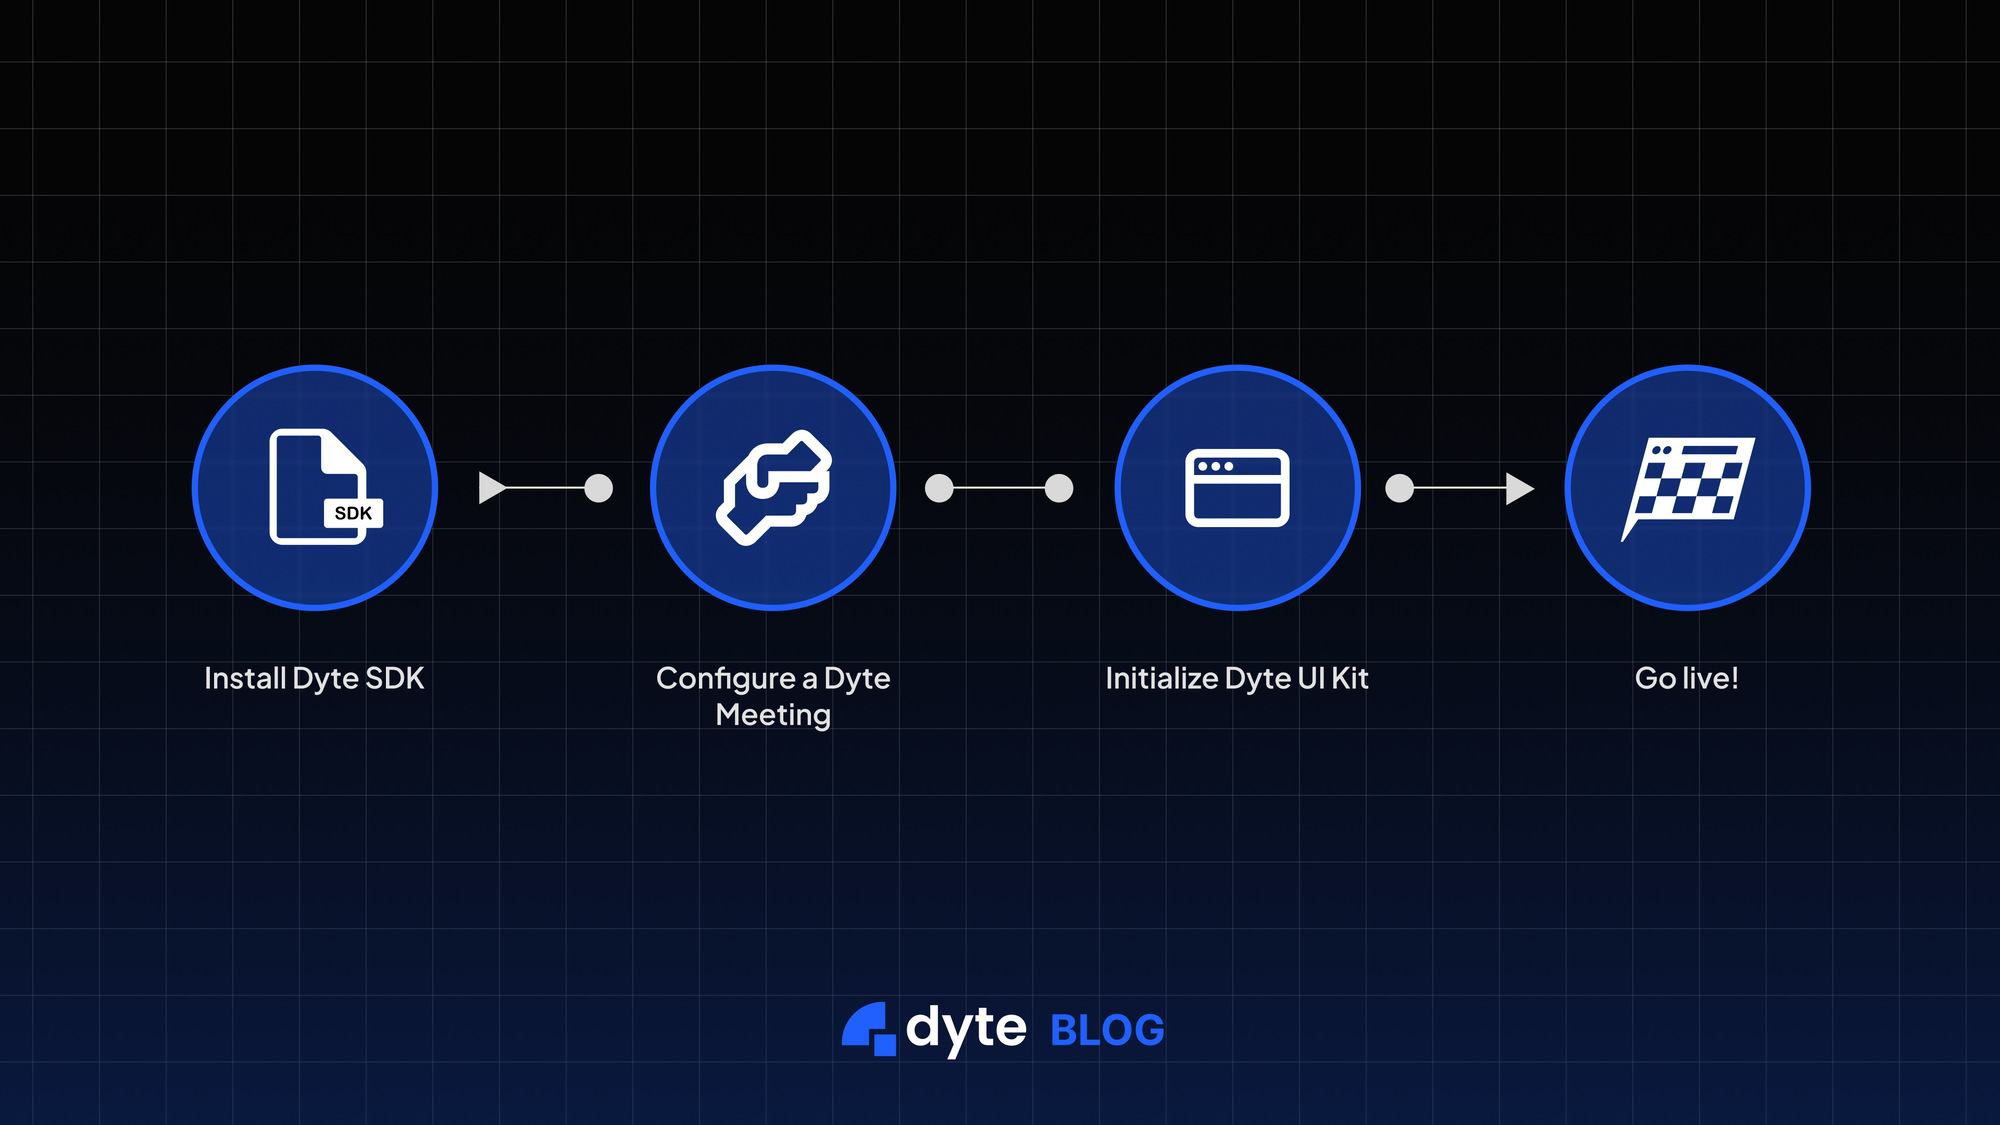
Now that we've covered all the prerequisites let's dive into the steps necessary to create a video chat app in Android with Dyte. You just need to do the following:
- Install the Dyte SDK
- Configure a Dyte Meeting
- Initialize Dyte UI Kit
- Go live!
Step 1: Install the Dyte SDK
1. Dyte's Android SDK is available on MavenCentral repository. Add the repository in your settings.gradle file.
dependencyResolutionManagement {
  repositoriesMode.set(RepositoriesMode.FAIL_ON_PROJECT_REPOS)
  repositories {
    google()
    mavenCentral()
  }
}
Add io.dyte:uikit to the dependencies block of your module's build.gradle file and click on Sync Project.
dependencies {
    // (other dependencies)
    implementation 'io.dyte:uikit:0.0.3'
}
2. Add the following permissions to the AndroidManifest.xml file.
<uses-permission android:name="android.permission.CAMERA"/>
<uses-permission android:name="android.permission.RECORD_AUDIO" />
<uses-permission android:name="android.permission.WAKE_LOCK" />
1. Add/create the file android/app/proguard-rules.pro.
# Keep `Companion` object fields of serializable classes.
# This avoids serializer lookup through `getDeclaredClasses` as done for named companion objects.
-if @kotlinx.serialization.Serializable class **
-keepclassmembers class <1> {
   static <1>$Companion Companion;
}

# Keep `serializer()` on companion objects (both default and named) of serializable classes.
-if @kotlinx.serialization.Serializable class ** {
   static **$* *;
}
-keepclassmembers class <2>$<3> {
   kotlinx.serialization.KSerializer serializer(...);
}

# keep webrtc classes
-keep class org.webrtc.** { *; }
-dontwarn org.chromium.build.BuildHooksAndroid

# keep ktor classes
-keep class io.ktor.** { *; }
2. Add the following line to your android/app/build.gradle to import the proguard configuration.
buildTypes {
        release {
            ...
            ...
            ...
            proguardFiles getDefaultProguardFile('proguard-android.txt'),
            'proguard-rules.pro'
        }
    }
Step 2: Configure a Dyte Meeting
To configure (or set up) a Dyte meeting, pass your organizationId, the created meeting's roomName, and the participant's authToken into DyteUIKitConfig as part of DyteMeetingInfo.
For Kotlin
import dyte.io.uikit.DyteUIKitBuilder
import dyte.io.uikit.DyteUIKitConfig
import io.dyte.core.models.DyteMeetingInfo

// Configure meeting parameters
val meetingInfo = DyteMeetingInfo(
    orgId = "YOUR_ORG_ID_HERE",
    roomName = "ROOM_NAME_HERE",
    authToken = "AUTH_TOKEN_HERE"
)
// pass in activity context for the SDK
val config = DyteUIKitConfig(
    activity = this,
    dyteMeetingInfo = meetingInfo,
)
For Java
import dyte.io.uikit.DyteUIKit;
import dyte.io.uikit.DyteUIKitBuilder;
import dyte.io.uikit.DyteUIKitConfig;
import io.dyte.core.models.DyteMeetingInfo;

// Configure meeting parameters
DyteMeetingInfo meetingInfo = new DyteMeetingInfo(
    "YOUR_ORG_ID_HERE",
    "ROOM_NAME_HERE",
    "AUTH_TOKEN_HERE",
    true, // enable audio
    true, // enable video
    "BASE_URL_HERE",
    "this is name" // display name here
);
// pass in activity context for the SDK
DyteUIKitConfig config = new DyteUIKitConfig(
    this,
    meetingInfo
);
Step 3: Initialize the Dyte UI Kit and Go Live
Use the DyteUIKitConfig created in the previous step to build the DyteUIKit.
This essentially builds the video chat feature for launch.
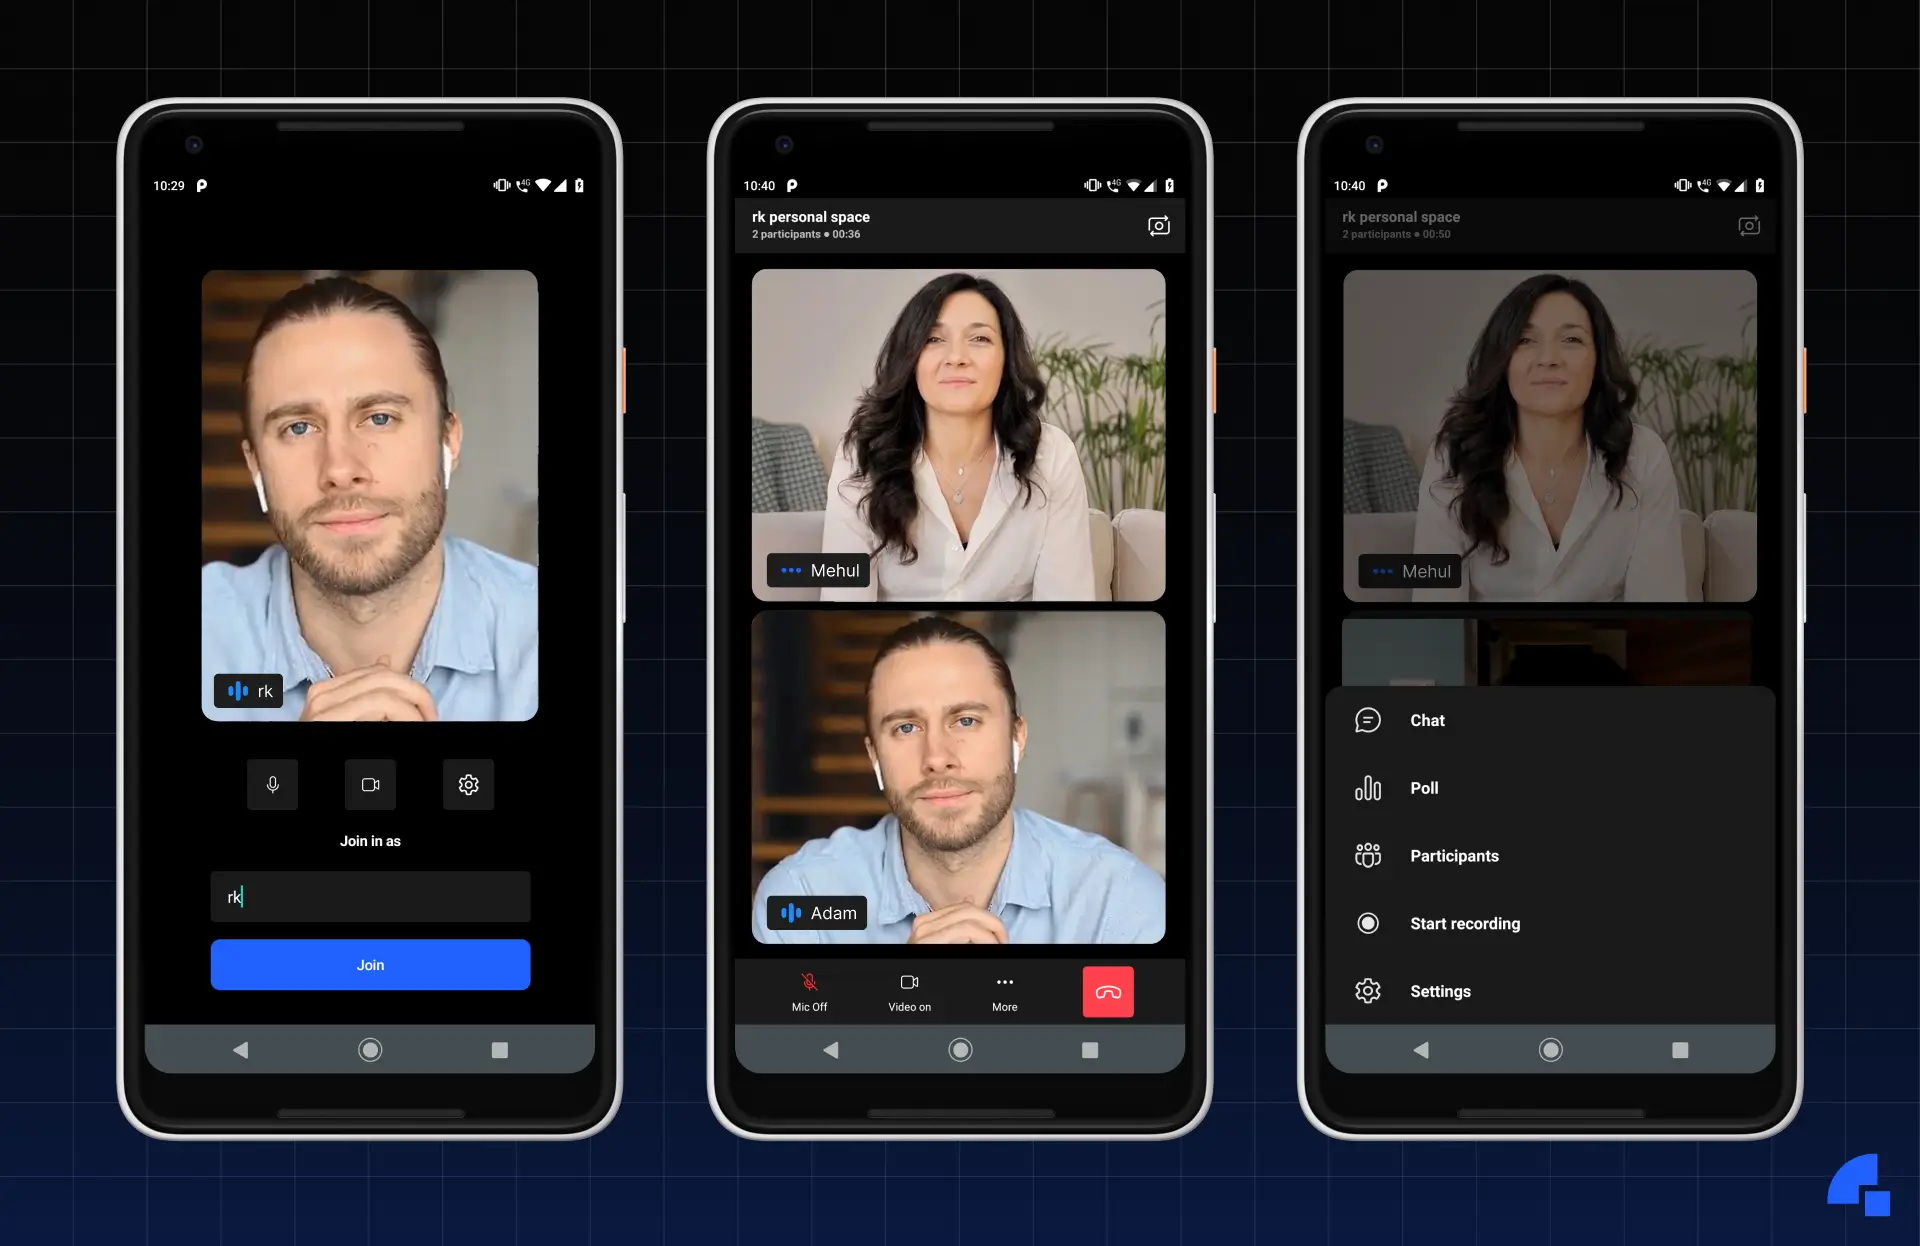
Launch the meeting in your app, and your meeting will be displayed in fullscreen mode. That's all you need to do!
For Kotlin
import dyte.io.uikit.DyteUIKitBuilder
import dyte.io.uikit.DyteUIKitConfig
import io.dyte.core.models.DyteMeetingInfo

// initialize an instance
val dyteUIKit = DyteUIKitBuilder.build(config)
// launch the activity
dyteUIKit.loadUi()
For Java
import dyte.io.uikit.DyteUIKit;
import dyte.io.uikit.DyteUIKitBuilder;
import dyte.io.uikit.DyteUIKitConfig;
import io.dyte.core.models.DyteMeetingInfo;

// initialize an instance
DyteUIKit dyteUIKit = DyteUIKitBuilder.INSTANCE.build(config);
// launch the activity
dyteUIKit.loadUi();
Wrapping Up
Building a video chat app from scratch can seem daunting, but with the help of Dyte, it's surprisingly easy! To recap, we installed the Dyte SDK, created a meeting, and initialized the Dyte UI Kit, and done!
You can also refer to the Quickstart guide and explore the sample app of Dyte's Android UI Kit to to gain a deeper understanding of how it works.
Sign up today and claim your free 10,000 minutes to get started. Need more help? Click here to talk with our team.
Can't wait to see what you build using Dyte...!

