Why should I even care?
Every programmer feels this uncontrollable urge to automate even the smallest of tasks. Of course, why would you spend 5 minutes doing it manually rather than spend 5 hours trying to automate it?

Well, we at Dyte also give in to these irresistible urges once in a while (a bit too often actually). However, this automation is one of the main reasons we’re able to move fast - since we spend less time and effort in manual testing and manual releases. We have internal tools to set up development environments for our engineers, and CLIs to automate tasks during on-call duties. We’ve gone so far as setting up auto-generation of documentation, open-API spec files, and even auto-updating the versions of our sample apps whenever a new SDK version is released.
Now, you might be wondering why anyone should even bother. It often feels like we spend too much time automating something (which we probably do), but we’ve always realized its value when we don’t have to do the same task - no matter how small - over and over again. It especially helps when you have a small team since you can afford to simply forget about something once you automate it and be sure that there’s no human error in the process.
What do I automate?
The scope of automation is not limited to the engineering team. Our GTM team has set up self-directed publishing of social-media posts, scheduling of blogs, and certain other things with the help of tools such as Zapier, Hubspot, and so on - but that’s a discussion for another blog.
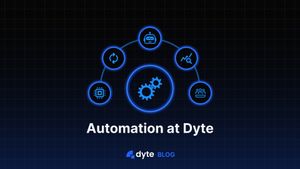
In the engineering team, we’ve set up some automation in every stage of development, namely:
- Local Development 👩💻
- PR Created 🟩
- PR Merged 🟪
- Deployment 🚀
- Testing and Validation 🧪
Local Development 👩💻
We have a bunch of microservices in the backend, and it’s incredibly difficult to run the entire development environment locally. About a year ago, we used to set up remote servers for developers with all the microservices set up, but we soon figured that it wouldn’t scale well with an increase in the team size. If we were to add a new microservice, we’d have to SSH into each of these remote servers and run the new service.
We wanted a way to emulate the production environment in the day-to-day developer workflow, but it’s implausible to expect every developer to set up Kubernetes or minikube on their laptops. Of course, another problem was that the laptops wouldn’t be able to handle the load of running tens of microservices.

Initially, we tried out this tool called telepresence and connected it to a testing k8s cluster. This did solve the problem of simulating a production environment during development, but we would still have to maintain separate clusters for every developer, and update these clusters whenever a new microservice was created.
Due to these reasons, we built an internal tool called deployte that spawns an environment for you on a k8s cluster in the cloud and synchronizes your local development environment. Essentially, the tool auto-deploys all the microservices and updates the version of these services whenever a new release is created. Let’s say you’re working on a particular microservice, you can simply run that microservice locally on your laptop and deployte will seamlessly synchronize it with the rest of the cluster. A developer can have multiple dev environments, and the environments are automatically shut down when they’re not being used to save us some bucks. One of the most useful features of deployte is that you can use it in CI pipelines to run integration tests with different versions of several microservices. Stay tuned for an article on deployte to know more about it!
PR Created 🟩
The workflows that we have set up when a Pull Request is created are quite common, but also quite useful. We run unit tests and integration tests at this stage. And it would be best if you braced yourselves at this stage because:

We also ensure that commit messages and PR titles are properly formatted in compliance with conventional commits since we like to auto-generate internal CHANGELOGs out of these commit messages. In short, we have linters for code, commit message, PR titles, and description, other than the testing pipeline (which also deserves its own article by the way).
PR Merged 🟪
Finally, a PR is merged into one of the release branches, which brings us to some of the most important automated scripts that run in our pipeline. When a PR is merged into one of our server-side repositories, it gets deployed to the respective cluster (say staging or production). This happens by pushing a Docker image of the service to a registry, and then creating a PR to our GitOps repository to sync the new image with the cluster. All of this is monitored on ArgoCD.
A “release” is also created for the repositories, which is especially important in our SDKs. We use a tool called semantic-release to help us do the following:
- Analyze the commit messages to auto-determine the next version while enforcing the Semantic Versioning specification.
- Generate a
CHANGELOG.mdfile from the commit messages that were formatted according to conventional commits. - Publish an internal NPM package, which gets released publicly on npmjs.com after testing.
- Make a commit to update the version in the
package.jsonandpackage-lock.jsonfiles, and also commit theCHANGELOG.md. - Create a GitHub release for the package, and upload relevant assets.
- Comment and add a release tag on each PR that was included in the release.
It’s incredible how all of this can be done with just a configuration file. We also have scripts that auto-generate the documentation and the OpenAPI Spec files, update the versions of our SDKs in our sample apps, and trigger a deployment to update our demo applications once a PR is merged.
Deployment 🚀
To deploy the changes that were made in any PR, we made a GitHub bot that essentially tracks every PR that’s made in the organization, and whenever it finds a PR that should change something in our production or our staging environment, it makes the corresponding change on our GitOps repository to update the version of the service and sync it with the respective Kubernetes cluster.
Testing and Validation 🧪
We built an internal tool that we like to call DUST (which stands for Dyte Ultra Stress Test framework 😅) for stress testing our system. Using DUST, we can add several bots in the meeting, and make them toggle their mics and cameras. We can control the type of network a bot is on (2G, 3G, 4G, etc.) to test how our system functions in poor network conditions. DUST also has modules to stress test our socket layer and our API. I could go on about DUST, but this too deserves its own article - stay tuned!
Where do we stop?
There’s really no reason to stop delegating your work to your CI pipelines while you sit back and sip a cup of tea (or coffee?). As a rule of thumb, I try to automate every task that takes more than 10 minutes of my time every day. One of these tasks is, of course, to set up the automation scripts that I mentioned above. Of course, I automated that as well by writing a bash script that sets up the entire release process on every existing repository, and on every new repository that we will make in the future! I’ll leave a trimmed-down version of the bash script below for you to take a look at!
https://gist.github.com/roerohan/2edfe3782d9e9afb1e9e10111373febe

If you haven’t heard about Dyte yet, head over to https://dyte.io to learn how we are revolutionizing live video calling through our SDKs and libraries and how you can get started quickly on your 10,000 free minutes which renew every month. If you have any questions, you can reach us at support@dyte.io or ask our developer community.


