Dyte CLI brings Dyte to your terminal. It reduces context switching, helps you focus, and empowers you to more easily script and create your own workflows on top of Dyte.
With our CLI, you can:
- Run your entire Dyte workflow from the terminal, from meetings through recordings
- Play around with webhooks
- Release your own custom plugins
🎬 From meetings to recordings
The inherent scriptability brought to you by a CLI lets you chain many logical actions together. For example, you could have a workflow like:
- You’re an ed-tech startup and have a quick extra session scheduled for your students. Let’s create a meeting in a jiffy:
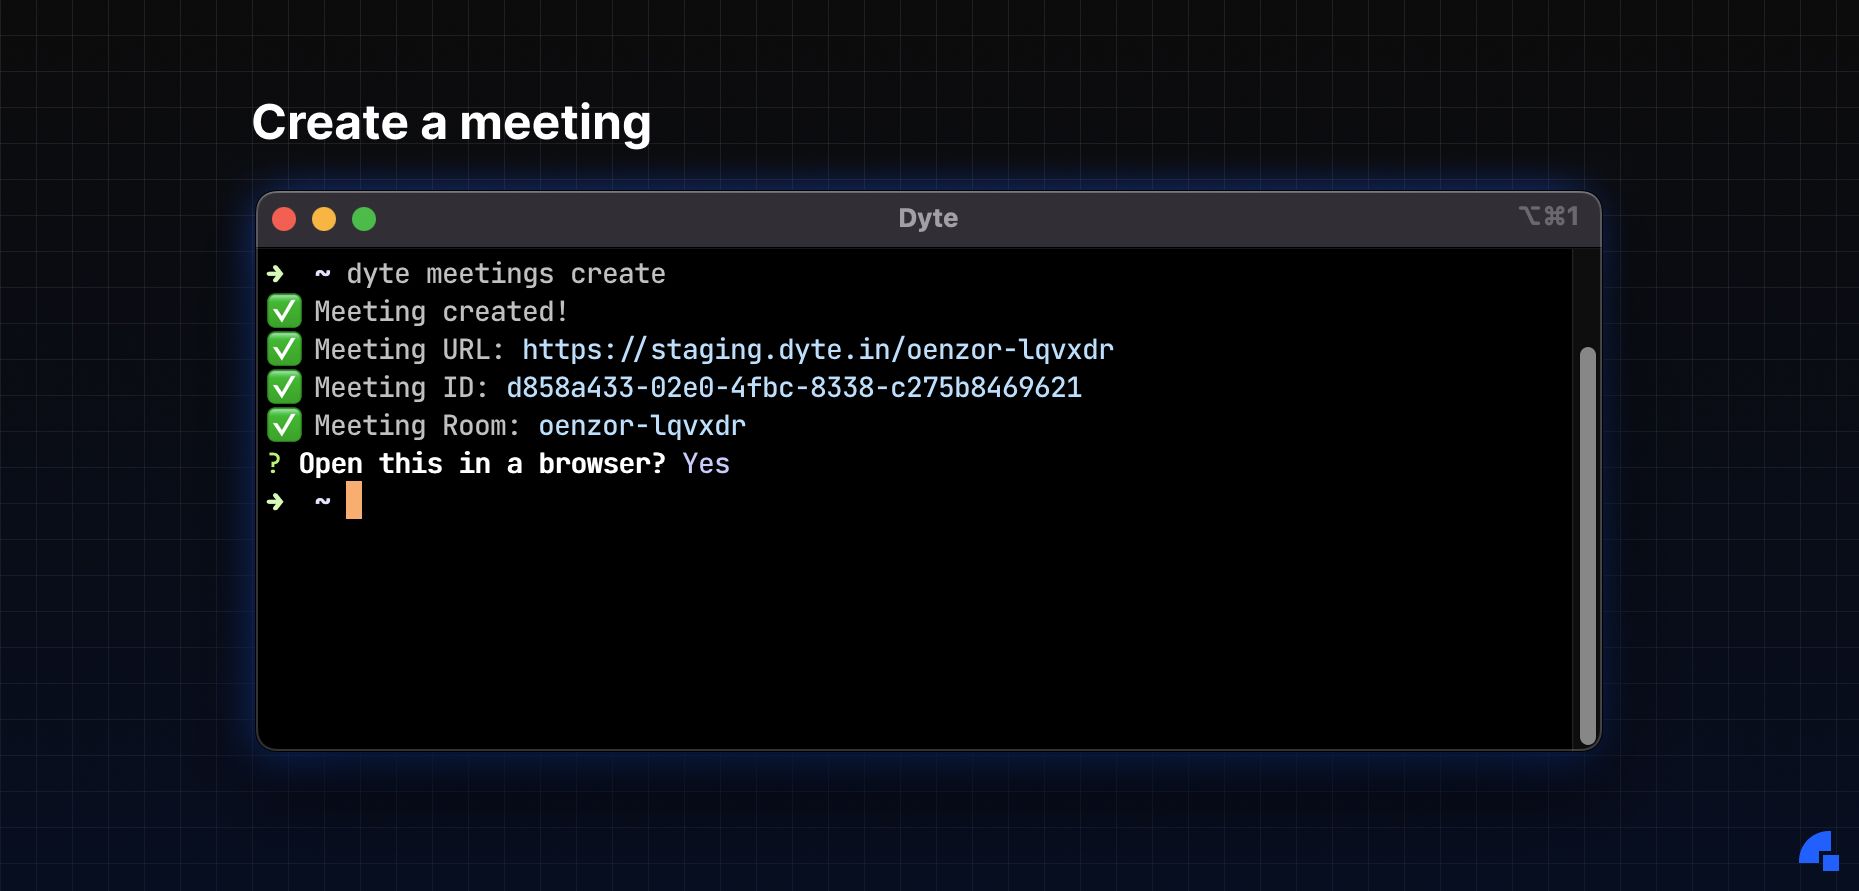
- Now that you have a meeting to work with, you can share the link with your students and have your session 🤝.
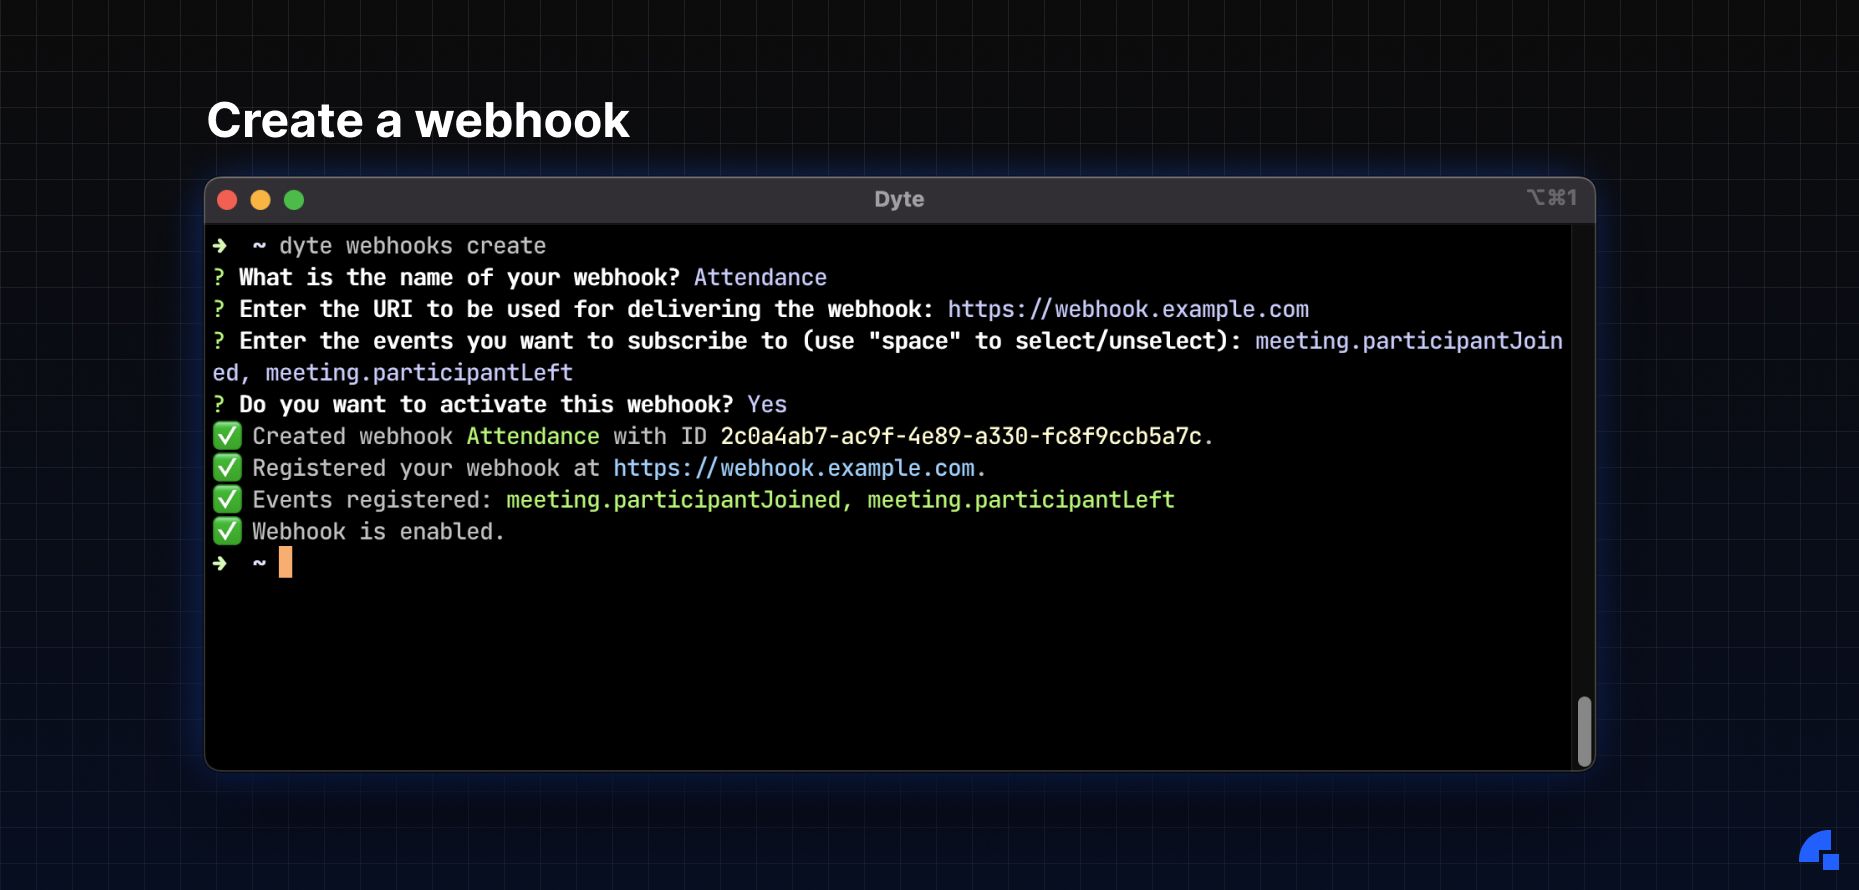
- You’ve noticed some people are tardy or completely skip extra sessions. Not good 😠. What can we do? We can keep a track of who joins using webhooks!
- Oh, the session is very important, you should record this!
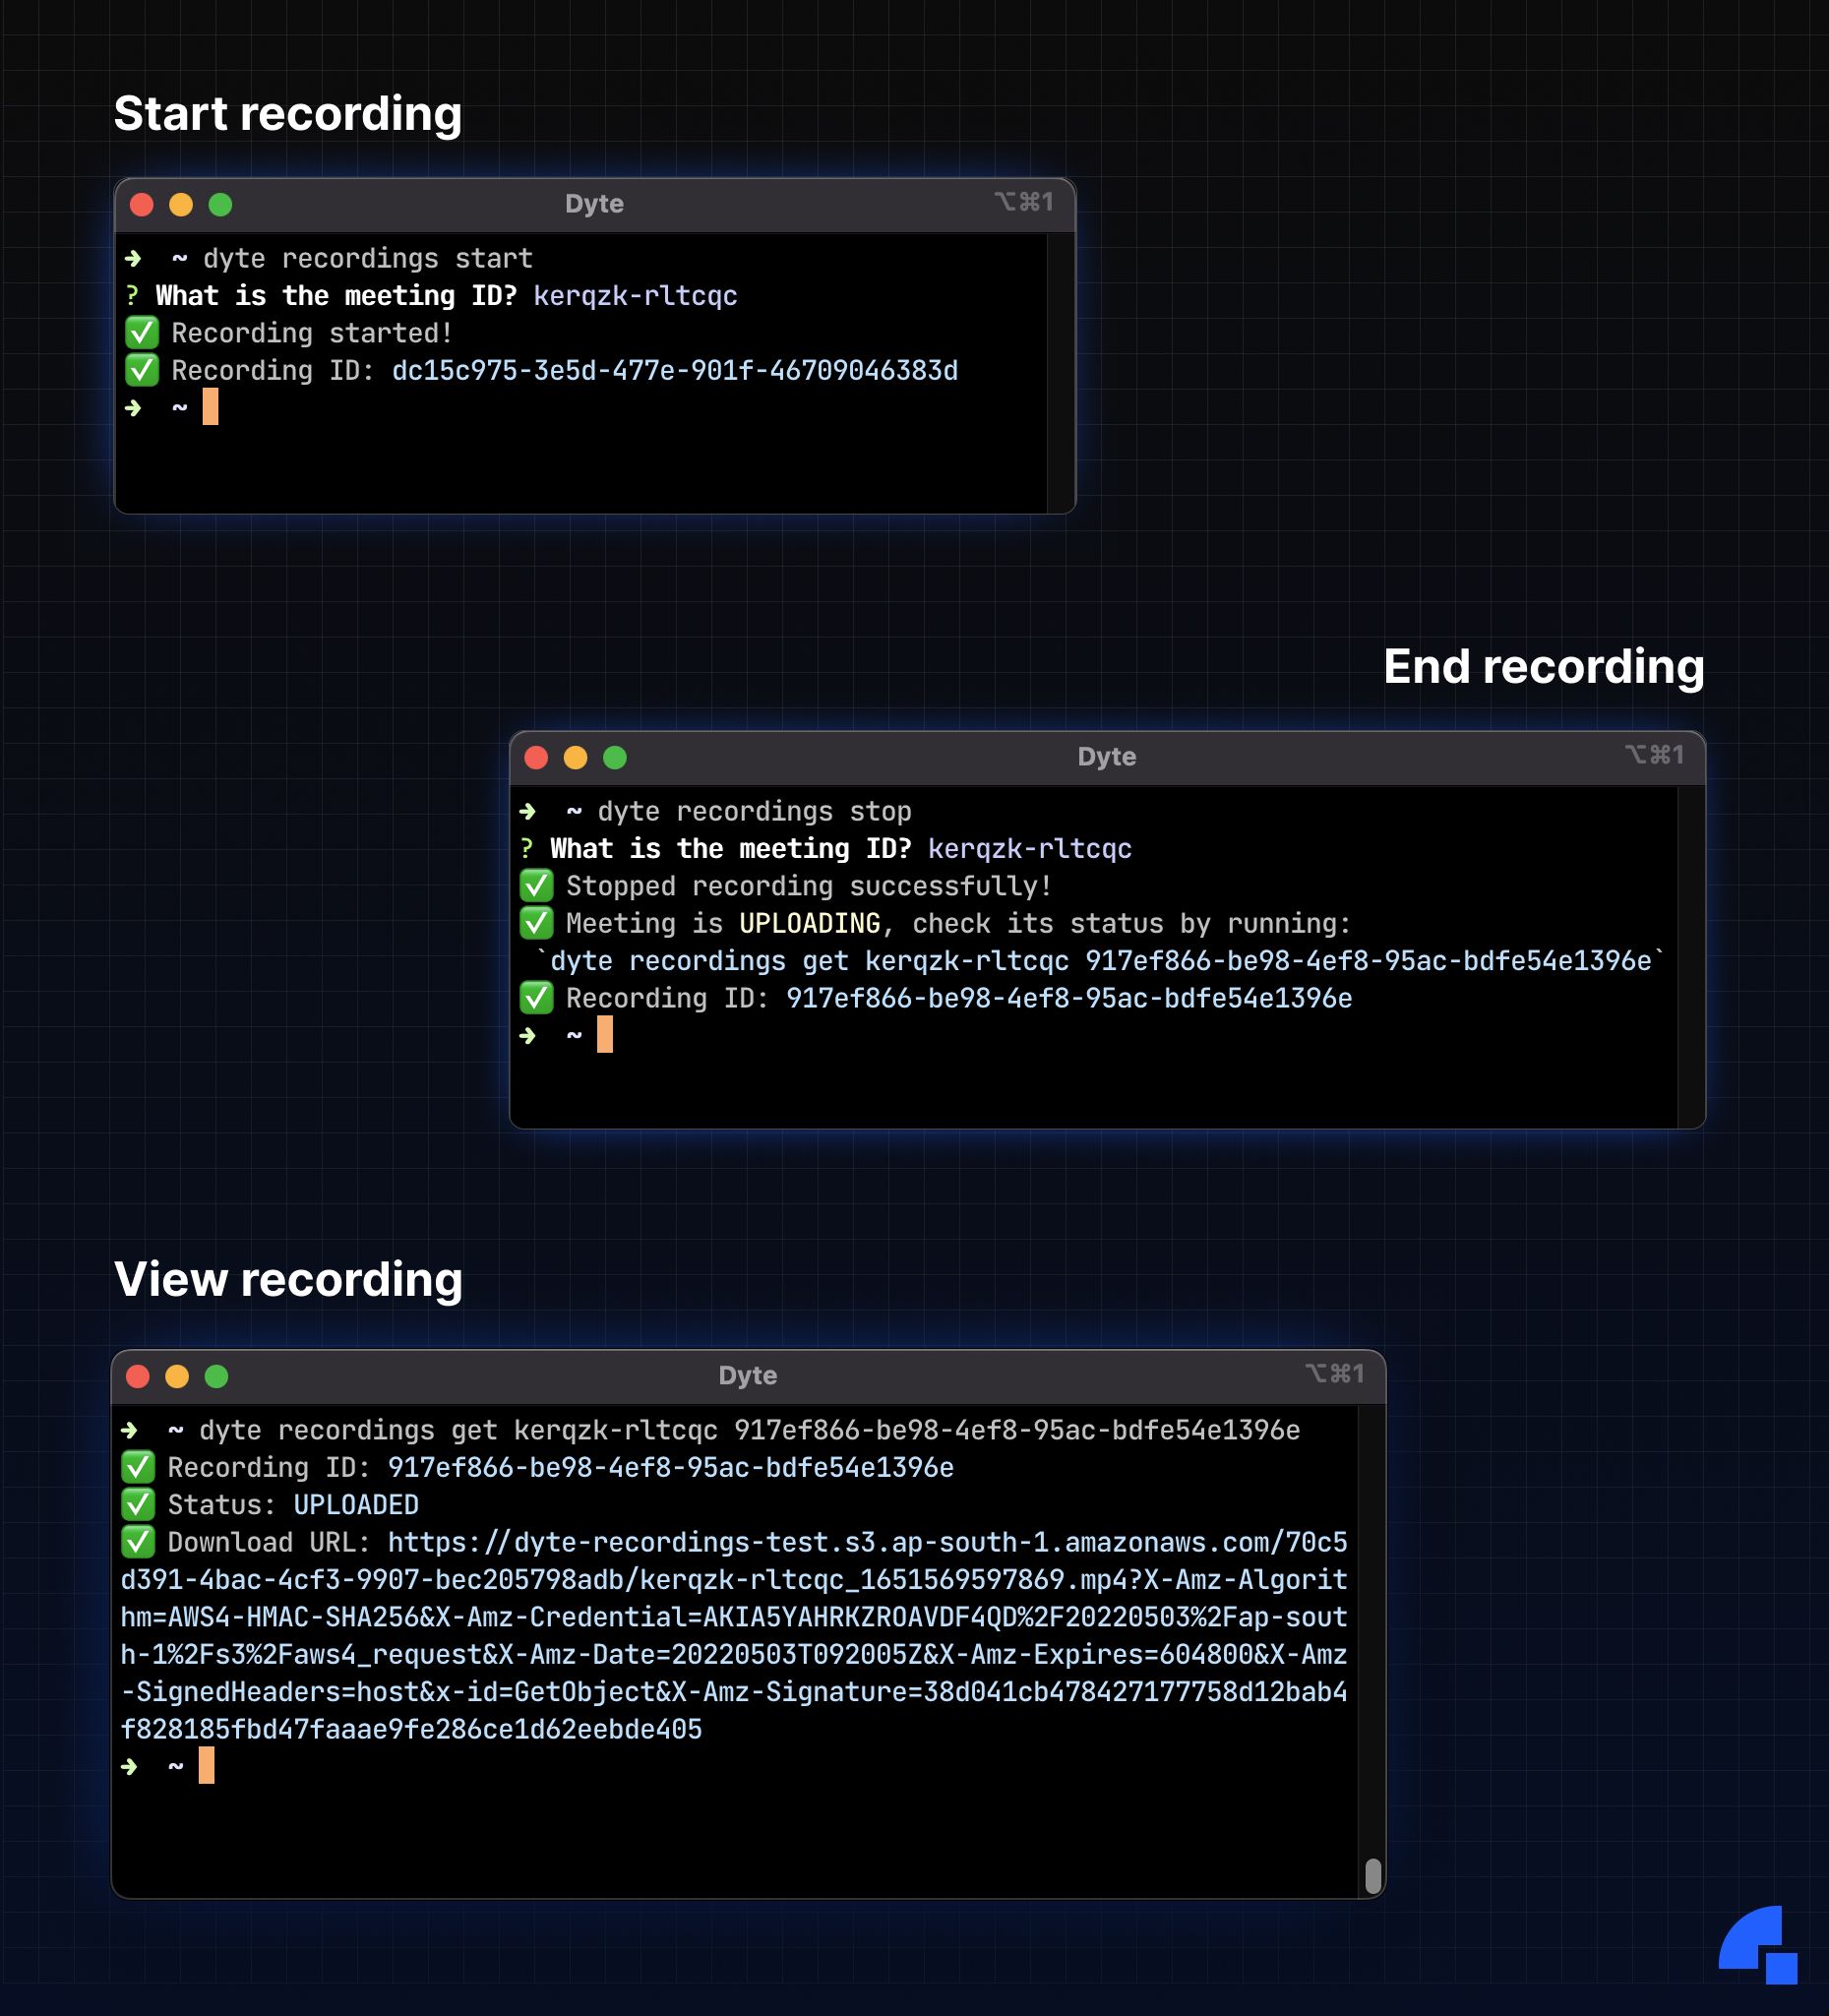
And that’s just an example of how you can make Dyte CLI your own!
🎨 Design considerations
While a CLI might not have a lot of snazzy eye-candy like a website or an app, the design that goes into it is just as important.
We kept a lot of things in mind while designing the CLI so that our end-users have the best possible experience while using it. Here’s a few of the things that went on in our heads while we were working on it:
#️⃣ POSIX compliance
Unix-like operating systems popularised the use of the command line and tools such as awkand sed. Such tools have effectively standardised the behaviour of command line options (aka flags), options-arguments, and other operands.
Why is it important? Users might get confused if our CLI’s syntax for arguments, options, or command parameters deviate from the de facto Unix standards they are used to.
Some examples of expected behaviour:
- Option-arguments or options can be notated in help or examples as square brackets (
[]) to indicate they are optional, or with angle brackets (<>) to indicate they are required. - Allowing short-form single letter arguments as aliases for long-form arguments (see reference from the GNU Coding Standards).
- specifying multiple options with no values may be grouped, such as
dyte -abcbeing equivalent todyte -a -b -c.
💕 Empathy for the user
We’ve put workflows in place that assist the user in interacting with the CLI successfully. We understand the frustration that comes with being unable to use an unfamiliar tool effectively, and we’re here to help you through it!
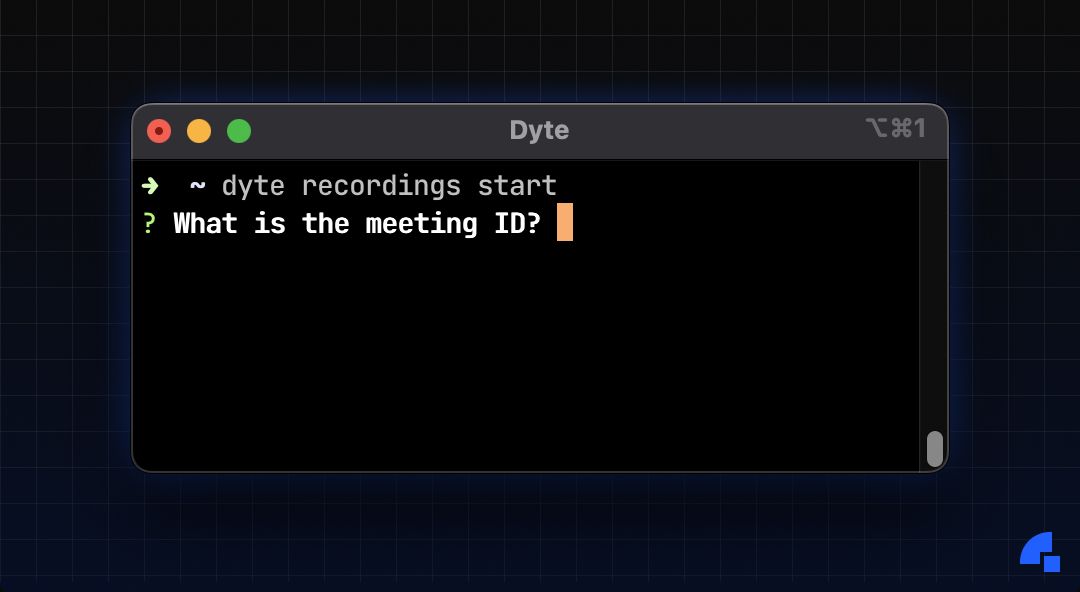
As we’ve seen while starting a recording, the start subcommand takes in a meeting ID. Failing to pass in one and being presented with an error would get pretty frustrating!
And so, we’ve taken care to prompt the user gently for any parameters they miss out on.
✨ Rich interactions and a colourful experience
We’ve leveraged rich command-line interactions beyond that of plain text input to provide a smoother experience for our users.
The CLI makes heavy use of prompts, drop-down selections, hidden password inputs, auto-complete and searchable lists.
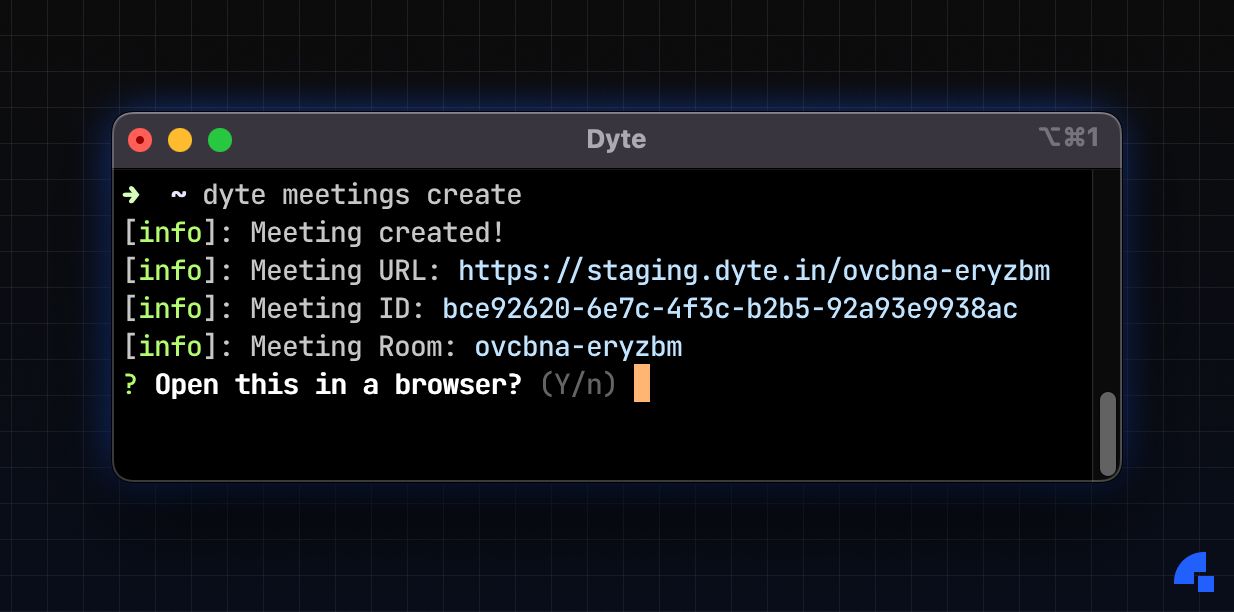
Moving on to colour, most terminals used today to interact with command line applications support coloured text. We’ve made use of this to highlight important bits of output, and to draw your attention to things that might otherwise get lost in an otherwise text-heavy experience.
🧠 Stateful data
We’ve strived to provide a stateful experience, by remembering values and data where we can to improve future interactions.
This is important to ensure we don’t bug the user to enter the same information again and again.
All data stored by the CLI can be found at ~/.config/dyte
🧹 Cleaning up
We’re sad to see you go, but look forward to seeing you again! We don’t leave any configuration files behind when you uninstall the CLI by leveraging the convenient postuninstall script that NPM provides.
📦 Zero dependencies
Okay, that was a bit misleading. We certainly use a few dependencies to make the CLI great, we’re not that good 😛.
What we do however, is bundle all these dependencies, and our own code into a single JS file using the nifty ncc tool (thanks Vercel!)
This lets us ship the CLI without having to worry about any breaking changes in dependencies or nasty supply-chain attacks (remember left-pad and colors.js?). This way, you get exactly what our CI systems build and publish, Untouched by Human Hands™️
🔥 Where can I get it?
The Dyte CLI is currently available on the NPM registry. Please also take a moment to check out how to use the CLI in our comprehensive docs.
We're also planning on open-sourcing the CLI soon, so keep a watch out for any announcements in that space and feel free to contribute!
Wrapping up
We’ve tried to make the usage of Dyte’s CLI to be as pleasant and painless as possible. Using it, you can automate an end-to-end workflow without having to interact with dashboards or our API directly.
We’ve already been using the CLI internally for months now, so bugs should be few and far between. Even so, if you find any, please report them to us!
Take your Dyte experience to new heights with the CLI!

