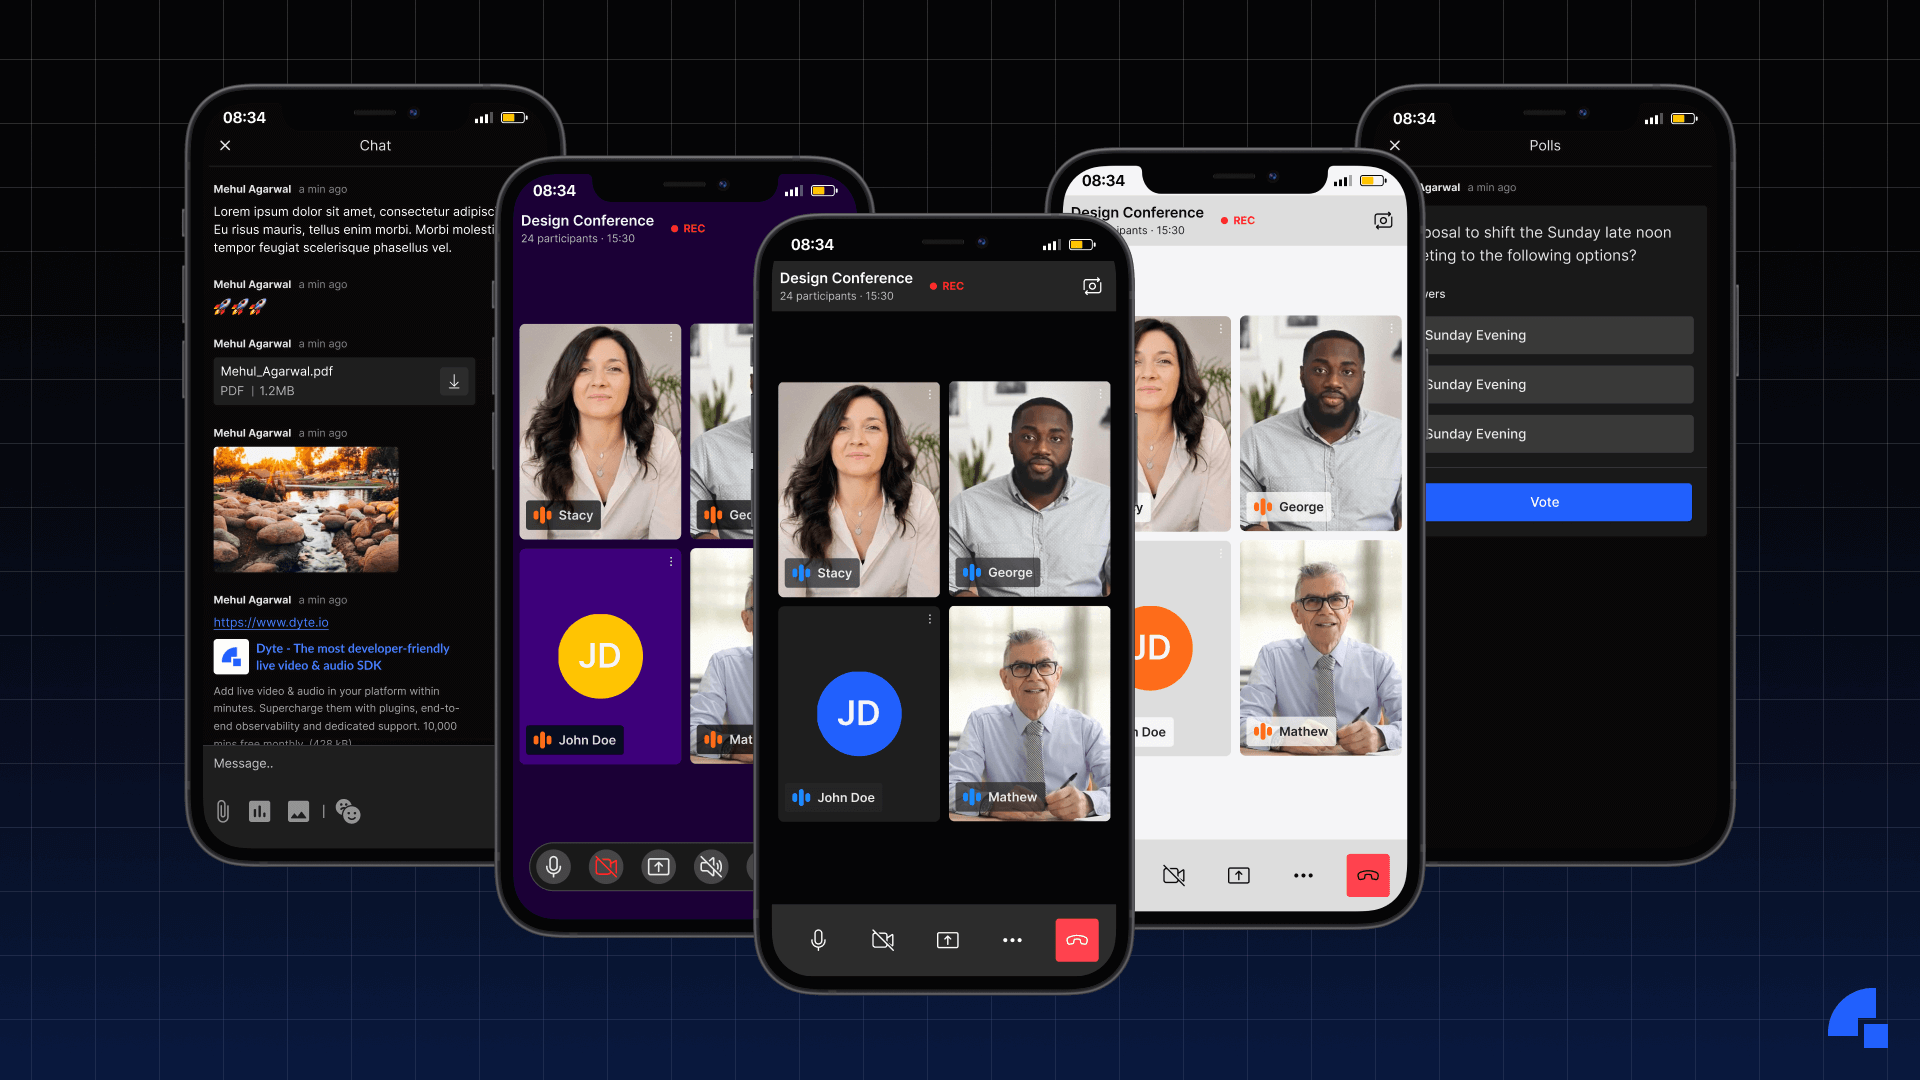
Introducing Dyte UI kit with iOS
Are you tired of spending countless hours designing and coding user interfaces for the same kind of features like audio/video calls, chat, polls, etc.? Look no further! We are thrilled to introduce the Dyte UI kit, a robust framework that simplifies UI development and harnesses the capabilities of Dyte iOS core to deliver stunning, prebuilt UI components and a seamless flow for creating and joining Dyte Meetings.
Effortless UI creation
Dyte UI kit takes the hassle out of UI development. With our framework, you can quickly integrate prebuilt UI components into your projects, saving you valuable time and effort. We provide a wide selection of UI elements that can be easily customized to fit your specific design requirements.
For e.g., DyteVideoView, DyteJoinButton, DyteNameTag, DyteButtonAtom, etc.
Flexible customization options
Dyte UI kit empowers you to tailor your UI components to match your app's unique branding and design. With just a few lines of code, you can control crucial visual aspects such as border radius, border size, spacing, and colors of UI elements. Whether you prefer a sleek and modern look or a vibrant and playful aesthetic, the Dyte UI kit's customization options make it easy to achieve the desired style for your app.
Design library for enhanced efficiency
To further streamline your UI development process, the Dyte UI kit includes a Design Library feature. This feature allows you to initialize a library with default values for border radius, border size, spacing, and colors. By setting up your preferred design configurations once, you can ensure consistency throughout your app and save valuable development time.
You can initialize DesignLibrary with your own default values for various components of DesignLibraryConfigurator
// Create a type which confirms to DesignLibraryConfiguratorProtocol
class DesignLibraryConfigurator: DesignLibraryConfiguratorProtocol {
    public let colorBackgroundBase: UIColor = UIColor(hex: "#050505")!
    public let colorBrandBase: UIColor = UIColor(hex: "#0246FD")!
    public let textColorBackgroundBase: UIColor = UIColor(hex: "#FFFFFF")!
    public let textColorBrandBase: UIColor = UIColor(hex: "#111111")!
    public let statusDangerColor: UIColor = UIColor(hex: "#FF2D2D")!
    public let statusSuccessColor: UIColor = UIColor(hex: "#83D017")!
    public let statusWarningColor: UIColor = UIColor(hex: "#FFCD07")!
    public let cornerRadiusRoundFactor: CGFloat = 4.0
    public let cornerRadiusExtraRoundFactor: CGFloat = 8.0
    public let cornerRadiusCircularFactor: CGFloat = 8.0
    public let borderSizeThinFactor: CGFloat = 1.0
    public let borderSizeFatFactor: CGFloat = 2.0
}

// You can initialize DesignLibrary with the command below
DesignLibrary.shared.setConfigurator(configurator: DesignLibraryConfigurator())
You can also decide app theme with the previously initialized DesignLibrary.
class AppThemeConfigurator: AppThemeProtocol {

    private let cornerRadiusType: CornerRadius.RadiusType? = .rounded
    private let borderSizeWidthType: BorderSize.Width? = .thin

    var cornerRadiusTypeButton: CornerRadius.RadiusType? {
        get {
            return cornerRadiusType
        }
    }

    var cornerRadiusTypePaginationView: CornerRadius.RadiusType? {
        get {
            return cornerRadiusType
        }
    }

    var cornerRadiusTypePeerView: CornerRadius.RadiusType? {
        get {
            return cornerRadiusType
        }
    }

    var cornerRadiusTypeDropDown: CornerRadius.RadiusType? {
        get {
            return cornerRadiusType
        }
    }

    var cornerRadiusTypeNameTag: CornerRadius.RadiusType? {
        get {
            return cornerRadiusType
        }
    }

    var cornerRadiusTypeNameTextField: CornerRadius.RadiusType? {
        get {
            return cornerRadiusType
        }
    }

    var cornerRadiusTypeCreateView: CornerRadius.RadiusType? {
        get {
            return cornerRadiusType
        }
    }

    var borderSizeWidthTypeTextField: BorderSize.Width? {
        get {
            return borderSizeWidthType
        }
    }

    var borderSizeWidthTypeButton: BorderSize.Width? {
        get {
            return borderSizeWidthType
        }
    }

    var borderSizeWidthTypeDropDown: BorderSize.Width? {
        get {
            return borderSizeWidthType
        }
    }
}

// You can initialize AppTheme with the command below

AppTheme.shared.setUp(theme: AppThemeConfigurator())
Future enhancements: more control and customization
We are committed to continuously improving the Dyte UI kit to meet the evolving needs of iOS app developers. In the near future, we have exciting plans to introduce advanced customization options. With these upcoming features, you will have the ability to customize specific UI elements within the Dyte UI kit, such as the Meeting top bar and Meeting bottom bar, and even inject your own custom screens seamlessly into the prebuilt flow. Additionally, we are developing a preset editor on the web, which will provide a visual interface for easily customizing and fine-tuning your app's UI.
Conclusion
Dyte UI kit is transformational for iOS app developers who want to use Dyte as an audio/video calling platform by simplifying UI development and offering a vast collection of prebuilt UI components. Its swift integration with Dyte iOS core, flexible customization options, and upcoming advanced features empowers you to efficiently create visually stunning and highly functional iOS applications.
We have built a sample app using this same SDK and you can find the source code here. You can read more about this SDK in our documentation.
If you have any thoughts or feedback, please contact me on LinkedIn or Twitter. Stay tuned for more related blog posts in the future!
If you haven't heard about Dyte yet, head over to dyte.io to learn how we are revolutionizing communication through our SDKs and libraries and how you can get started quickly on your 10,000 free minutes, which renew every month. You can reach us at support@dyte.io or ask our developer community if you have any questions.