Do you remember what people said on the last video call you attended? The average person attends 3-4 calls every day, making it difficult to remember everything that was discussed in the calls. At Dyte, we always have a single person taking notes for every call (generally the person that joins last 🧙♂️). But even this leads to frequently missing out on a few action items every call. Cue cloud recordings! Cloud recordings capture everything on your video call to a file that can be viewed anytime in the future. This article will cover the different approaches we covered while engineering this feature at Dyte and the hurdles we had to overcome in the process.
How to build it?
We knew we had to build recordings for our video calling company (duh) but we could have accomplished this in numerous ways. Firstly, we started by asking ourselves the following questions:
- What do we want to record? Just the webcam and audio stream? Or the chat in the meeting as well? What about other interactive elements (polls, plugins, file uploads, etc.) in the meeting?
- Do we want to record on the client-side or server-side?
- Do we want to store the recording locally or server-side?
Let's consider these questions one by one. To answer the first question, we decided that we want to record any interactive element present on the screen. Also, we were sure that we wanted to store all the recordings on the server side since everyone in a meeting should be able to download the recording post-meeting. But, we didn't know how to answer the second question as all the approaches had trade-offs.
We came up with 3 major approaches to answer the second question:
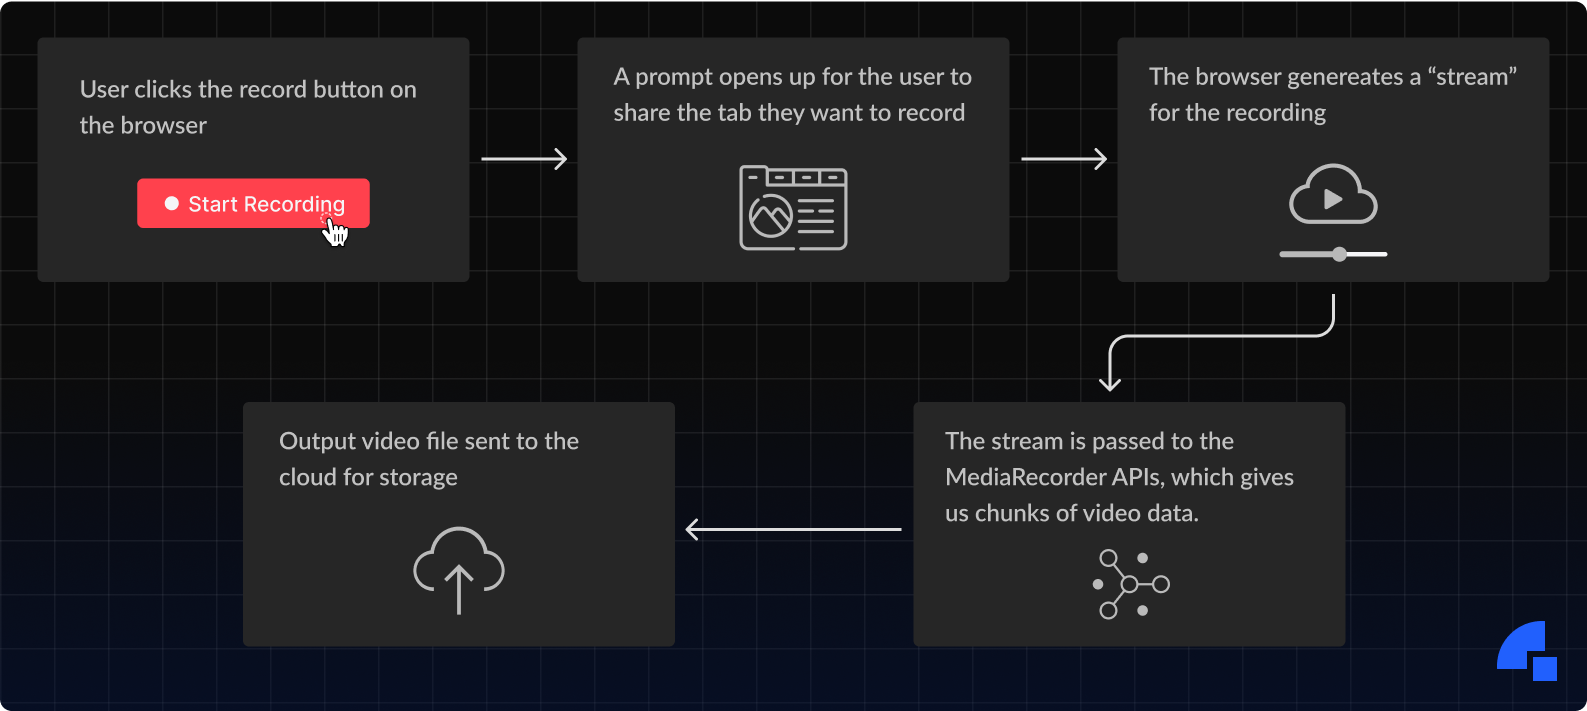
1. Recording a browser tab: We could run a recording logic on the user’s browser that would record their screen and either store it locally or send it to the cloud. All browsers already ship with MediaRecorder APIs allowing you to record and store any media stream you generate. The flow looks something like this:
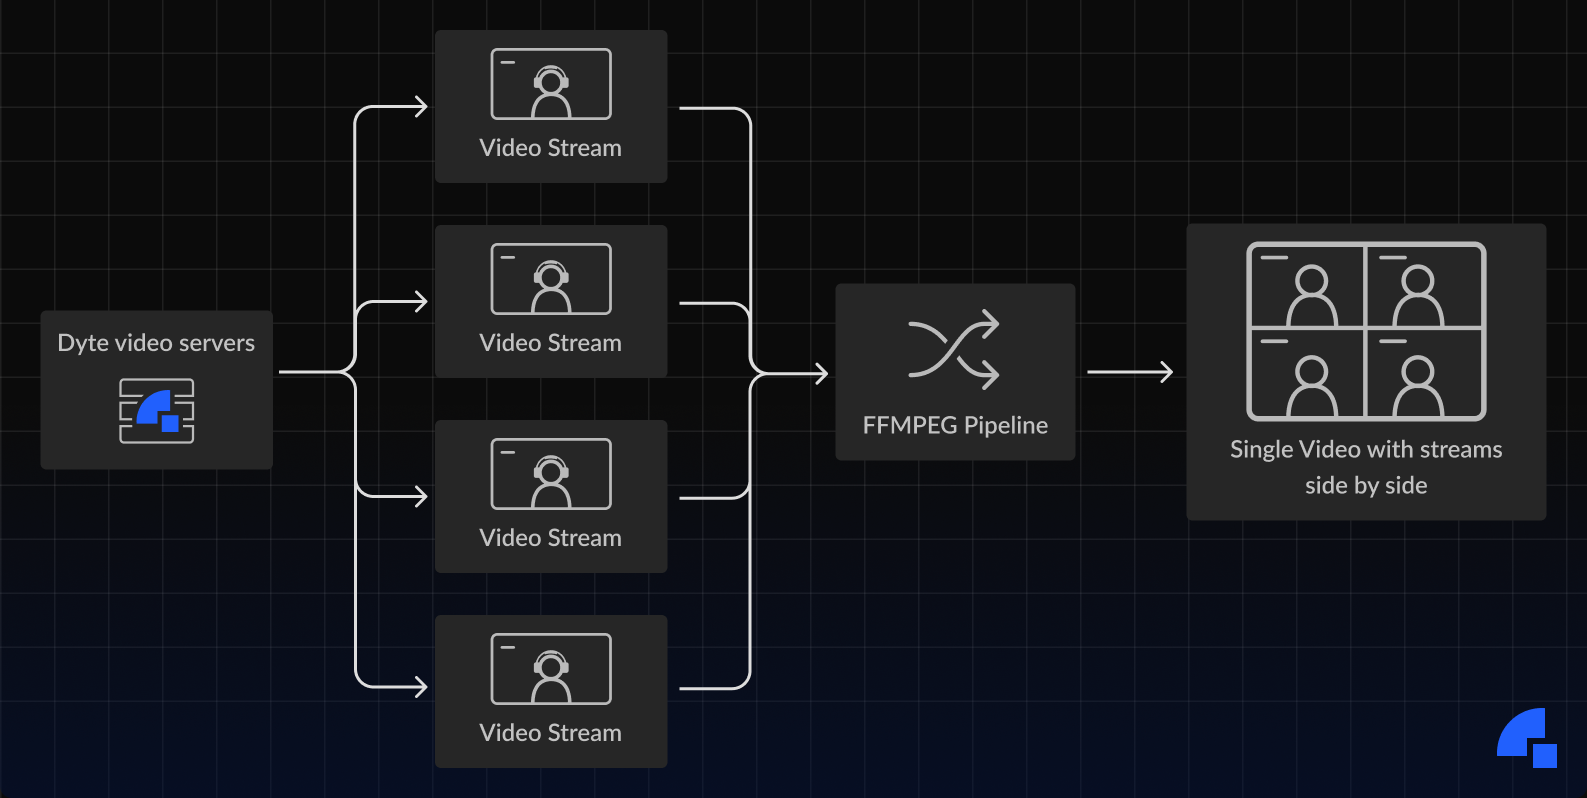
2. Record the streams received from the server: Most video call solutions send their streams to a server that processes them and sends them to all users who want to consume them. We can simply add another layer that sends these videos to a processing pipeline built using GStreamer or FFmpeg, which takes all the raw streams, stitches them together, and then stores them. In layman’s terms, think of this as taking everyone’s webcam videos from a call, then placing the videos side-by-side, and finally exporting to a single video.
3. Good old screen capture: A simple approach is to join the meeting using a virtual “Bot” user and record the entire screen of this Bot using tools like FFmpeg or OBS. This approach preserves the interactive elements on a webpage as we now see the meeting just like how any other user in the meeting would perceive it. However, we would need to incur the hardware cost of running FFmpeg/OBS for every recorded meeting.

We experimented with all 3 solutions and realized that the 2nd solution might be the best long-term, but it required the most effort as there was no easy way to record interactive elements like chat and plugins. On the other hand, the 3rd approach ,as mentioned above, needed a lot of CPU and memory resources. Therefore, we decided to go with the 1st approach.
The MVP
We first thought of allowing users to record locally (using their own browser’s MediaRecorder API) but quickly realized that we can’t depend on the user’s machine to remain stable during lengthy recordings. What if a user leaves a meeting earlier than other users or runs into network issues and rejoins a meeting mid-way? To overcome these issues, we structured our recording MVP like this:
- We ran a Chrome browser on the cloud that joined the call as a hidden participant.
- This Chrome browser had an extension that activated as soon as a call was joined.
- The hidden participant then starts to stream its tab. This stream is fed to the MediaRecorder API which then stores the recording in browser storage.
- When the meeting ends, the recording is transferred to our S3 bucket.
We shipped the MVP within 2 weeks of planning that we had to do recording (oh, we do miss those days) and on the first day, it broke the entire system! Why? Well, there were a few things we failed to account for:
- The entire recording was stored in memory, and as the calls become larger, the available memory decreases. We were running Chrome. This led to our cloud VMs running out of memory frequently.
- Even when it had enough memory, the Chrome browser was unstable and crashed randomly.
- Sometimes our recorder was unable to join the meeting.
- Certain players couldn’t play the recording. Most importantly, it couldn't be played in QuickTime Player (Mac’s default player) and Windows Media Player (Windows default player).
- ... and a lot more.
On a side note, we were in the YC W21 batch during the time and recently came to know about a concept called PRD or Product Requirements Document (stop rolling your eyes OK, we had no clue about anything). Getting into the details of how we struggled with that will take another blog post, but we essentially realized this: we were just building a cool showcase by linking the maximum amount of systems possible, most of which weren’t even necessary.
Thinking along the same lines, we decided to start by writing a detailed PRD outlining the revamped architecture for the system. We clearly defined the goals with the rewrite, and how we could satisfy these requirements in a reliable manner.
The big refactor
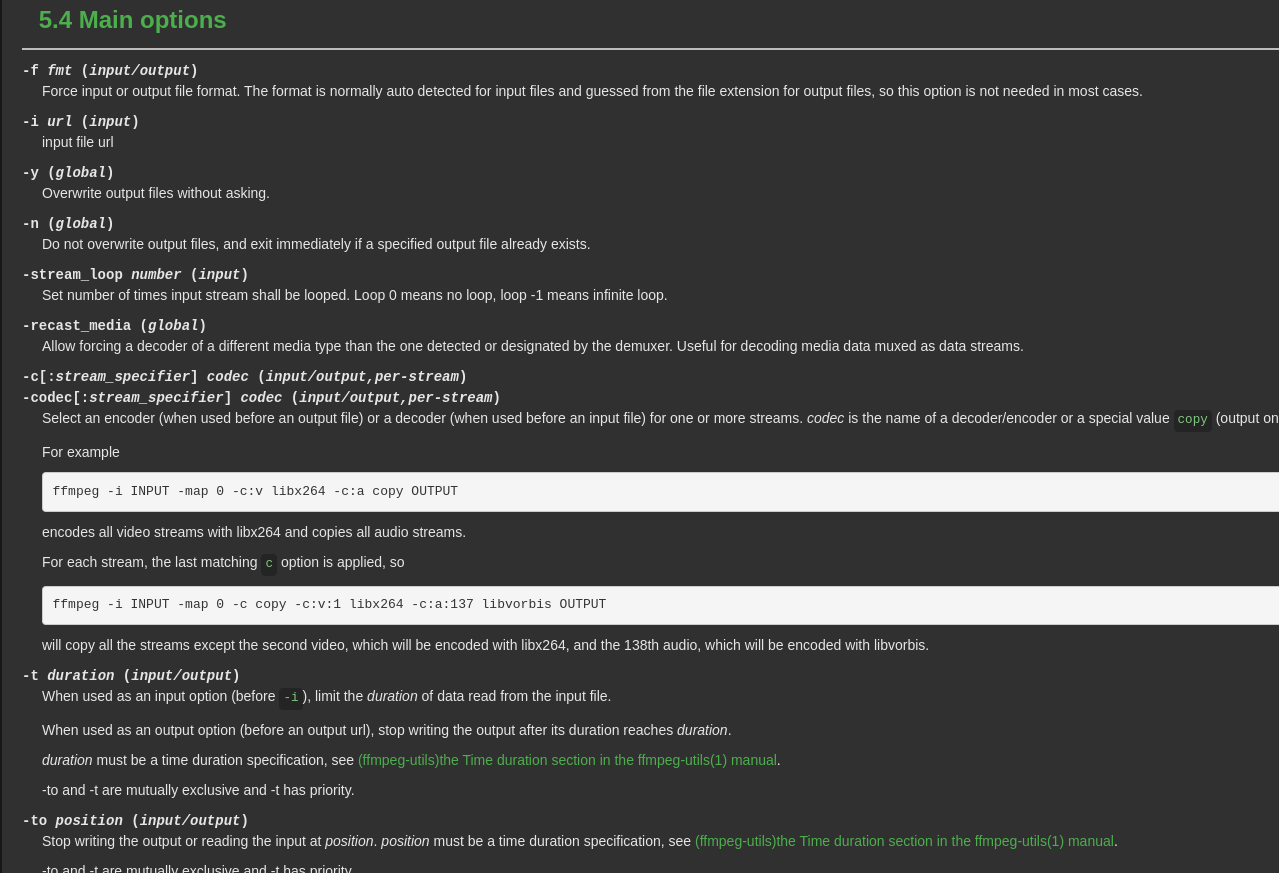
This time, we decided to architecture a solution around the third approach, i.e., screen capture, described previously in this article. We built our own in-house docker image packaged with selenium, Xrandr, FFMPEG, and our application code. This container would join the meeting and then record the browser’s screen using FFMPEG. A lot of our time went into fine-tuning FFMPEG parameters to ensure the correct trade-off between quality and output size of the video file. Since FFMPEG continuously writes to the file system, we did not encounter the memory issue faced in the MediaRecorder approach. Moreover, FFMPEG provided a plethora of output encoding formats, allowing us to export videos to both H.264 and VP9 codecs. The vast majority of video players can easily play these.
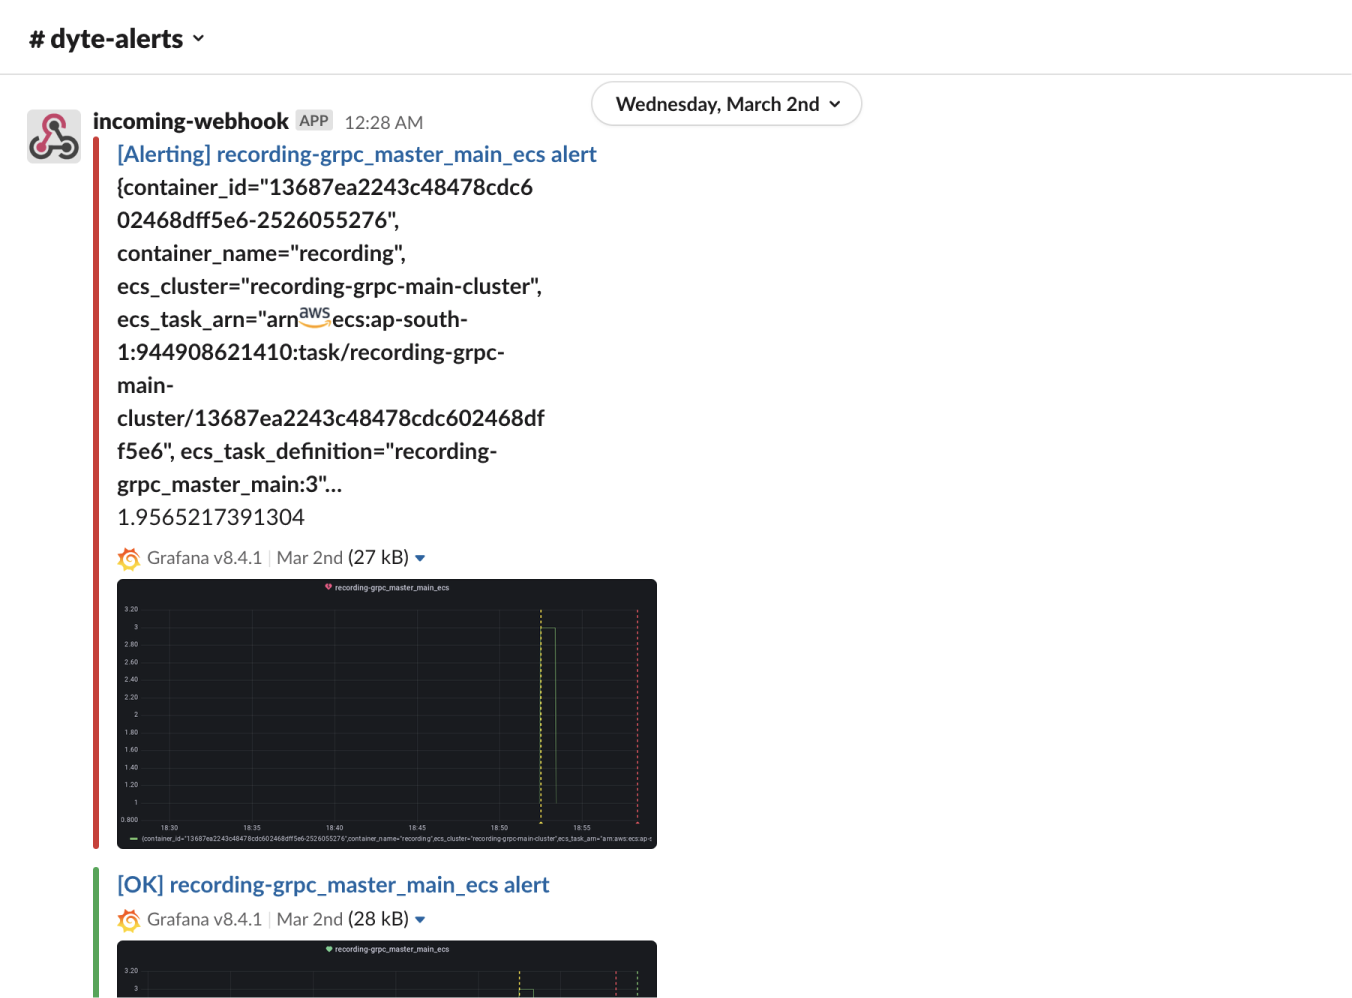
To ensure that the browser joined our meetings reliably, we added retry logic that would look for failures in joining the meeting and try to reload the page again when such errors happened. Moreover, we added logging in every component of the system, which helped us easily debug issues on live-call. A crucial step was monitoring these logs and setting up automated alerts on slack whenever we saw an increased frequency of “error” log lines.
Another issue we encountered was the long durations to spawn these docker containers on Amazon’s Elastic Container Service. ECS did not have any well-defined SLAs on how long it would take to spin up our containers. Our tests revealed that this startup time could range anywhere from 10 seconds to 5 minutes under stress and high load. We were later able to optimize this startup time to less than a second by using a neat trick, something we will cover in a future blog post.
What we learned
- LOG EVERYTHING!! This is probably the most understated thing that we have learned. Don’t worry about performance; use a proper logging library. Don’t worry about cluttering; use proper log levels and make the logging follow a proper structure. If you don’t have data on how to debug the problem, it’s really hard to find the issue. We ended up building a structured logging framework on top of winston which helped us identify edge cases with FFmpeg and our recording logic, and this was then shipped across all our microservices. Also, we ended up building alerts on top of these logs using Grafana, which allowed us to respond to issues even before customers reported them.
- Try to reduce your iteration loop. We realized that testing a recording change locally was taking a lot of time and we didn’t have a proper reproducible test for testing our recording. For the redesign, we started with first writing a simple reproducible test and collecting baseline performance for that test. We built a simple script that allows us to deploy local change directly on the testing environment. That allowed us to shift from doing 1-2 iterations of recording per day to at least 5 iterations per day.
- On the other end, once you are ready with the change, test everything. There was a random bug we saw where for some meetings, we saw the recording was never stopping. We saw then that these were meeting with a host, which when ends meeting for all participants causes recorder (who is also a hidden participant) to get stuck in an invalid state. You can’t test for everything but we ended up creating a feature checklist as part of our SDK and then each new feature is tested against the combinations of existing features.
- Understand the cloud infra that you are building on top. Remember that random Chrome crash that we talked about? Turns out it was an issue on ECS. We had to go deep in the documentation for how ECS works and debug that.
Wrapping Up
In this post, we described our engineering journey in developing and perfecting meeting recordings on Dyte. We covered the different approaches we took, and what we learned in the process. Hope this helped you not only learn something new but also understand the importance of a well-defined developer workflow!
Do check out our recording APIs by triggering a recording using our REST API. Also, stay tuned for a future blog post on how we fine-tuned our infra for lightning-fast recording start times!