Introduction
Back in the day, dependency management was a mounting ache, especially in languages like C/C++. There was no standardized tool for managing dependencies and their versions, and it took several hours of developer effort to manage them for a project.
Fast forward to 2023, there are several tools for dependency management, like maven and gradle for Java, pip for Python, npm, pnpm and yarn for Javascript, and Cargo for Rust, to name a few. Now, each package manager needs a way to keep track of which versions of which packages are supposed to be used in your current project. Generally, a file is created that maps these dependencies to their corresponding versions - for instance you’ll generally find a requirements.txt file in most Python projects.
Similarly, the primary job of the package.json file is to keep track of all of the dependencies and developer dependencies that are required in your project. On running the install command on your favorite JS package manager, it will install the corresponding versions of the packages mentioned in the package.json file. Besides keeping track of dependencies, the package.json file also stores the name and version of your package, - which is generally considered metadata for certain tools. Let’s say you were to publish your project on npmjs (or any other NPM registry), you’d require to have all the metadata about the package in your package.json file located in the root directory of your project.
Creating a package.json file
You can create a package.json file in your Javascript/Typescript project using the npm init command. It’ll ask you a series of questions when you run that command, and all the answers that you enter will show up in your package.json file.
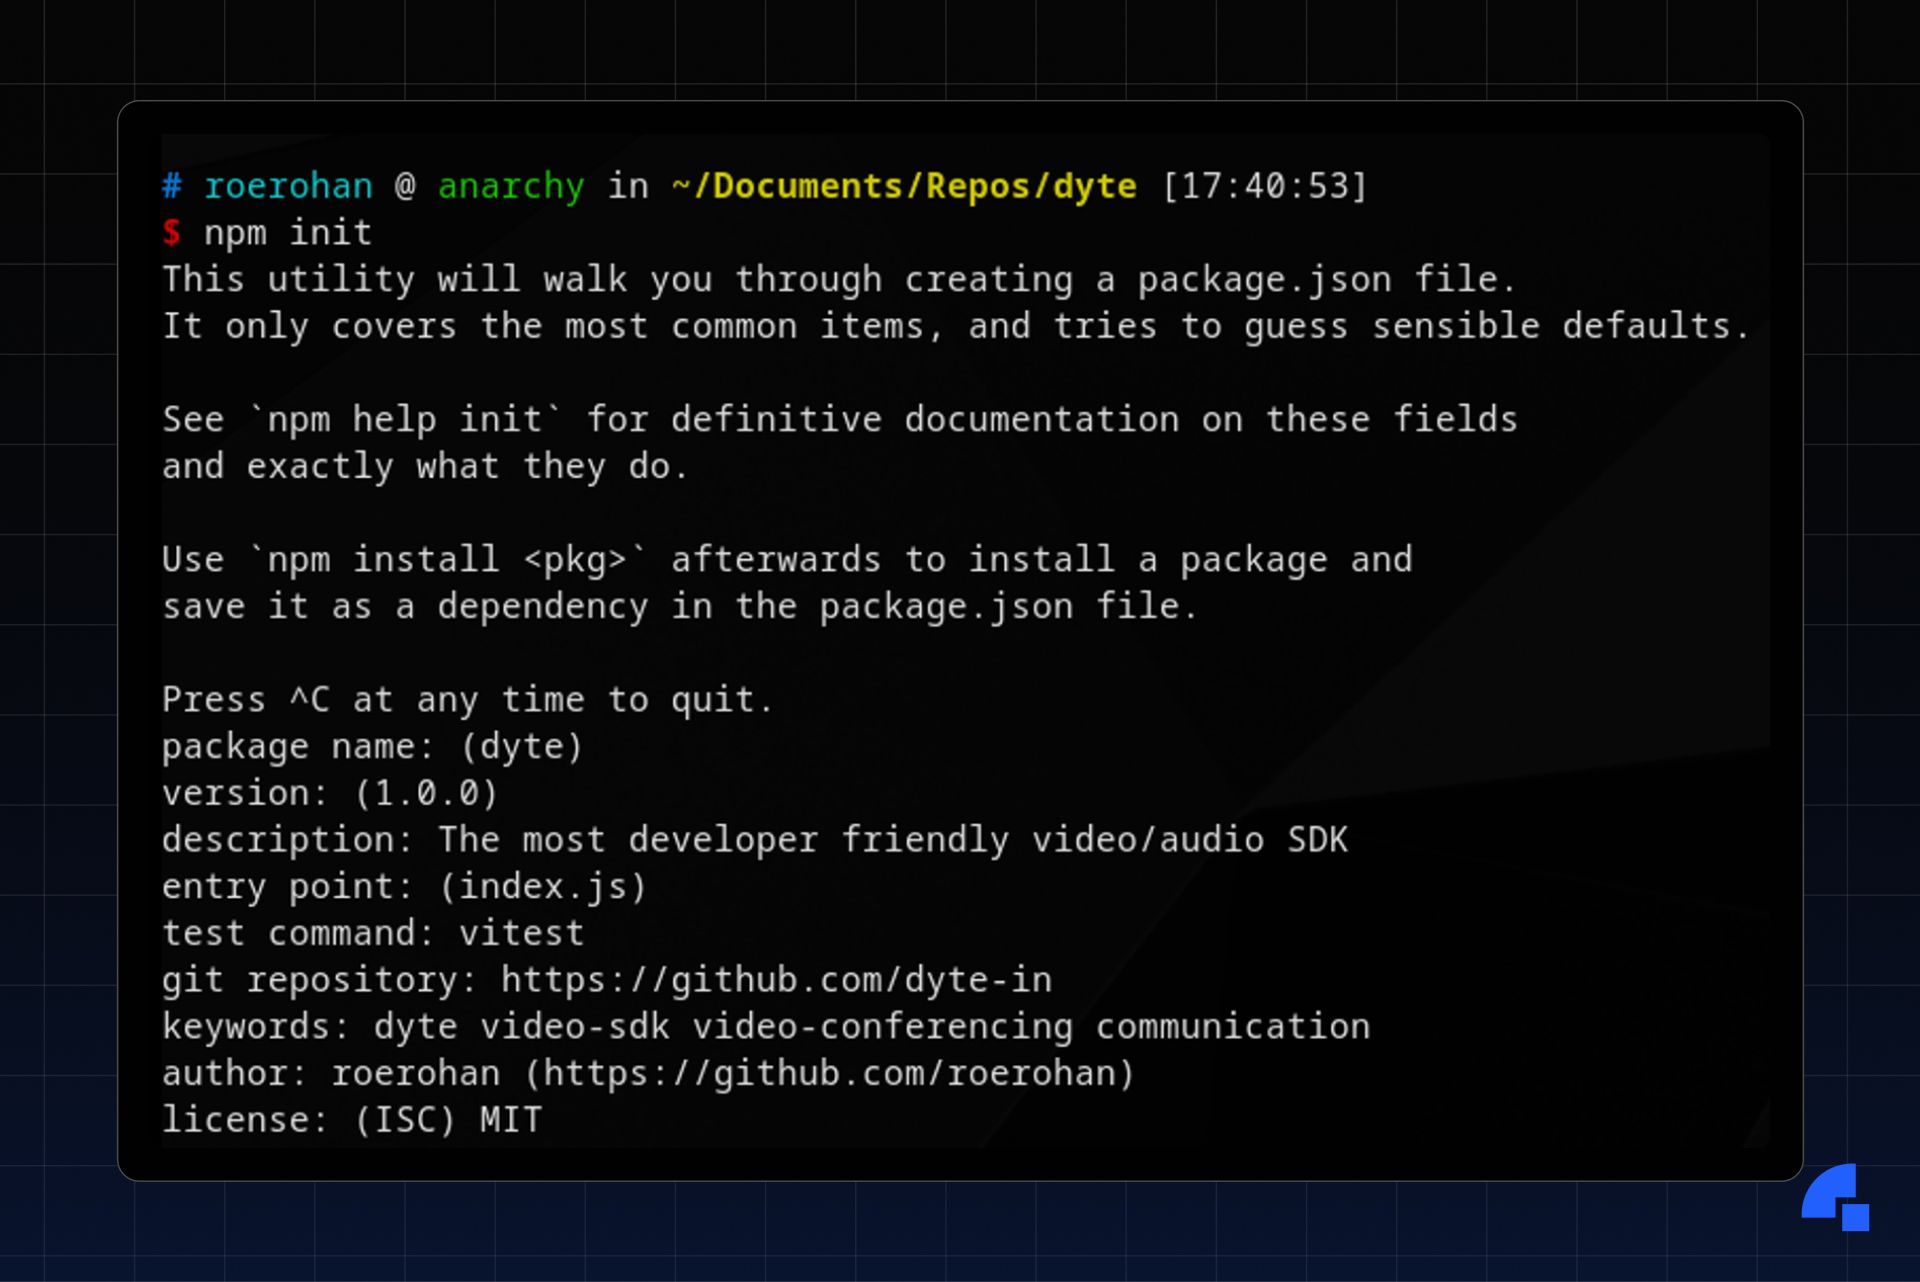
npm initHere’s the corresponding package.json file that’s generated when running the above npm init command.
{
  "name": "dyte",
  "version": "1.0.0",
  "description": "Dyte is the most developer-friendly video and audio SDK.",
  "main": "index.js",
  "scripts": {
    "test": "vitest"
  },
  "repository": {
    "type": "git",
    "url": "https://github.com/dyte-in"
  },
  "keywords": [
    "dyte",
    "video-sdk",
    "video-conferencing",
    "communication"
  ],
  "author": "roerohan (https://github.com/roerohan)",
  "license": "MIT"
}
More often than not, the keys other than scripts and dependencies come into play when publishing a package. From this point onwards, the discussion will be more relevant to packages that are supposed to be published to any NPM registry. However, if you have a standalone Node.js project for example, the properties in the package.json file still mean the same.
Common keys in package.json
The properties in package.json are either descriptive or functional. For instance, the name of the package is a descriptive property, whereas the scripts that are defined in package.json are functional properties.
Here are some of the most useful properties in package.json and what they signify.
name
The name field is used to identify the package. The name and the version fields are mandatory in the package.json file, and together they’re assumed to be unique. For instance, if the name is web-core and the version is 0.1.2, then it is assumed that web-core@0.1.2 is unique and doesn’t refer to any other package. A package name has certain restrictions - it can’t be more than 214 characters in length, and must contain all small letters. The name can not begin with a . or an _. Additionally, the name is often part of a URL so it must be URL-safe.
Package names may also be scoped. For instance, the name of a package can be @dytesdk/web-core. This is of the form @organization/package.
version
The version field is one of the keys used to identify a package. Typically, this version number must be parseable by node-semver. Semantic versioning is a set of rules for versioning so that the change in the version number is indicative of the kind of changes in the package. The version is written in the form of MAJOR.MINOR.PATCH. If there’s a bug fix in the new version, the PATCH is incremented. If there’s a new feature, the MINOR part of the version is incremented. If the new version has a breaking change or is not compatible with older versions, the MAJOR part of the version is incremented.
For instance, if the current version of a package is 1.0.9:
- If the next release has bug fixes only, the new version should be
1.0.10. - If the next release has a new feature, the new version should be
1.1.0. - If the next release has a breaking change, the new version should be
2.0.0.
description
The description field in the package describes in brief what the package does. It’s also useful in SEO as it helps other people find your package.
keywords
Just like the description, the keywords field is also used for SEO. It’s an array of words that describes the package. If someone searches for any of the words in the keywords field, it’s likely that your package will show up.
homepage
Typically you would link your project’s website in this field. Alternatively, you can also point to the projects README or documentation.
bugs
The purpose of this field is to point to your project’s issue tracker or any support email. It could be of the form
{
  "url": "https://github.com/dyte-io/html-samples/issues",
  "email": "support@dyte.io"
}
If you don’t want to provide a support email, you can directly assign a URL to the bugs property.
license
The license is an important field as it describes to the users of your package the permissions and restrictions placed by you while using this package. Ideally, for open-source packages, the license should be one that’s approved by OSI. If you do not wish to grant any permissions to the users of the package under any terms, you can set this field to UNLICENSED. You should consider setting the private field in the package.json file to true to prevent yourself from accidentally publishing the package.
author
The author field is used to provide information about the developer of the package. It consists of a name, and an optional email and url field. Here’s an example:
{
  "name": "Rohan Mukherjee",
  "email": "rohan@dyte.io",
  "url": "https://dyte.io"
}
All the information can also be downsized into a single string of the following format:
{
  "author": "Name <Email> (Site)"
}
For instance, you can specify the same author as above in this format:
{
  "author": "Rohan Mukherjee <rohan@dyte.io> (https://dyte.io)"
}
contributors
Just like the author field, the contributors field provides information about the developers of the package. It holds an array of authors.
funding
In this field, you can specify any links for funding your open-source package. For example, if you have a Patreon or a buymeacoffee link for funding your project, you can add it in this field. This can also take an array of multiple funding URLs. This is the URL that gets opened when a user runs npm fund <projectname>.
files
The files field comprises an array of files that need to be uploaded to the registry when your package gets published. File patterns follow a similar syntax to .gitignore. The only difference is that the files specified in a .gitignore are excluded, whereas these files are included. You can also use glob patterns such as *, and **/*, just like in .gitignore files. The files field defaults to ["*"] if not specified otherwise.
You should note that package.json, README, and LICENSE/LICENCE files are always included, irrespective of your settings. The README and LICENSE/LICENCE files can have any extension.
main
The entry point to your program is defined in the main property. When you require a package, you actually import the file described in the main property. There is a Node.js 12+ alternative to this field known as exports, which is described below.
exports
You can define entry points to your package using the exports field as an alternative to the main field. Unlike main, exports allows you to define subpath exports and conditional exports.
For example, you can export the submodule.js file of your project using the following exports property:
{
  "exports": {
    ".": "./index.js",
    "./submodule.js": "./src/submodule.js"
  }
}
It is also possible to export conditionally - depending on whether the user of the package uses require or import.
{
  "exports": {
    "import": "./index-module.js",
    "require": "./index-require.cjs"
  },
  "type": "module"
}
Conditional exports are used often for ESM packages for backward compatibility, as the import keyword can only be used in ESM.
type
This describes whether the .js files in the current package are supposed to be treated as ESM or commonjs. You can set the type of module for ESM and commonjs for non-ESM packages. Also, you can explicitly specify if a file is supposed to be interpreted as ESM or commonjs using the .mjs extension for ESM and the .cjs extension for commonjs files.
{
  "type": "module"
}
packageManager
As of February 2023, the packageManager is an experimental field that defines which package manager is to be used for the current package. It should also specify the version of the package manager being used. This field can hold values that are present in this list.
browser
This field is used instead of main to indicate if a package is meant to be used in a browser instead of in a Node.js project. This is used when your package uses primitives like window, that are not available in Node.js environments.
bin
On certain occasions, npm packages need to be installed to PATH, so that they can be run directly by the operating system from any directory. The bin field specifies these executable-like files. For instance, you can have the following configuration in your bin property.
{
  "bin": {
    "dyte": "./dyte.js",
    "myapp": "./cli.js"
  }
}
Upon installing this package globally (using npm install -g), you’ll be able to run commands like dyte and myapp directly from your terminal. This internally creates a symlink for the file dyte.js to /usr/local/bin/dyte and a symlink for cli.js to /usr/local/bin/myapp on unix-like OSs. On Windows, a C:\\Users\\{Username}\\AppData\\Roaming\\npm\\dyte.cmd file is created which runs the dyte.js script. It should be noted that each of the files mentioned as values in the bin property starts with the shebang #!/usr/bin/env node, otherwise your operating system will not realize that the file is to be run in a Node.js environment.
man
You can link a document or a list of documents for the man program to find in this field. When you run man <package-name> it should show this doc.
directories
You can use the directories object if you want to expose a folder full of binaries or a folder full of man pages. If you use this option, you don’t need to specify all the man pages in an array or all the binaries in an object. You can just add the following config:
{
  "directories": {
    "man": "./man",
    "bin": "./bin"
  }
}
repository
For open-source repos, you can specify where the source code resides for your package. This generally points to a git repository. Here’s an example:
{
  "repository": {
    "type": "git",
    "url": "https://github.com/dyte-in/docs.git"
  }
}
scripts
The scripts property is a dictionary containing script commands that you can run using the npm CLI. You can also specify scripts that run at different times during the lifecycle of your package. For instance, you can add a prepublish script, that runs just before a package is published (when you run npm publish).
config
This lets you specify configuration for your package that persists across package versions. For instance, you can specify a config such as:
{
  "config": {
    "port": "8080"
  }
}
Now, you can use the npm_package_config_port environment variable in your scripts.
dependencies
All the dependencies of your package are specified in dependencies. Whenever you npm install a package, the package name gets added to the dependencies dictionary as a key, and the package version gets added as the value. You can also specify version ranges instead of a single version according to the semver specification. You can also use GitHub URLs and local directories to specify dependencies alongside npm packages.
devDependencies
If you have dependencies that you only need during the development of a package, you can specify it as a devDependency. You can install a package as a devDependency using npm install -D <package-name>. Generally, packages like typescript, ts-node, etc. are installed as devDependencies.
peerDependencies
Often, your package requires another package but you don’t want to add a fixed version in your dependencies. For instance, if you build a react package, you don’t want to add react to your dependencies - because if you do so, installing your package will also install the said version of react from your package.json. In this case, you can specify react as a peerDependency, which indicates that your package needs a certain version range of react to function properly. Your package is called a plugin if it has this behavior. For example, check out this peerDependencies config.
In the recent versions of npm, all peerDependencies of a package are automatically installed alongside the package.
peerDependenciesMeta
Sometimes, a peerDependency might be good to have but is not required. If your package functions without any of the peerDependencies then you can specify that dependency to be optional in the peerDependenciesMeta key in package.json.
bundleDependencies
You can specify an array of dependencies that should be bundled with your package using this option. When your package gets prepared to be published, the dependencies mentioned in bundleDependencies or bundledDependencies will also be packaged alongside the source in the tarball.
optionalDependencies
When a dependency is not found or fails to install, the npm install command exits with an error. You can prevent that from happening for a specific package if that package is present in optionalDependencies instead of any of the other dependencies lists/dictionaries.
publishConfig
You can specify if your package is meant to be publicly accessible, and what tag a package is released with this option. By default, a package is private, and the default tag is latest. Using a different tag, for instance beta, let’s users install the specific version of the package using npm install <package-name>@beta.
workspaces
This option is really useful in mono-repos. You can specify a list of workspaces in the following manner:
{
  "workspaces": [
    "./packages/client",
    "./packages/server"
  ]
}
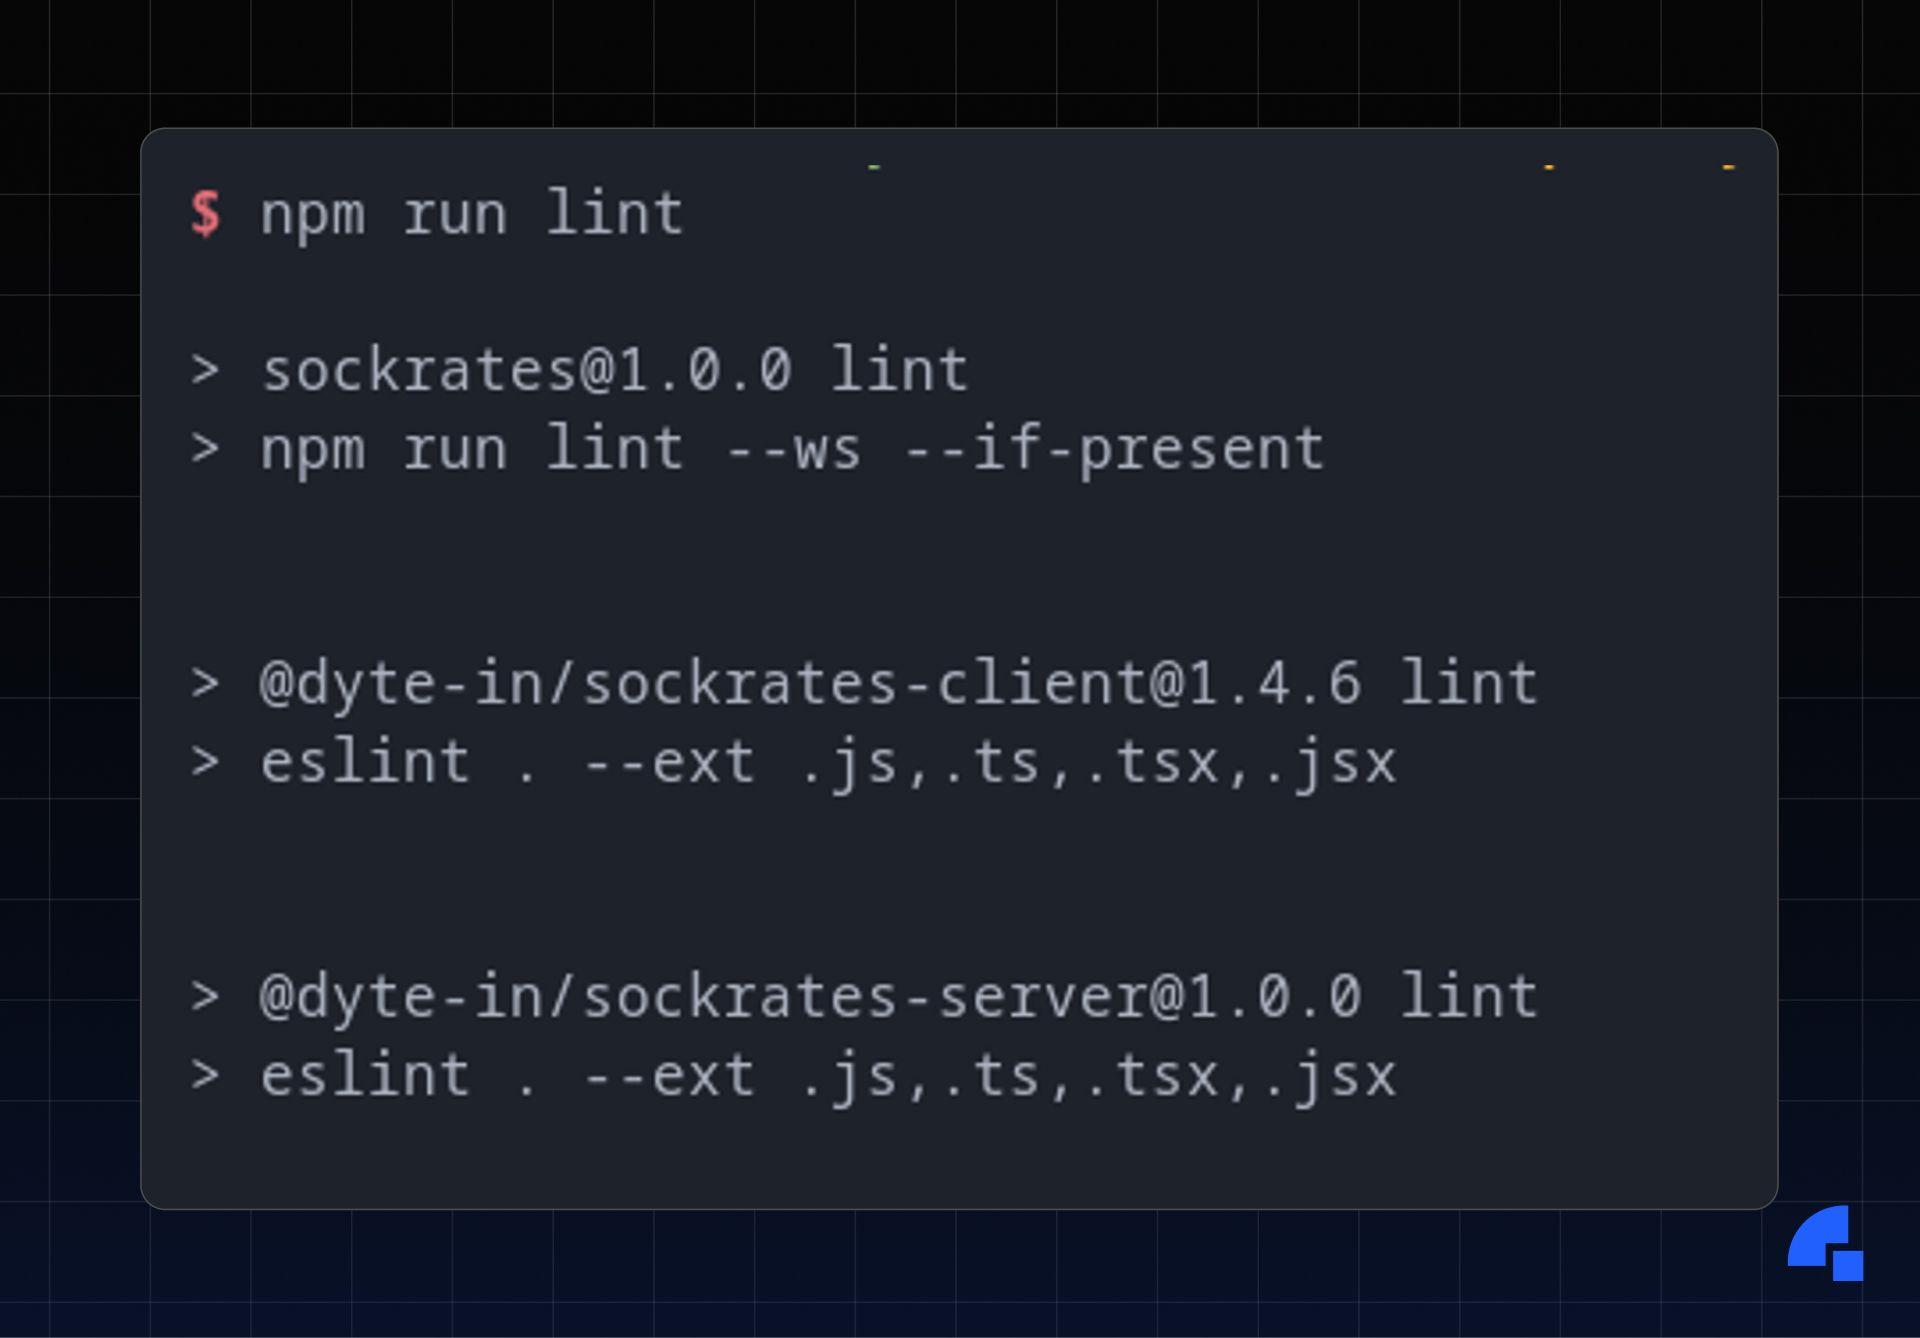
You can have separate package.json files in the client and server directory, which have separate scripts. Running npm install --workspaces will run npm install in both directories. In fact, you can run any script in all the workspaces specified using the --workspaces command. For instance, if you have separate lint scripts in packages/client and packages/server, in the root package.json, you can have a lint script that runs npm run lint --workspaces --if-present. Now, if you run npm run lint in the root, it will run the lint script in all the workspaces that have the lint script present. Here’s an example - the sockrates package has 2 sub workspaces @dyte-in/sockrates-client and @dyte-in/sockrates-server.
The “lockfile”
There’s a mysterious package-lock.json file that shows up whenever you install packages in your npm project.
As the name suggests, package-lock.json is a lockfile, i.e., a file that stores the exact version numbers of the packages used and all its dependent packages. This includes all the packages that are present in your node_modules directory.
The purpose of this file is to ensure that all the dependencies are installed in the same way on different machines, which guarantees that the project will work consistently across different environments.
The package-lock.json file also includes a cryptographic hash of the contents of each package, which ensures that the installed packages are not tampered with and are the exact same packages that were published by the package author.
When you run npm install, npm uses the information in package-lock.json to determine the exact versions of the packages to install, and it installs them in the same order and with the same dependencies as the original installation.
If you inspect the package-lock.json file, you might find random packages that exist in your node_modules that you didn’t even know about. For instance, this is a package that I found in the lockfile of one of Dyte’s projects.
"node_modules/why-is-node-running": {
  "version": "2.2.2",
  "dev": true,
  "license": "MIT",
  "dependencies": {
    "siginfo": "^2.0.0",
    "stackback": "0.0.2"
  },
  "bin": {
    "why-is-node-running": "cli.js"
  },
  "engines": {
    "node": ">=8"
  }
},
Package why-is-node-running present in the lockfile.
In fact, you can actually run it with npx and see that the package is present in your node_modules.
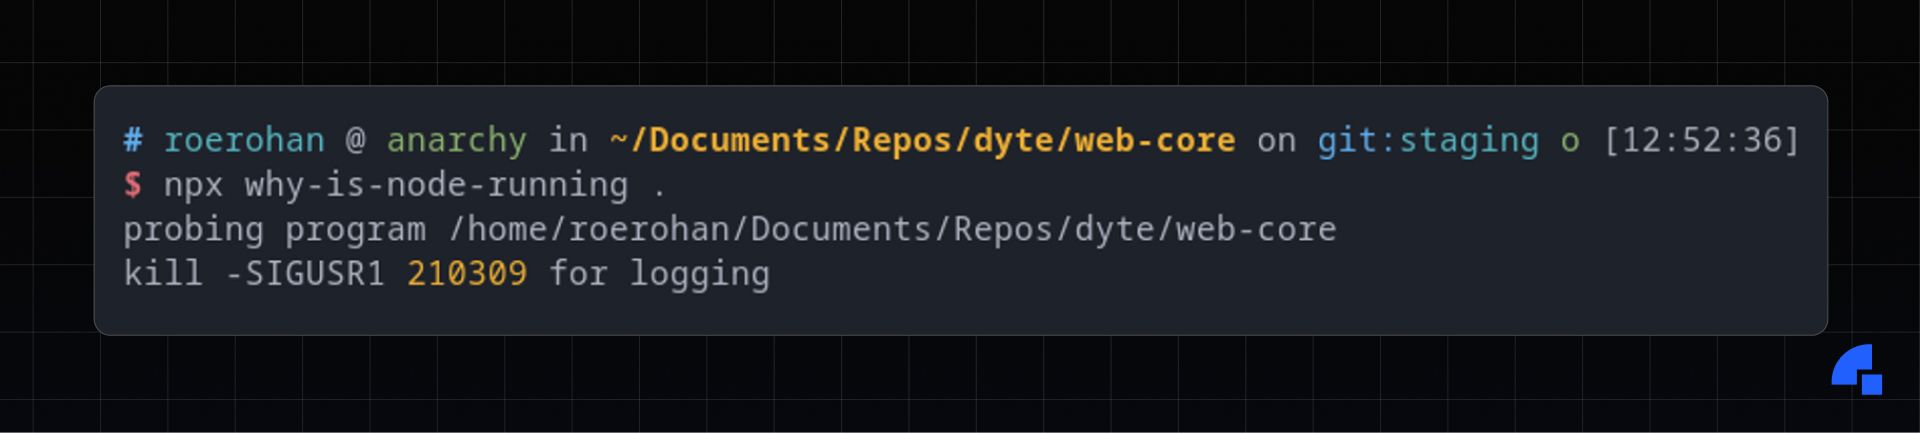
npxOther package managers
Even though npm is one of the most popular package managers, a lot of people use other package managers like yarn, pnpm, or turbo. The package.json file still exists for all of these, but the lockfile might be named differently for different package managers. For instance, the lockfile created by yarn is yarn.lock, that looks something like the following:
# THIS IS AN AUTOGENERATED FILE. DO NOT EDIT THIS FILE DIRECTLY.
# yarn lockfile v1
package-1@^1.0.0:
  version "1.0.3"
  resolved "https://registry.npmjs.org/package-1/-/package-1-1.0.3.tgz#a1b2c3d4e5f6g7h8i9j0k1l2m3n4o5p6q7r8s9t0"
package-2@^2.0.0:
  version "2.0.1"
  resolved "https://registry.npmjs.org/package-2/-/package-2-2.0.1.tgz#a1b2c3d4e5f6g7h8i9j0k1l2m3n4o5p6q7r8s9t0"
  dependencies:
    package-4 "^4.0.0"
package-3@^3.0.0:
  version "3.1.9"
  resolved "https://registry.npmjs.org/package-3/-/package-3-3.1.9.tgz#a1b2c3d4e5f6g7h8i9j0k1l2m3n4o5p6q7r8s9t0"
  dependencies:
    package-4 "^4.5.0"
package-4@^4.0.0, package-4@^4.5.0:
  version "4.6.3"
  resolved "https://registry.npmjs.org/package-4/-/package-4-2.6.3.tgz#a1b2c3d4e5f6g7h8i9j0k1l2m3n4o5p6q7r8s9t0"
Similarly, pnpm generates a lockfile called pnpm-lock.yaml. The purpose of all these lockfiles however is the same as the package-lock.json file generated by npm.
Conclusion
Overall, package.json is a vital metadata file used in Node.js development. It helps manage dependencies, automate tasks, and configure the project. The file contains essential information such as the project name, version number, author, license, dependencies, and more.
By using package.json, developers can easily manage the dependencies required by their project, ensuring that the correct version of each package is installed. This makes it easier to maintain the project and update dependencies when necessary.
Furthermore, it can be used to automate tasks such as building the project, running tests, and starting the application. This can save time and effort for developers, allowing them to focus on more important aspects of the project.
Finally, it allows developers to publish their projects to the npm registry, making it easy for other users to install and use the project in their own projects. This can help increase the visibility of the project and make it more accessible to others.
I hope you found this post informative and engaging. If you have any thoughts or feedback, feel free to reach out to me on Twitter or LinkedIn 😄. Stay tuned for more related blog posts in the future!