TL;DR
This tutorial shows you how to create a smart contact form using the Dyte video SDK, React, and Apollo.io, where the prospect can start a live meeting with an agent based on the details provided by them through the contact form.
You'll learn how to set up a backend server with Node.js and Express.js, integrate the Dyte video SDK into your React frontend, and build a contact form that allows clients to join live video calls.
Introduction
In today's highly competitive business landscape, delivering exceptional customer experience is critical to the success of any enterprise. Customers now demand more personalized and effective ways to communicate with businesses, and traditional contact forms or email communication channels may no longer suffice. Video conversation has become a powerful tool for providing a more engaging, efficient, and seamless customer experience.
Dyte is a platform that allows businesses to easily integrate video communication into their products, enabling their users to connect real time. This article will explore how Dyte can help companies to transform their sales to enhance their customer experience.
Dyte provides various tools and services for businesses and developers to build, customize, and integrate video communication features into their applications. With Dyte's SDKs and APIs, companies can enable their users with high-quality video and audio calls, webinars, live streaming, and screen-sharing capabilities, among other features.
Before diving in, let's check if we've covered the essentials.
Prerequisites
To follow along with this tutorial, you should have the following:
- A basic understanding of React.js, Node.js, sockets, and webhooks
- A Dyte developer account, which you can create for free at dev.dyte.io
- It would be best to have proper tooling on your system: for this tutorial, you'll need Node.js, npm, or yarn.
- An Apollo.io API key
Tech Stack
Part I: Contact form
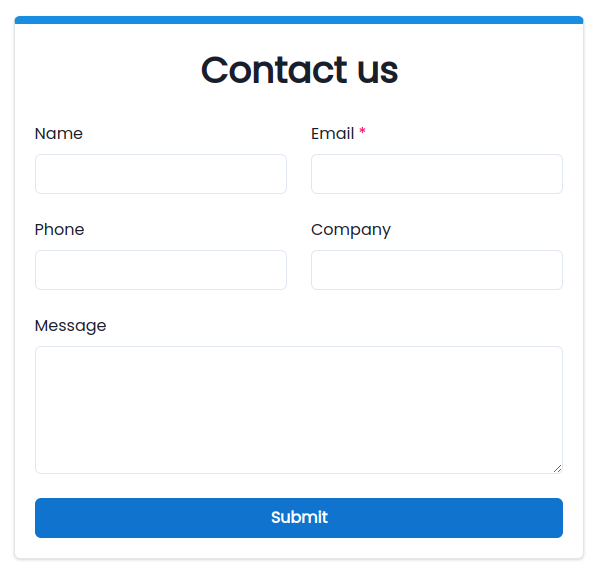
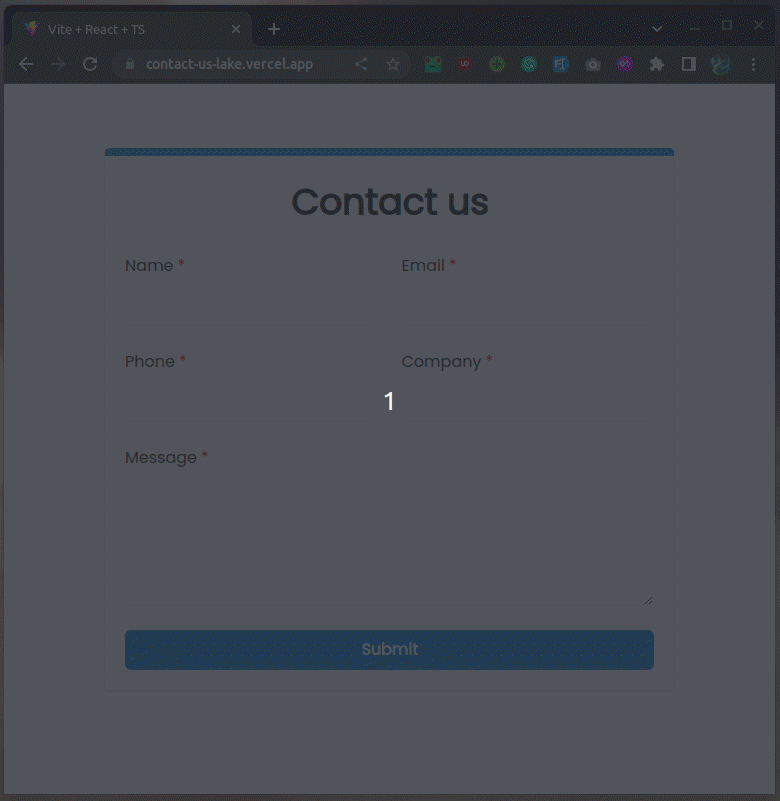
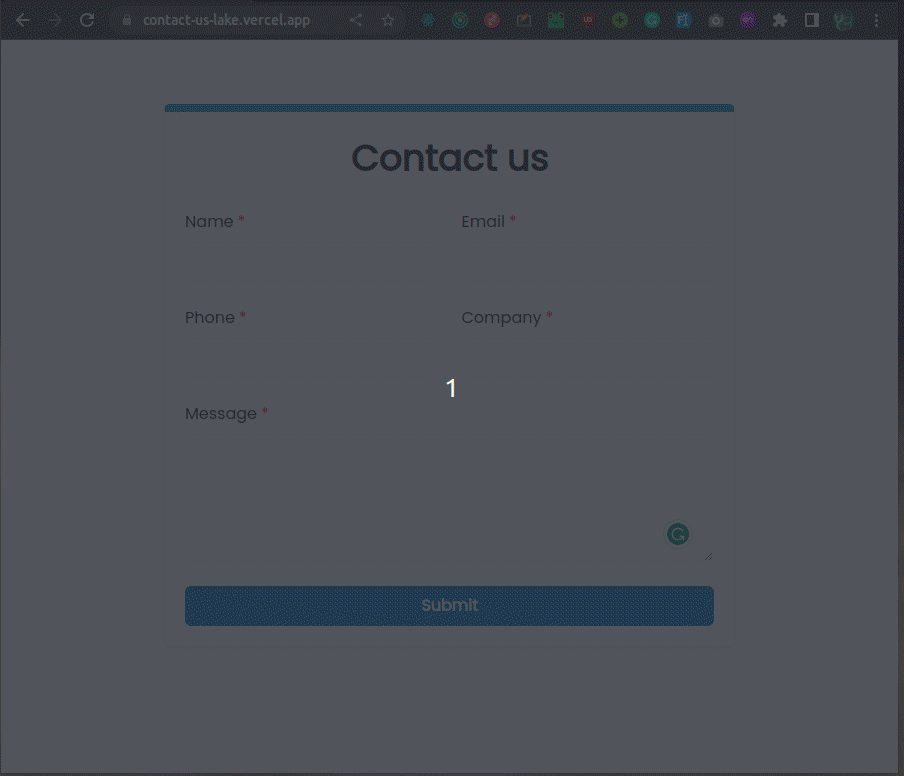
We will create a contact form on the client-side, similar to those found on websites, to collect information from visitors and increase leads.
The contact form will have the following fields:
- Name (required)
- Email ID (required)
- Phone Number (required)
- Company Name (required)
- Additional Message
The complete code for the form can be found here - src/components/Form/index.tsx
Criteria for video call
Now that the contact form is ready let's add the functionality to start a video call with an agent. But of course, there have to be some filtration criteria, as we do not want to have a live video call with every single person that fills out the form.
For this tutorial, we can have the following criteria:
- Company revenue > 1 million OR funding > 1 million OR person's designation is director and above
- Employee size > 50
- The region is either North America, Europe, the United States, or ANZ.
To get this information about the client, we will make use of apollo.io's people-enrichment API, which can provide all the necessary details using just the email id of the client.
Follow the instructions given here to obtain an API key.
As we can see on the example request in their docs, the API key will be sent to the endpoint as plain text in the POST request body. To make it confidential, we'll instead hit a Node.js server with our client's information, and that server will call the enrichment API and provide the details back to the client.
We will use a simple Node.js HTTP server as follows:
const port = process.env.PORT || 4001

const app = express()
app.use(bodyParser.json())
app.use(cors())

const server = http.createServer(app)

app.post('/person-enrich', (req, res) => {
  const person = req.body
  axios.post('https://api.apollo.io/v1/people/match', {
    api_key: '<--- YOUR API KEY --->',
    ...person
  }, {
    headers: {
      'Cache-Control': 'no-cache',
      'Content-Type': 'application/json'
    }
  }).then(({ data }) => {
    res.status(200).json({ person: data, ok: true })
  })
})

server.listen(port, () => console.log(`Listening on port ${port}`))
Next, on submitting the form, a POST request containing the client's details is sent to our node js server, and the server returns the relevant information using Apollo's API:
axios
	.post("https://dyte-webhook.onrender.com/person-enrich", payload)
	.then(({data}) => {
		if (data.ok) {
			setLoading(false);
			const {person} = data.person;
			const org = person.organization;
			...
			if (!org) {
				// validation failed, don't make a video call
				return;
			}
			...
			if (employeeSize < 50) {
				// validation failed, don't make a video call
				return;
			}

			if (!validFields.has(region.toLowerCase())) {
				// validation failed, don't make a video call
				return;
			}

			if (
				(!companyRevenue && !funding) ||
				(companyRevenue < 1000000 && funding < 1000000)
			) {
				if (validFields.has(designation.toLowerCase())) {
					// validation success, proceed with the video call
					return;
				}

				// validation failed, don't start a video call
				return;
			}
			// validation success, proceed with the video call
		} else {
			// error handlers for server failure
			return;
		}
	});
Above is just the pseudo-code; complete code can be found here: src/components/Form/index.tsx
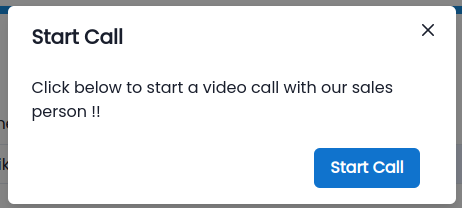
So if the criteria is met, we display a modal to join a video call:
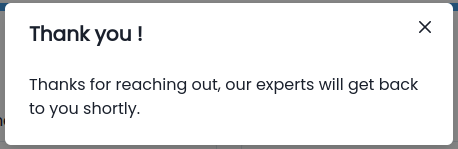
And if the criteria is not met, we just display a "thank you" message, concluding that this client might not be of our interest.
With all that in place, phase 1 is complete, and we proceed to phase 2.
Phase 2: Integrating Dyte's SDK
Step 1: Creating a developer account
Head over to dev.dyte.io and sign up for a developer account. Within the developer portal, check out the API Keys. We only need the ORGANIZATION ID and the API KEY for this tutorial.
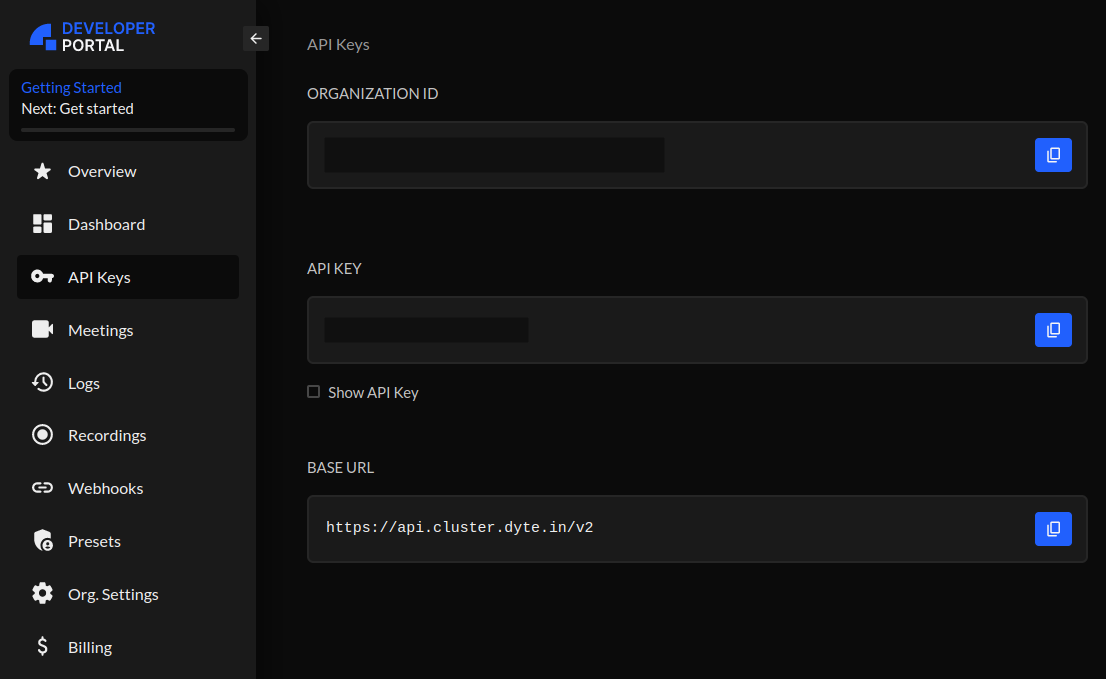
Dyte's APIs consume these credentials in a combined manner - the base64 equivalent of <ORG_ID>:<API_KEY> (colon included, brackets excluded)
Step 2: Integration
We'll be using Dyte's react-ui-kit for the video calls. This comes with a default UI which is relatively clean by default. Dyte also enables developers to use their UI components; more about that here.
Dyte's react-ui-kit contains many valuable components; references for each can be found here.
For the scope of this tutorial, however, we only require one component to handle all our video call needs: The DyteMeeting component.
All these will be available by installing the following packages:
npm install @dytesdk/react-web-core @dytesdk/react-ui-kit
OR
yarn add @dytesdk/react-web-core @dytesdk/react-ui-kit
The meeting component requires only one object: the meeting object, which comes from a react hook as follows:
import {useDyteClient} from "@dytesdk/react-web-core";Then inside the component:
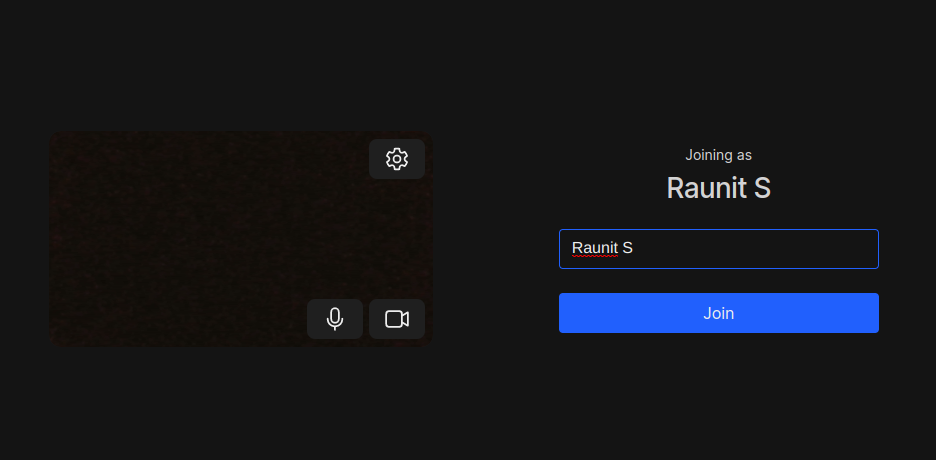
const [meeting, initMeeting] = useDyteClient();The meeting object needs to be initialized with an authToken, which is present in the API response when we create a meeting. The source for this implementation can be found here: src/pages/JoinCall/index.tsx
That's it; now, our application has a fully functional live meeting component.
Phase 3: Agent view using webhooks
Once the client starts a video call, the agent must be notified about that call so they can attend the call. This needs to happen in real-time, and for this functionality, Dyte offers a webhook service that can automatically send event-related information to our application. Head over to the webhooks section in the developer portal to create a new webhook.
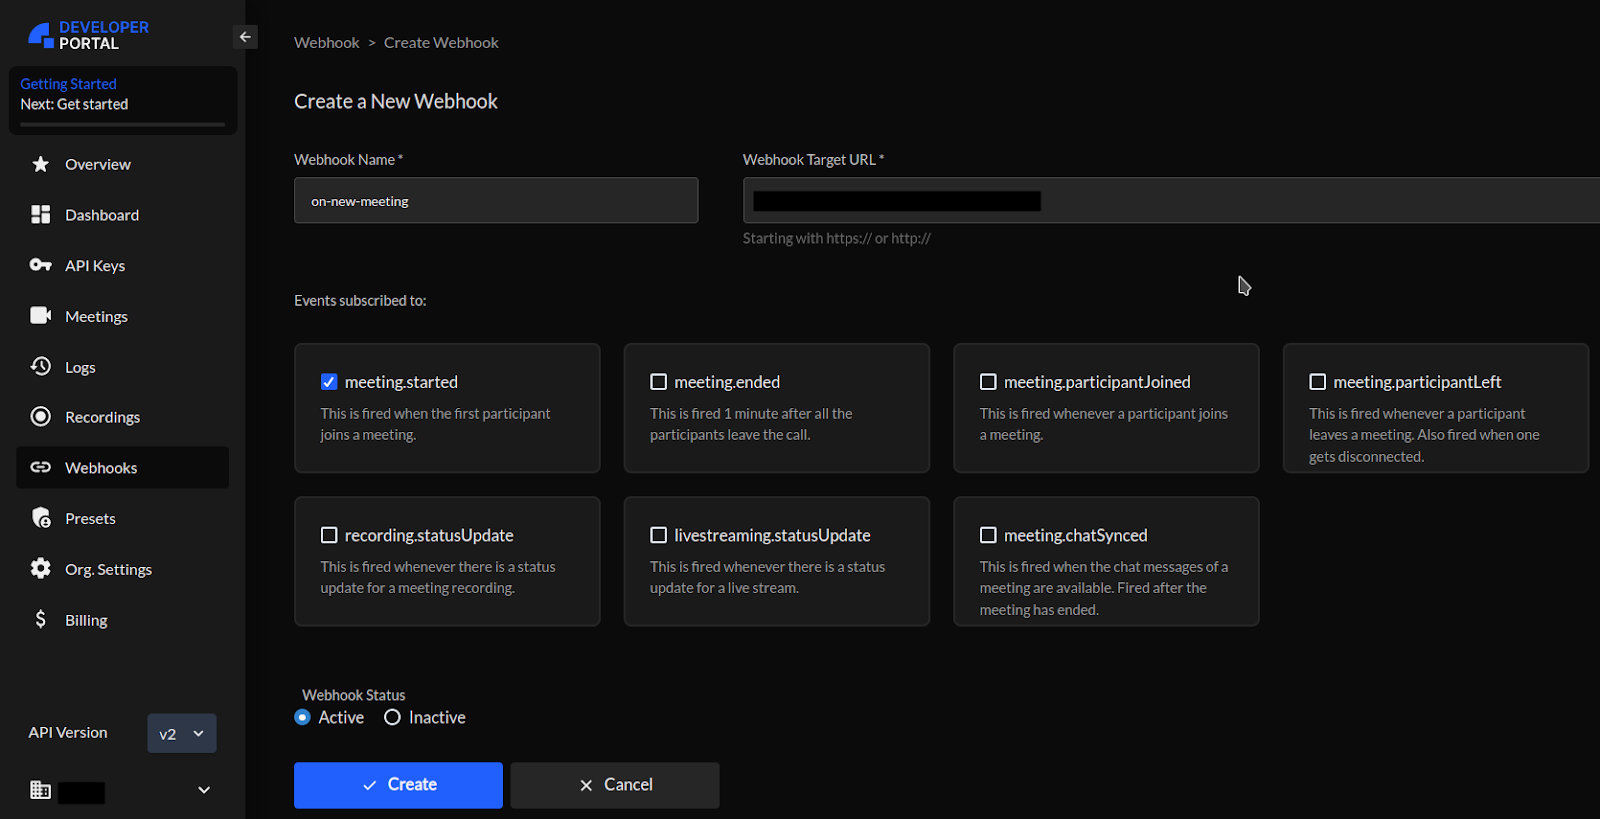
To create a webhook, we need the following info:
- Webhook name: a descriptive name for your webhook
- Target URL: The webhook will POST the event information to this URL. For this tutorial, we'll use a simple node.js server that handles this.
- Events subscribed: Check all the events that you need information for. The webhook will be triggered automatically on any of the selected events.
For handling webhook data, we will add another POST request handler to our Node.js server as follows:
const app = express();

const server = http.createServer(app);
.
.
.

app.post('/webhook', (req, res) => {
  const payload = req.body;
  console.log(payload);
  res.status(200).send('Success');
});

.
.
.
server.listen(port, () => console.log(`Listening on port ${port}`));
The webhook sends data to this route, and we can then forward it to our client react app as using sockets:
const app = express();

const server = http.createServer(app);
.
.
.

const io = new Server(server, {
  cors: {
    origin: "<-- react app url -->",
  }
});

io.on("connection", (socket) => {
  console.log("New client connected");

  socket.on("disconnect", () => {
    console.log("Client disconnected");
  });
});

app.post('/webhook', (req, res) => {
  const payload = req.body;
  console.log(payload);
  io.emit('new_meet', payload);
  res.status(200).send('Success');
});

.
.
.
server.listen(port, () => console.log(`Listening on port ${port}`));
Here, we emit a new event tagged "new_meet" to our react app. The react app listens for this event, and upon receiving the same, it parses the payload and updates the UI with information about the currently active meeting. The overall data flow is as follows:
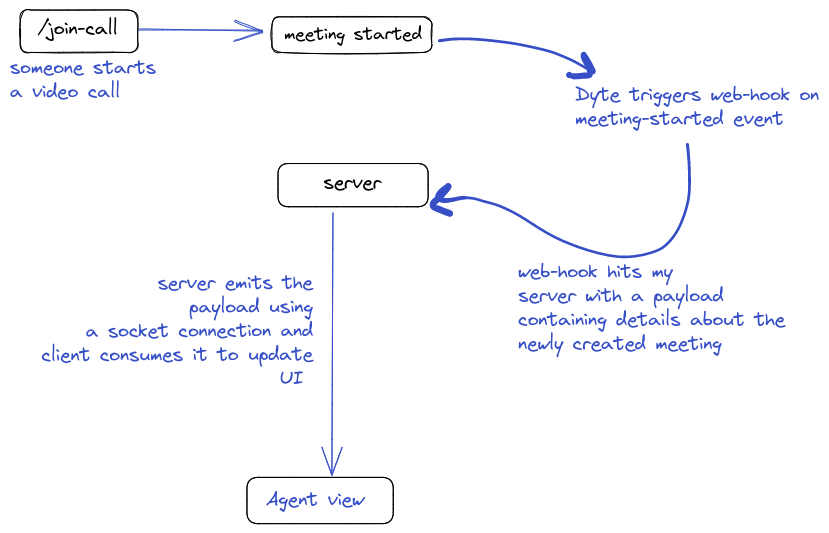
We catch the socket event "new_meet" on the client side in a use-effect hook as follows:
useEffect(() => {
    const socket = io(SERVER_ENDPOINT);
    socket.on("connection", () => console.log("connected"));
    socket.on("new_meet", data => {
      console.log(data);
      setMeeting(data.meeting);
      dispatch(_showNotification());
    });
    return function cleanup() {
      socket.close();
    };
  }, []);
Demo of the smart contact form
Case 1: The client does not fulfill the criteria for a video call
Case 2: The client matches the criteria for the video call
Customer view:
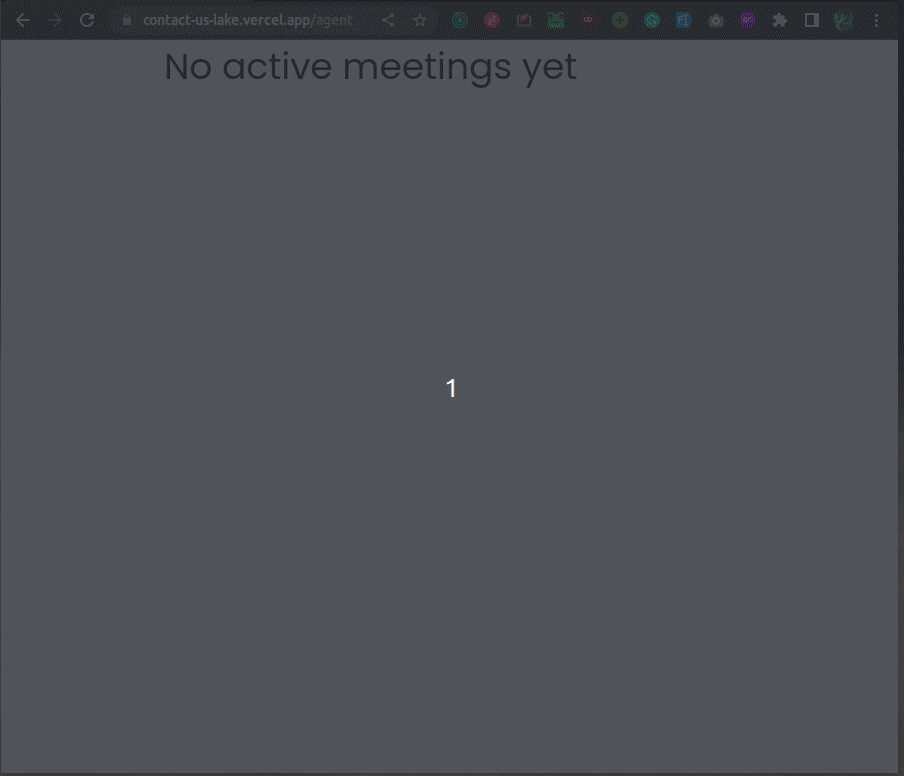
Agent view:
With this, our app is complete! We have hosted this solution so that you can test this out by yourself.
Demo app link: https://contact-us-lake.vercel.app
Agent View: https://contact-us-lake.vercel.app/agent
The complete source code for the same can be found here.
Conclusion
This tutorial has provided a comprehensive guide on creating a smart Contact form using the Dyte SDK and Apollo's people enrichment API allowing businesses to provide a more personalized and efficient experience.
By integrating the Dyte video SDK into the form, businesses can offer their customers a seamless live video meeting experience, increasing customer satisfaction and loyalty.
Build the future on live video with Dyte's customizable SDKs, low-code UI builder, and user-friendly documentation. Create the next big thing with ease! 🚀