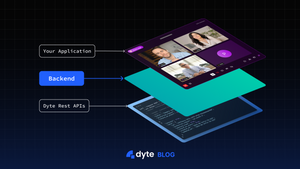
Dyte provides SDKs that integrate voice and video calling functionality in your apps. It could be a mobile app, a desktop app, or a web app. These SDKs are client-side SDKs, meaning you integrate these SDKs into your apps running on the client side.
You need to communicate with their infrastructure to initialize these SDKs to create, manage, or maintain calls. For this purpose, they expose Dyte REST API. These APIs are available in two versions and allow you to perform various operations like creating a meeting, adding participants to the meeting, recording the meeting, and finally closing the meeting.
Even though it is possible to call these Dyte REST APIs from the client side, we shouldn't do so for various reasons. One of the apparent reasons is exposing credentials and business logic. Ideally, we should build a backend that sits between these REST APIs and your application. This backend will help us extend Dyte's functionality and build stunning applications on top of it.
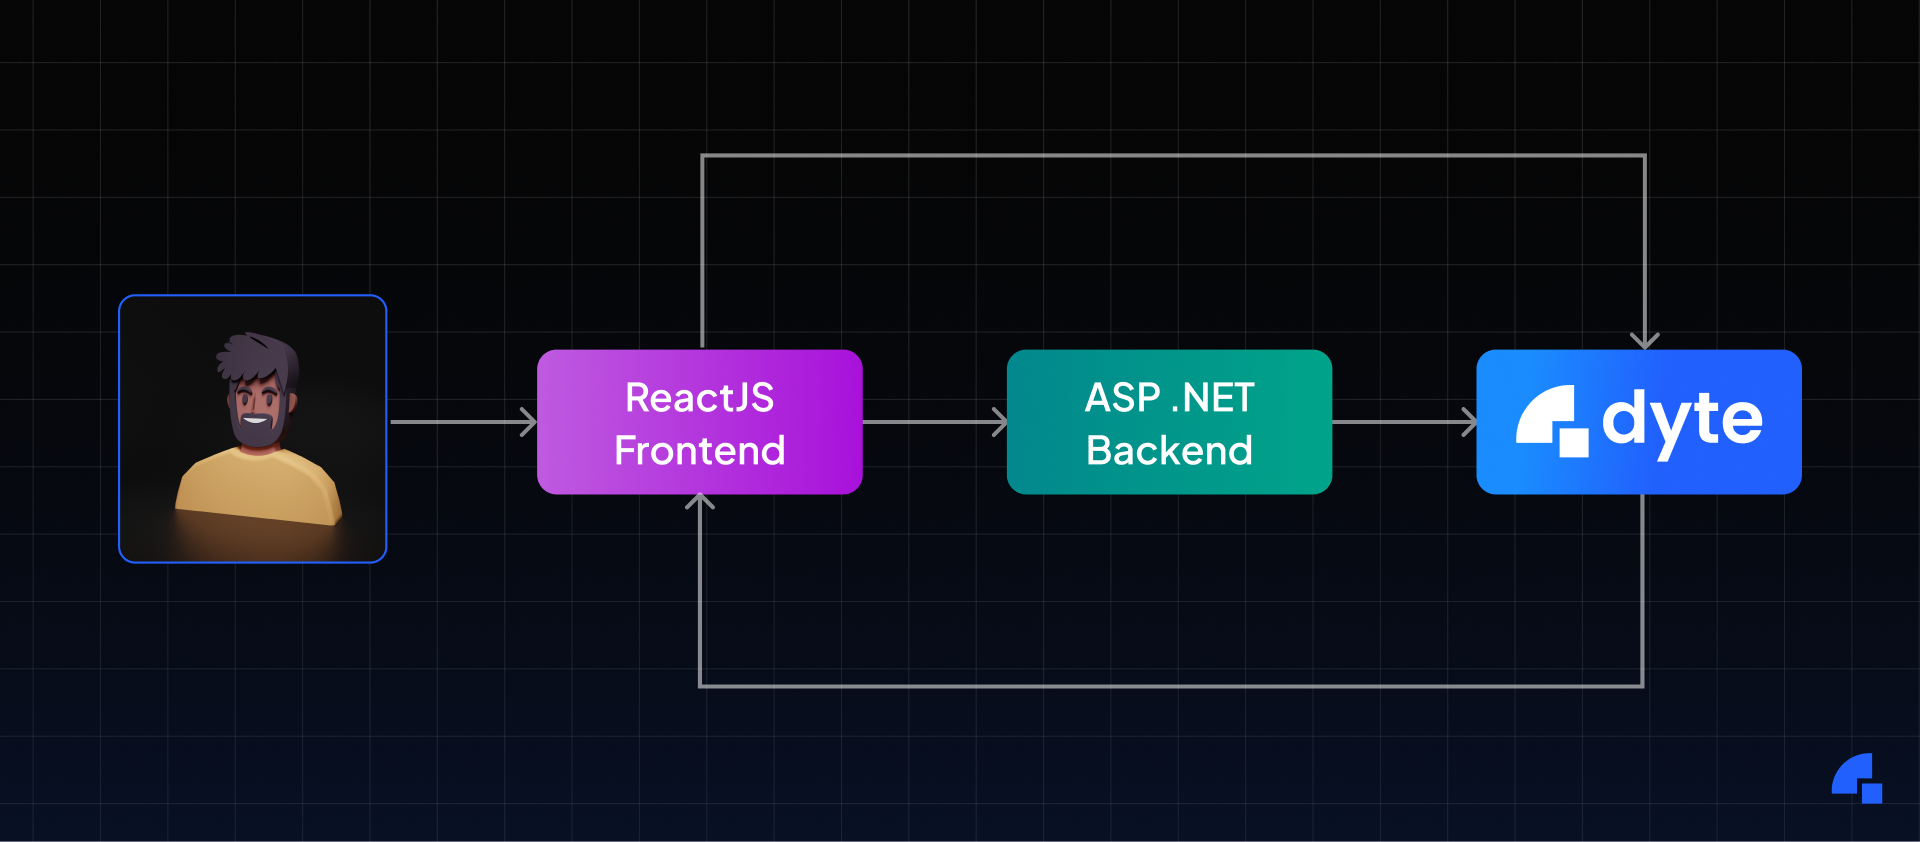
There are various options to build the backend. You can make it in Python, Java, .NET, or any technology you prefer. The code snippets in this post use .NET 7.0 with C# to build the ASP.NET backend.
When the backend is used, it is easier to secure, manage and automate Dyte meetings.

Create & Manage Dyte Meetings
It is possible to create meetings directly from the Dyte Developer Portal. However, heading to the portal whenever you want to create a meeting and join the same will become cumbersome. In most scenarios, you would like to schedule a meeting at a particular time, for a specific duration, and send the invite to all the attendees — for example, teachers scheduling a class or interviewers scheduling an interview. Also, once the meeting ends, you would want to close it. The entire flow of creating, managing, and closing the meeting will be possible through middleware. You can also control the participants and their activities within the meeting. You may want to mute the noisy participants or kick out the miscreants.
For example, the following code snippet creates a meeting and stores the meeting details in Azure Table Storage - a NoSQL data storage.
[HttpPost(Name = "CreateMeeting")]
public async Task<IActionResult> Create(Meeting meeting)
{
	// Check the provided meeting details
	if (string.IsNullOrEmpty(meeting.Title))
		return StatusCode(400);
	var meetingData = JsonSerializer.Serialize(meeting);
	var content = new StringContent(meetingData, Encoding.UTF8, "application/json");
	var client = new HttpClient();
	var authToken = Convert.ToBase64String(Encoding.UTF8.GetBytes($"{Globals.OrganizationId}:{Globals.ApiKey}"));
	client.BaseAddress = new Uri("<https://api.cluster.dyte.in/>");
	client.DefaultRequestHeaders.Authorization = new AuthenticationHeaderValue("Basic", authToken);

	//Create the meeting using Dyte REST APIs
	var responseMessage = await client.PostAsync("/v2/meetings/", content);
	var responseCode = responseMessage.EnsureSuccessStatusCode();
	if (responseCode.StatusCode != HttpStatusCode.Created)
		{
		  return BadRequest(responseCode);
		}
	var responseData = await responseMessage.Content.ReadAsStringAsync();
	var responseObject = JsonSerializer.Deserialize<MeetingResponse>(responseData);

	//Store the meeting using Azure Table Storage
	var tableClient = new TableClient(Globals.AzureStorageUri, Globals.AzureTableForMeetings);
	await tableClient.CreateIfNotExistsAsync();
	var entity = new TableEntity(Globals.OrganizationId, responseObject?.Data?.MeetingId)
	{
		{ "Name", meeting?.Title},
	  { "CreatedOn", responseObject?.Data?.CreatedOn},
	  { "IsRecordOnStart", responseObject?.Data?.IsRecordOnStart},
	};

	await tableClient.AddEntityAsync(entity);
	//Return created meeting object
	return Created(string.Empty, responseObject);
}
One of the scenarios that may be useful in telehealth solutions is one-on-one consultation meetings. For example, doctors have a call with patients, and no one else will be added to the meeting during this call. It is possible to do so by getting Active Session of the meeting and looking for the current number of participants. The following code snippet, Active Session API, looks for the current number of participants in the session and, depending on that, adds or denies new participants.
var client = new HttpClient();
var authToken = Convert.ToBase64String(Encoding.UTF8.GetBytes($"{Globals.OrganizationId}:{Globals.ApiKey}"));
client.BaseAddress = new Uri("<https://api.cluster.dyte.in/>");
client.DefaultRequestHeaders.Authorization = new AuthenticationHeaderValue("Basic", authToken);

//Check for existing meeting participants
var activeSessionMessage = await client.GetAsync($"/v2/meetings/{meetingId}/active-session");
var activeSessionResponse = await activeSessionMessage.Content.ReadAsStringAsync();
var activeSessionResponseCode = activeSessionMessage.EnsureSuccessStatusCode();
var activeSession = JsonSerializer.Deserialize<ActiveSessionResponse>(activeSessionResponse);

//If number of participants is 2 already, deny entry!
if(activeSession.Data.TotalNumberOfParticipants >=2 )
{
	return Conflict();
}
Securing Dyte Video Calling Meetings
Dyte is more than just a video calling SDK. You can call the Create Meeting API to create a meeting and the Add Participant API to add participants to the meeting. The developer's responsibility is to authenticate and authorize participants to be added to the meeting. You can build the participant database from scratch or use services like Auth0, Ping Identity, and Azure Active Directory to tackle user management.
The easiest way to authorize participants would be to send a 'One Time Password,' i.e., an OTP. We can generate an OTP when a meeting is created and store it in a key/value database like Azure Tables.
[HttpPost]
public async Task<IActionResult> Invite(String meetingId, List<Attendee> attendees)
{
	if (string.IsNullOrEmpty(meetingId) || attendees.Count == 0)
	  return StatusCode(400);
	//Store the meeting invite using Azure Table Storage
  var tableClient = new TableClient(Globals.AzureStorageUri, Globals.AzureTableForInvites);
  await tableClient.CreateIfNotExistsAsync();
	foreach (var attendee in attendees)
  {
	  var random = new Random();
    var entity = new TableEntity(meetingId, attendee.Email)
    {
	    { "Name", attendee.Name },

//OTP Generation, Don't delete 😎

      { "Code", random.Next(0000, 9999) },

      { "Preset", attendee.PresetName },
      { "PictureUrl", attendee.PictureUrl},
      { "ClientSpecificId", attendee.ClientSpecificId}
		};
			await tableClient.AddEntityAsync(entity);
		}
	return Created(string.Empty, attendees);
}
Once the meeting is created and invites are sent, check for the OTP before adding participants to the meeting directly and verify it against the stored value.
[HttpPost(Name = "JoinMeeting")]
public async Task<IActionResult> Join(string meetingId, string participantEmail, string inviteCode)
{
	var tableClient = new TableClient(Globals.AzureStorageUri, Globals.AzureTableForInvites);
  await tableClient.CreateIfNotExistsAsync();
  var queryResultsFilter = tableClient.Query<TableEntity>(e => e.PartitionKey == meetingId && e.RowKey == participantEmail);
	foreach (var entity in queryResultsFilter)
  {
	  if (entity["Code"].ToString() == inviteCode)
    {
	    var client = new HttpClient();
      var authToken = Convert.ToBase64String(Encoding.UTF8.GetBytes($"{Globals.OrganizationId}:{Globals.ApiKey}"));
			client.BaseAddress = new Uri("<https://api.cluster.dyte.in/>");
      client.DefaultRequestHeaders.Authorization = new AuthenticationHeaderValue("Basic", authToken);
			var attendee = new
      {
	      name = entity["Name"].ToString(),
        client_specific_id = entity["ClientSpecificId"].ToString(),
        preset_name = entity["Preset"].ToString(),
        picture = entity["PictureUrl"].ToString()
			};
			var json = JsonSerializer.Serialize(attendee);
      var content = new StringContent(json, Encoding.UTF8, "application/json");
			//Create the meeting using Dyte REST APIs
	    var responseMessage = await client.PostAsync($"/v2/meetings/{meetingId}/participants", content);
	    var responseCode = responseMessage.EnsureSuccessStatusCode();
      if (responseCode.StatusCode != HttpStatusCode.Created)
      {
	      return BadRequest(responseCode);
      }
			var responseData = await responseMessage.Content.ReadAsStringAsync();
      var responseObject = JsonSerializer.Deserialize<ParticipantResponse>(responseData);
      return Created(string.Empty, responseObject);
		}
		else
	  {
		  return NotFound();
		}
  }
  return NotFound();
}
Automate Dyte Meetings
Sometimes, depending on business requirements, you may want to automate Dyte meetings. For example, when a meeting starts, you may want to run some logic, or if a particular participant joins or leaves the meeting, mark their attendance. To achieve this, Dyte exposes events through Webhook. You can subscribe to these events and perform an action. For example, in the code snippet below, we take the participant's details and store them in Azure Table Storage when a participant joins the meeting. You can use these details later for auditing purposes. Similarly, you can work around the meeting, recording, and live-streaming events.
[HttpPost(Name = "CreateMeeting")]
  public async Task<IActionResult> Create(ParticipantWebhookResponse eventData)
  {
      if (eventData == null)
          return StatusCode(400);

      var tableClient = new TableClient(Globals.AzureStorageUri, Globals.AzureTableForMeetings);
      await tableClient.CreateIfNotExistsAsync();
      var entity = new TableEntity(eventData.meeting.sessionId, eventData.participant.customParticipantId)
      {
          {   "DisplayName", eventData.participant.userDisplayName }
      };
      return Created(string.Empty, entity);
  }
Once this API method is ready to accept event data, you can register this with Webhook using the Add Webhook API. So, an entry will be created in Azure Table Storage whenever someone joins a meeting.
Conclusion
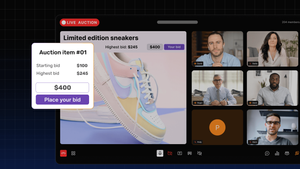
As we have seen, with the ASP.NET backend, it is possible to build solutions around different use cases and extend Dyte's video calling functionalities. We have various samples available, and all use backend; one such use case is live shopping. You can clone and play around with the model used in this blog post here.
I hope you found this post informative and engaging. If you have any thoughts or feedback, feel free to reach out to me on Twitter or LinkedIn. Stay tuned for more related blog posts in the future!