TL;DR
In this tutorial, we will create a video-calling app using the Dyte SDK. This app will enable users to input prompts, generate AI-generated images, and set them as background during video calls. ✨
Introduction
With the advent of text-to-image models like DALL.E 3 and Midjourney, there has been a rise in different use cases for them.
In this tutorial, we're going to create a video calling app that uses a similar model from Stability AI. Users can input prompts and have AI-generated images as their backgrounds during video calls. ✨
So, let's get going! 🚀
High-Level Design of the application
Our aim is to create a seamless and engaging video-calling experience that goes beyond the ordinary. When users click the "Create Meeting" button in our app, they see a staging area with the option to input prompts for AI image generation. The generated image will be set as the background of your video.
- In this project, we will use React with Dyte UI kit and Dyte React Web Core packages for the frontend.
- For the backend, we will use NodeJS with Express
- For image generation, we will use Stability AI
- Lastly, we will use Imgur for storing screenshots.
Folder Structure
We will keep our client code in frontend folder meanwhile our backend code will reside in the root folder itself. After completing the tutorial, the folder structure will look like this. 👇
├── frontend
│   ├── public
│   └── src
│       ├── components
│       │   ├── Home.js
│       │   ├── Meet.js
│       │   └── Stage.js
│       ├── App.css
│       ├── App.js
│       ├── App.test.js
│       ├── index.css
│       ├── index.js
│       ├── logo.svg
│       ├── reportWebVitals.js
│       └── setupTests.js
├── package.json
└── src
    ├── api
    │   ├── dyte.js
    │   └── stability.js
    └── index.js
Step 0: Configurations and Setup
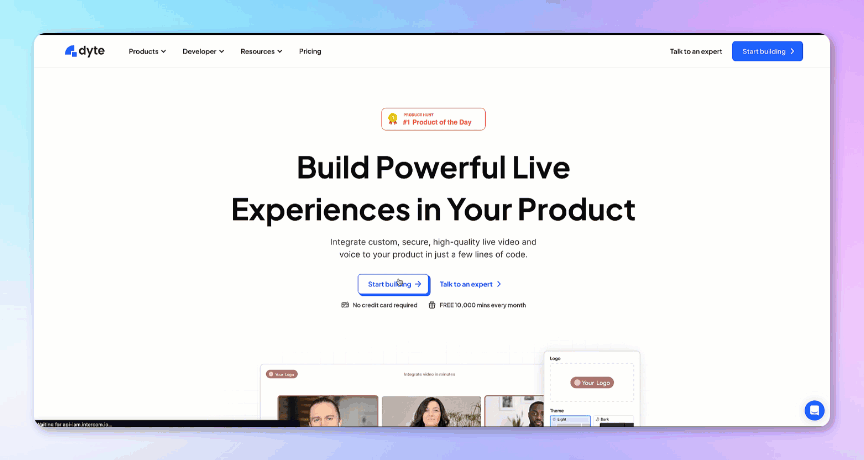
💻 Before building our application, we must set up a Dyte account.
We can create a free account by clicking the "Start Building" button on Dyte.io and signing up using Google or GitHub .
Once signed up, we can access our Dyte API keys from the "API Keys" tab in the left sidebar. We will keep these keys secure as we will use them later. 🤫
We will begin by creating a new directory for our project, and navigating into it using the following commands:
mkdir dyte
cd dyte
Please note:
We will also require accounts on the following platforms:
- Imgur: Create an account on Imgur and create an API key. Here is a step-by-step guide
- Stability AI : Here is a step-by-step guide
Now back to the tutorial.
Step 1: Setting up the frontend
Let's start setting up our front-end project using React and Dyte! ✨
create-react-appWe will create a boilerplate React app using . We can do this with the following command:
npx create-react-app frontend
This will initialize a new React app in the frontend directory. 📁
react-routerThen, we will go ahead and install the dyte react-web-core, dyte react-ui-kit and packages in this project using the following command 👇
cd frontend
npm install @dytesdk/react-web-core @dytesdk/react-ui-kit react-router react-router-dom @dytesdk/video-background-transformer dotenv
Step 2: Setting up the backend
Let's get started with setting up our NodeJs with express backend now. 🙌
We will go back to the root directory of our project and initiate our backend here itself for the ease of hosting:
npm init -y
Now let's install our dependencies
npm install express cors axios dotenv
npm install -g nodemon
Step 3: Setting up our backend application
First let us start by defining our .env file to store our 3rd party API keys. 🔑
DYTE_ORG_ID=<ORG_ID>
IMGUR_CLIENT_ID=<IMGUR_KEY>
DYTE_API_KEY=<DYTE_KEY>
STABILITY_API_KEY=<SATBILITY_KEY>
Now we would need to write code for using Dyte and Stability APIs.
First we will write a module that provides a function to interact with the Stability API to generate an image based on our text prompt.
src/api/stability.js
// Description: This file contains the functions that interact with the Stability API
const axios = require("axios");
const dotenv = require("dotenv");
const path = require("path");

// Create an absolute path to the .env file located one directory above
const dotenvPath = path.join(__dirname, "../..", ".env");

// Load the environment variables from the .env file
dotenv.config({ path: dotenvPath });

const STABILITY_API_KEY = process.env.STABILITY_API_KEY;
const textToImage = async (prompt) => {
	const apiUrl =
		"https://api.stability.ai/v1/generation/stable-diffusion-512-v2-1/text-to-image";

	const headers = {
		Accept: "application/json",
		Authorization: STABILITY_API_KEY, // Replace with your actual API key
	};

	const body = {
		steps: 10,
		width: 512,
		height: 512,
		seed: 0,
		cfg_scale: 5,
		samples: 1,
		text_prompts: [
			{
				text: prompt,
				weight: 1,
			},
			{
				text: "blurry, bad",
				weight: -1,
			},
		],
	};

	try {
		const response = await axios.post(apiUrl, body, {
			headers,
		});

		if (response.status !== 200) {
			throw new Error(`Non-200 response: ${response.status}`);
		}

		const responseJSON = response.data;
		console.log(response);
		console.log(responseJSON);
		const base64Images = responseJSON.artifacts.map((image) => image.base64);

		console.log(base64Images);
		return base64Images[0];
	} catch (error) {
		throw new Error(`Error generating image: ${error.message}`);
	}
};

module.exports = { textToImage };
Now lets write code for using Dyte API.
src/api/dyte.js
const axios = require("axios");
const path = require("path");
const dotenv = require("dotenv");

// Create an absolute path to the .env file located one directory above
const dotenvPath = path.join(__dirname, "../..", ".env");

// Load the environment variables from the .env file
dotenv.config({ path: dotenvPath });

const DYTE_API_KEY = process.env.DYTE_API_KEY;
const DYTE_ORG_ID = process.env.DYTE_ORG_ID;

console.log(DYTE_API_KEY, DYTE_ORG_ID);

const API_HASH = Buffer.from(
  `${DYTE_ORG_ID}:${DYTE_API_KEY}`,
  "utf-8"
).toString("base64");

console.log(API_HASH);
const DyteAPI = axios.create({
  baseURL: "https://api.dyte.io/v2",
  headers: {
    Authorization: `Basic ${API_HASH}`,
  },
});

module.exports = DyteAPI;
Next, we will start with our index.js file, we would need to create the following routes:
POST /meetings - Create a new meeting
POST /meetings/{meetingId}/participants - This route is responsible for adding a participant to a specific meeting identified by meetingId
POST /upload - Responsible for generating the AI image from the prompt, uploading to imgur and returning the imgur link
So let's get started 👇
src/index.js
const express = require("express");
const cors = require("cors");
const DyteAPI = require("./api/dyte");
const axios = require("axios");
const bodyParser = require("body-parser");
const { textToImage } = require("./api/stability"); // Update the path accordingly

const PORT = process.env.PORT || 3000;
const app = express();

app.use(cors());
app.use(express.json());
app.use(bodyParser.json({ limit: "10mb" }));

app.post("/meetings", async (req, res) => {
	const { title } = req.body;
	const response = await DyteAPI.post("/meetings", {
		title,
	});
	return res.status(response.status).json(response.data);
});

app.post("/meetings/:meetingId/participants", async (req, res) => {
	const meetingId = req.params.meetingId;
	const { name, preset_name } = req.body;
	const client_specific_id = `react-samples::${name.replaceAll(
		" ",
		"-"
	)}-${Math.random().toString(36).substring(2, 7)}`;
	const response = await DyteAPI.post(`/meetings/${meetingId}/participants`, {
		name,
		preset_name,
		client_specific_id,
	});

	return res.status(response.status).json(response.data);
});

app.post("/upload", async (req, res) => {
	try {
		const { prompt } = req.body;
		console.log(prompt);

		const generatedImageBase64 = await textToImage(prompt);

		// Upload the generated image to Imgur
		const imgurClientId = process.env.IMGUR_CLIENT_ID;

		const response = await axios.post(
			"https://api.imgur.com/3/image",
			{
				image: generatedImageBase64,
			},
			{
				headers: {
					Authorization: `Client-ID ${imgurClientId}`,
					"Content-Type": "application/json",
				},
			}
		);

		const imgurLink = response.data.data.link;
		return res.status(200).json({ imgurLink });
	} catch (error) {
		console.error("Error uploading image:", error.message);
		if (error.response) {
			console.error("Imgur API response:", error.response.data);
		}
		return res.status(500).json({ error: "Could not upload image." });
	}
});

app.listen(PORT, () => {
	console.log(`Started listening on ${PORT}...`);
});
Step 4: Creating the frontend
This React application provides functionality to automatically create a meeting when the main route (/) is accessed and doesn't contain a meeting ID in the URL.
The application displays different views/components based on the route: a Home view when at the root and a Stage view when accessing a specific meeting.
App.js
import { useEffect, useState } from "react";
import Home from "./components/Home";
import { BrowserRouter, Routes, Route, Link } from "react-router-dom";
import "./App.css";
import Stage from "./components/Stage";

const SERVER_URL = process.env.SERVER_URL || "http://localhost:3000";

function App() {
	const [meetingId, setMeetingId] = useState();

	const createMeeting = async () => {
		try {
			const res = await fetch(`${SERVER_URL}/meetings`, {
				method: "POST",
				body: JSON.stringify({ title: "AI generated image background" }),
				headers: { "Content-Type": "application/json" },
			});

			if (!res.ok) {
				throw new Error("Failed to create meeting"); // You can customize the error message
			}

			const resJson = await res.json();
			setMeetingId(resJson.data.id);
		} catch (error) {
			console.error("Error creating meeting:", error);
		}
	};

	useEffect(() => {
		const id = window.location.pathname.split("/")[2];
		if (!!!id) {
			createMeeting();
		}
	}, []);

	return (
		<BrowserRouter>
			<Routes>
				<Route path="/" element={<Home meetingId={meetingId} />}></Route>
				<Route path="/meeting/:meetingId" element={<Stage />}></Route>
			</Routes>
		</BrowserRouter>
	);
}

export default App;
Now let's come to our Home component.
🚀 The Home component is the heart of the user interface, serving as a minimal entry point for the application. Here's what it does:
Prompt Handling: Users can input a prompt in a text field. This is managed using useState, making the input reactive and interactive.
Meeting Creation: The core feature here is the ability to create a meeting. Upon clicking the Create and join meeting button, it triggers handleCreateMeeting function which further calls handleUpload. This sends the prompt to a server and navigates the user to a meeting page.
src/components/Home.js
import { useNavigate } from "react-router-dom";
import { useState } from "react";
import { useAIImage } from "../SharedDataContext";

function Home({ meetingId }) {
	const [prompt, setPrompt] = useState("");
	const [loading, setLoading] = useState(false);
	const { updateAIImageUrl } = useAIImage();
	const navigate = useNavigate();

	const REACT_APP_SERVER_URL =
		process.env.REACT_APP_SERVER_URL || "http://localhost:3000";

	const handleUpload = async () => {
		try {
			const response = await fetch(REACT_APP_SERVER_URL + "/upload", {
				method: "POST",
				headers: {
					"Content-Type": "application/json",
				},
				body: JSON.stringify({ prompt: prompt }),
			});

			if (response.ok) {
				const data = await response.json();
				console.log(data);
				updateAIImageUrl(data?.imgurLink);
				setLoading(false);
				navigate(`/meeting/${meetingId}`);
			} else {
				console.log("error" + response);
			}
		} catch (error) {
			console.log(error);
		}
	};

	const handleCreateMeeting = async () => {
		setLoading(true);
		try {
			updateAIImageUrl(prompt);
			handleUpload();
		} catch (error) {
			console.error("Error generating image:", error);
		}
	};

	return (
		<div
			style={{
				height: "100vh",
				width: "100vw",
				fontSize: "x-large",
				display: "flex",
				flexDirection: "column",
				justifyContent: "center",
				alignItems: "center",
			}}
		>
			<h2
				style={{
					color: "#00000",
					fontWeight: "bold",
					fontSize: "1.5rem",
					marginBottom: "20px",
				}}
			>
				Enter AI prompt
			</h2>
			<input
				type="text"
				value={prompt}
				onChange={(e) => setPrompt(e.target.value)}
				style={{
					paddingTop: "8px",
					paddingBottom: "8px",
					paddingLeft: "4px",
					paddingRight: "4px",
					border: "2px #2260FD solid",
					borderRadius: "4px",
					width: "300px",
					marginBottom: "20px",
				}}
			/>
			<button
				onClick={handleCreateMeeting}
				style={{
					backgroundColor: "#2260FD",
					color: "white",
					padding: "10px 20px",
					borderRadius: "4px",
					fontWeight: "bold",
					alignItems: "center",
					border: "none",
					cursor: "pointer",
					width: "310px",
					display: "flex",
					justifyContent: "center",
				}}
				disabled={loading}
			>
				{loading ? (
					<div className="spinner-border text-light" role="status">
						<span className="visually-hidden">Loading...</span>
					</div>
				) : (
					"Create and join meeting"
				)}
			</button>
		</div>
	);
}

export default Home;
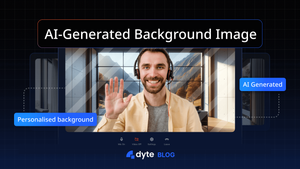
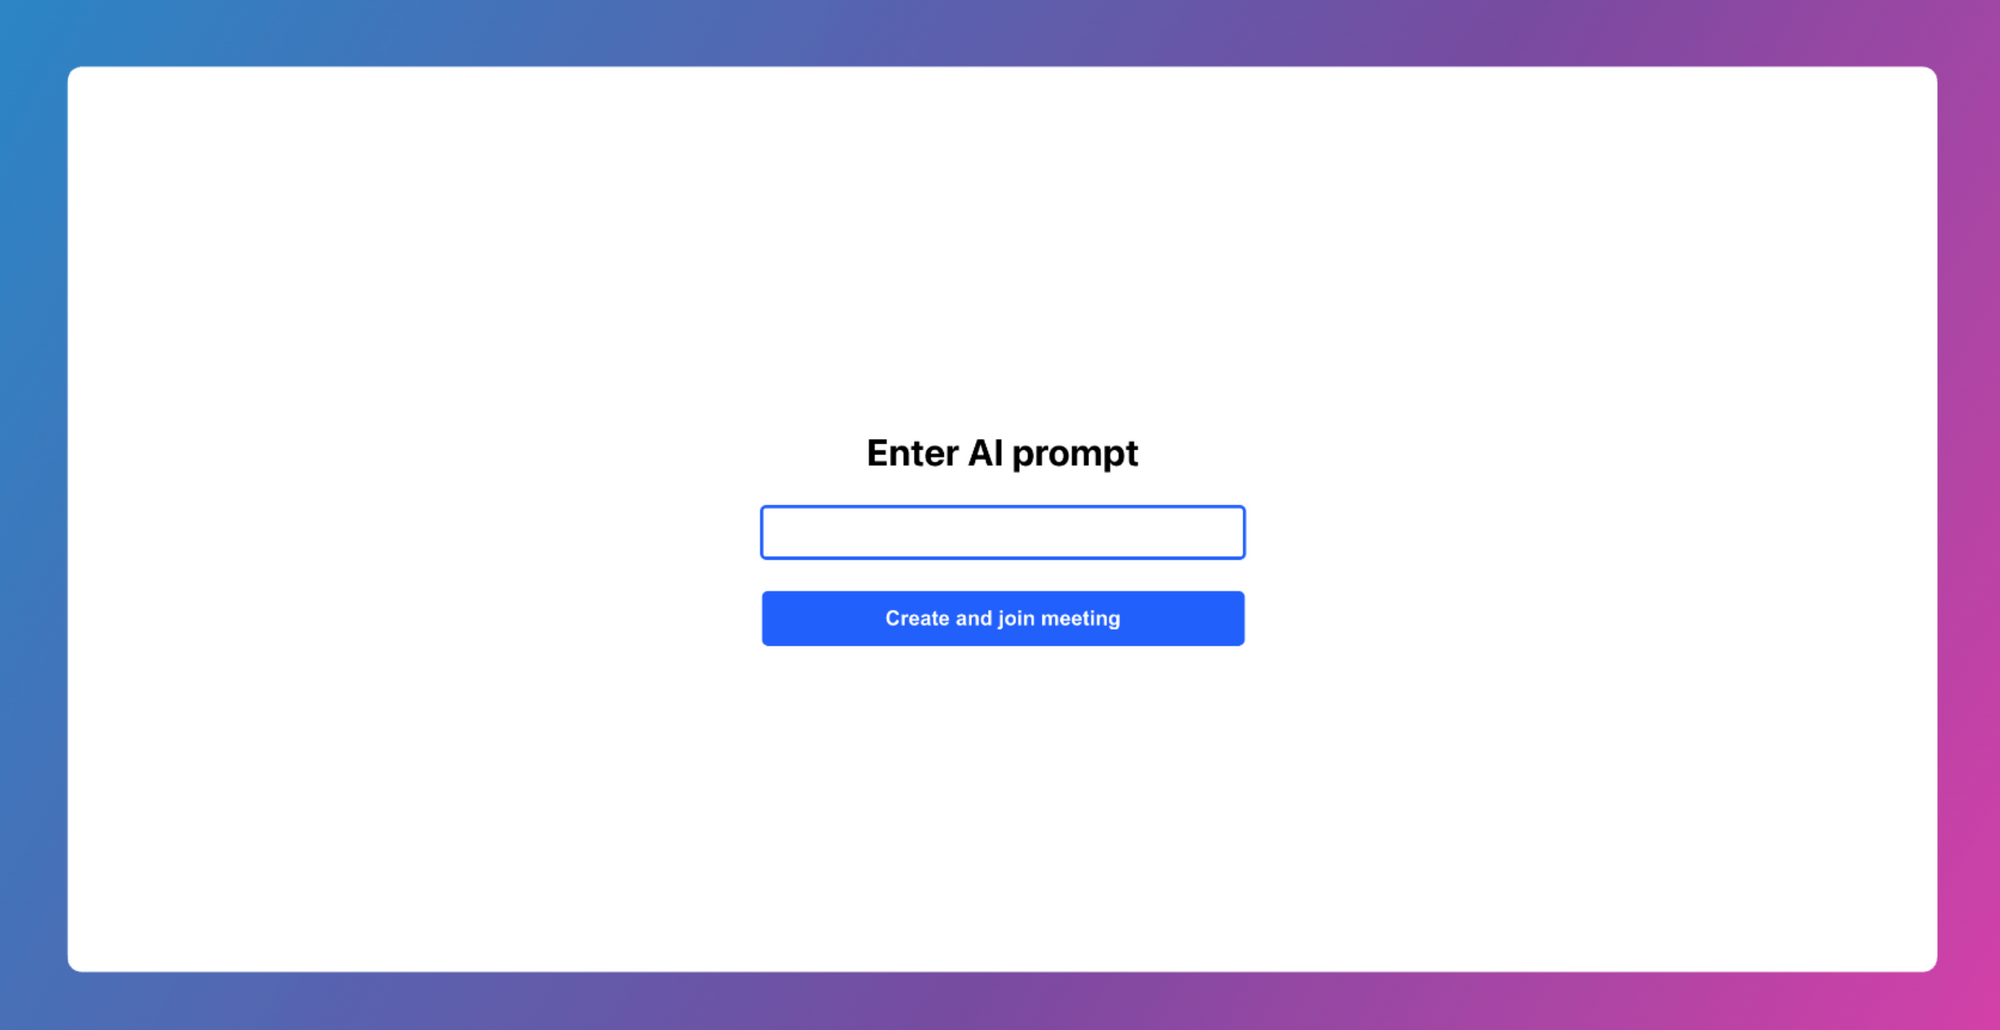
📸 Here's how our root page looks after adding the Home component :
Now, let's delve into the Stage component that renders on route /meeting/:meetingId which acts as a container component, orchestrating the meeting stage of the application.
When the admin clicks on the link provided on the / route, he gets redirected to the Stage page
src/components/Stage.js
import Meet from "./Meet";

const Stage = () => {
	return (
		<div
			style={{
				height: "100vh",
				width: "100vw",
				display: "flex",
				justifyContent: "center",
				alignItems: "center",
				color: "white",
			}}
		>
			<>
				<Meet />
			</>
		</div>
	);
};

export default Stage;
And the last one is the Meet component. The Meet component is where we utilize the DyteMeeting component from the Dyte SDK, to set up and manage a meeting environment.
src/components/Meet.js
import { useState, useEffect, useRef } from "react";
import { DyteMeeting, provideDyteDesignSystem } from "@dytesdk/react-ui-kit";
import { useDyteClient } from "@dytesdk/react-web-core";
import DyteVideoBackgroundTransformer from "@dytesdk/video-background-transformer";
import { useAIImage } from "../SharedDataContext";

// Constants

const REACT_APP_SERVER_URL =
	process.env.REACT_APP_SERVER_URL || "http://localhost:3000";

const Meet = () => {
	const meetingEl = useRef();
	const [meeting, initMeeting] = useDyteClient();
	const [userToken, setUserToken] = useState();
	const [hasInitializedBackground, setHasInitializedBackground] =
		useState(false);

	const { AIImageUrl } = useAIImage();

	const meetingId = window.location.pathname.split("/")[2];

	const initializeVideoBackground = async () => {
		try {
			if (!meeting) {
				return; // No need to proceed if the meeting is not available
			}

			const videoBackgroundTransformer =
				await DyteVideoBackgroundTransformer.init();
			const videoMiddleware =
				await videoBackgroundTransformer.createStaticBackgroundVideoMiddleware(
					AIImageUrl
				);

			meeting.self.addVideoMiddleware(videoMiddleware);
			console.log("Video background initialized");
		} catch (error) {
			console.error("Error initializing video background:", error);
		}
	};

	const joinMeeting = async (id) => {
		try {
			const res = await fetch(
				`${REACT_APP_SERVER_URL}/meetings/${id}/participants`,
				{
					method: "POST",
					body: JSON.stringify({
						name: "new user",
						preset_name: "group_call_host",
						meeting_id: meetingId,
					}),
					headers: { "Content-Type": "application/json" },
				}
			);

			if (!res.ok) {
				throw new Error("Failed to join meeting"); // Customize the error message
			}

			const resJson = await res.json();
			return resJson.data.token;
		} catch (error) {
			console.error("Error joining meeting:", error.message);
		}
	};

	const joinMeetingId = async () => {
		if (meetingId) {
			const authToken = await joinMeeting(meetingId);
			await initMeeting({
				authToken,
			});
			setUserToken(authToken);
		}
	};

	useEffect(() => {
		if (meetingId && !userToken) joinMeetingId();
	}, []);

	useEffect(() => {
		if (meeting && !hasInitializedBackground) {
			initializeVideoBackground();
			setHasInitializedBackground(true);
		}
	}, [meeting, hasInitializedBackground]);

	useEffect(() => {
		if (userToken) {
			provideDyteDesignSystem(meetingEl.current, {
				theme: "light",
			});
		}
	}, [userToken]);

	return (
		<div style={{ height: "100vh", width: "100vw", display: "flex" }}>
			{userToken && (
				<>
					<div style={{ width: "100vw", height: "100vh" }}>
						<DyteMeeting mode="fill" meeting={meeting} ref={meetingEl} />
					</div>
				</>
			)}
		</div>
	);
};

export default Meet;
This component will handle the meeting setup. It will take user prompt and apply an AI-generatedted image from that prompt as the background.nd.
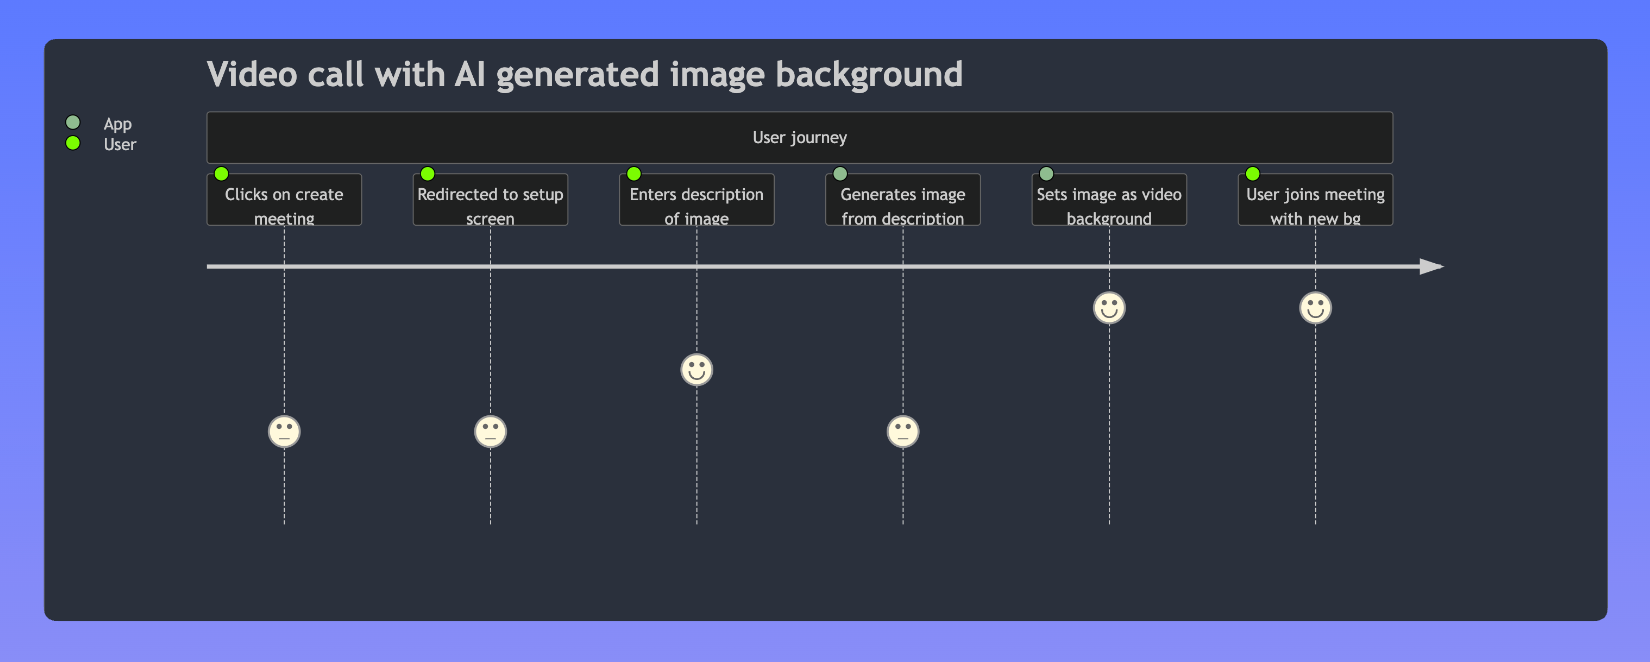
Step 5: Trying out our application
Ta-da! ✨ It's time to put our application to the test and see it in action!
- First click on create meeting 🧑💻
- Then we give a prompt for the AI to generate an image from. Voila! Your background is set
- We then join the meeting with our new customised AI generated background!
You can try the live demo here: Live Demo Link
To run locally:
n the / folder
npm i
nodemon index.js
In frontend/
npm i
npm run start
Conclusion
In conclusion, we've harnessed recent image generation AI's power to create our video call backgrounds, opening up exciting possibilities. Now, your virtual meetings, classes, or gatherings can be infused with vibrant visuals, from scenic landscapes to dynamic artwork.
You may go ahead and start creating your video calling applications with Dyte. 🌟