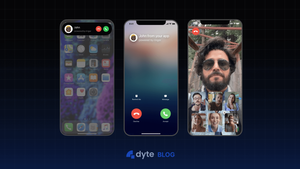
In today's world, video calling has become an essential tool for communication, especially since the COVID-19 pandemic. With the increasing growing demand for video conferencing solutions, developers are constantly looking for ways to integrate video calling features into their applications.
A key issue when dealing with video SDKs is the absence of a continuous user notification system, similar to the ringing feature seen in apps like WhatsApp and FaceTime. This functionality is vital for developers to replicate the real-time, familiar video call experience.
In this blog post, we will explore how to build a robust video call app with a call notification like Facetime using Dyte Video SDK and React Native.
Prerequisite
- A Dyte developer account, which you can create for free at dev.dyte.io.
- Basic understanding of Typescript, React Native, and Node js.
- Conceptual knowledge of asynchronous communication and cloud messaging.
- Any IDE that supports Android projects and Typescript: Webstorm by JetBrains, vs-code, etc.
Techstack
- React Native (Typescript) for the Android app
- NativeWind for styling
- Node.js for a simple HTTP server
- React Native Firebase for cloud messaging
Step 0: Setup and configuration
First, let's ensure we have all the tools and programs required for running a React Native app on our system.
Setting up React Native
To develop React Native applications, we must have Android SDK on our system. This typically involves installing LTS versions of Node.js, Java SE Development Kit (JDK), and Android SDK. This is covered in detail in React Native’s official documentation.
Creating a Dyte developer account
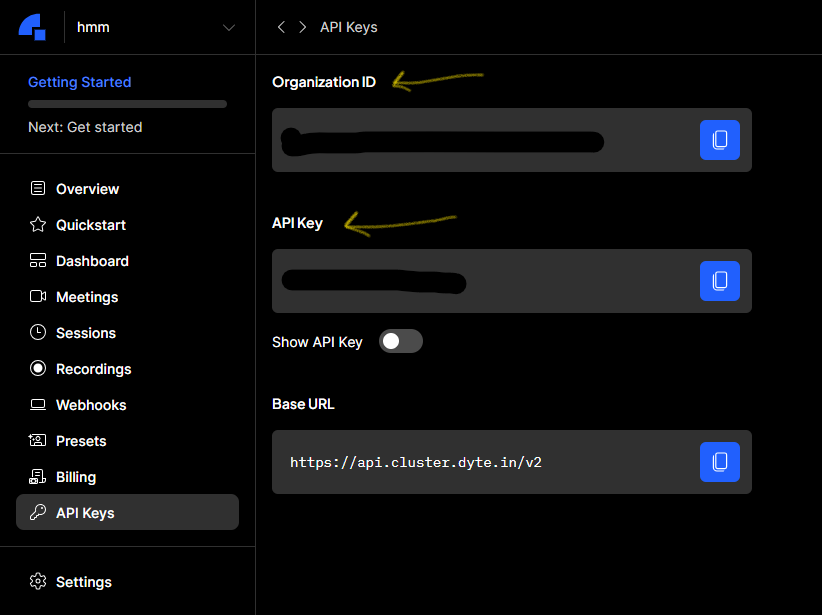
We’ll need a free account to access Dyte’s APIs for creating and managing meetings. Head over to dev.dyte.io and register for a free account. Once you log in, head over to the developer dashboard > API Keys and copy the Organization ID and API Key from the dashboard.
Creating a Firebase project
To enable cloud messaging in our application, we need to create a new project on Firebase. Go to console.firebase.google.com, log in with your Google account, and create a new project. Enter your project’s name, follow the instructions, and complete the project setup.
Now we’re ready to work on our application.
Step 1: Create a React Native app and install dependencies
According to the official documentation, we can create a React Native app using either the CLI or through Expo. In this blog, we’ll use React Native CLI to create our Android app as follows:
npx react-native init react-native-video-callThis will create our app using Typescript and Yarn for package management. Next, install node_modules from package.json using:
yarn installTo run the application, connect your Android device to your machine via USB and make sure USB debugging is enabled from the developer settings. Once the connection is established, run the app using with:
npx react-native run-androidThis will launch the sample boilerplate app on your Android device. Next, follow the official docs to set up and configure NativeWind in the project.NativeWind is a great utility for styling React Native applications. NativeWind uses Tailwind CSS as a scripting language to create a universal style system for React Native. We can style React Native components using Taillwind’s classes via the className prop.
Make sure to check the typescript config section for troubleshooting typescript errors!
Next, we need to install some third-party libraries in the project:
- @dytesdk/react-native-core - for using Dyte’s video call core services
- @dytesdk/react-native-ui-kit - for using Dyte’s video call meeting interface
- @react-native-firebase/app - for connecting with our firebase project
- @react-native-firebase/messaging - for firebase cloud messaging services
- react-native-callkeep - for using Android’s native Caller UI
- zustand - un-opinionated state-management solution for managing global app state
Install the above dependencies one by one or through a single command as follows:
yarn add @dytesdk/react-native-core @dytesdk/react-native-ui-kit @react-native-firebase/app @react-native-firebase/messaging react-native-callkeep zustandInstall the required dependencies for Dyte’s SDK using the following command:
yarn add react-native-webrtc react-native-document-picker react-native-file-viewer react-native-fs react-native-safe-area-context react-native-sound-player react-native-svg react-native-webview
Apart from these, we’ll also need React navigation for navigating between screens in our applications, and axios for making HTTP requests:
yarn add react-native-screens react-native-safe-area-context axios Check their documentation for further configuration and troubleshooting.
Step 2: Setting up an HTTP server
The HTTP server will act as a mediator between our React Native app and the Firebase cloud messaging service. This will allow us to manage the incoming messages from the app and adequately route them to their destination.
First, set up a node.js project with:
yarn init -yAdd dependencies:
yarn add express body-parser firebase-adminWe will use firebase-admin to communicate with the FCM service from our server. More info here.
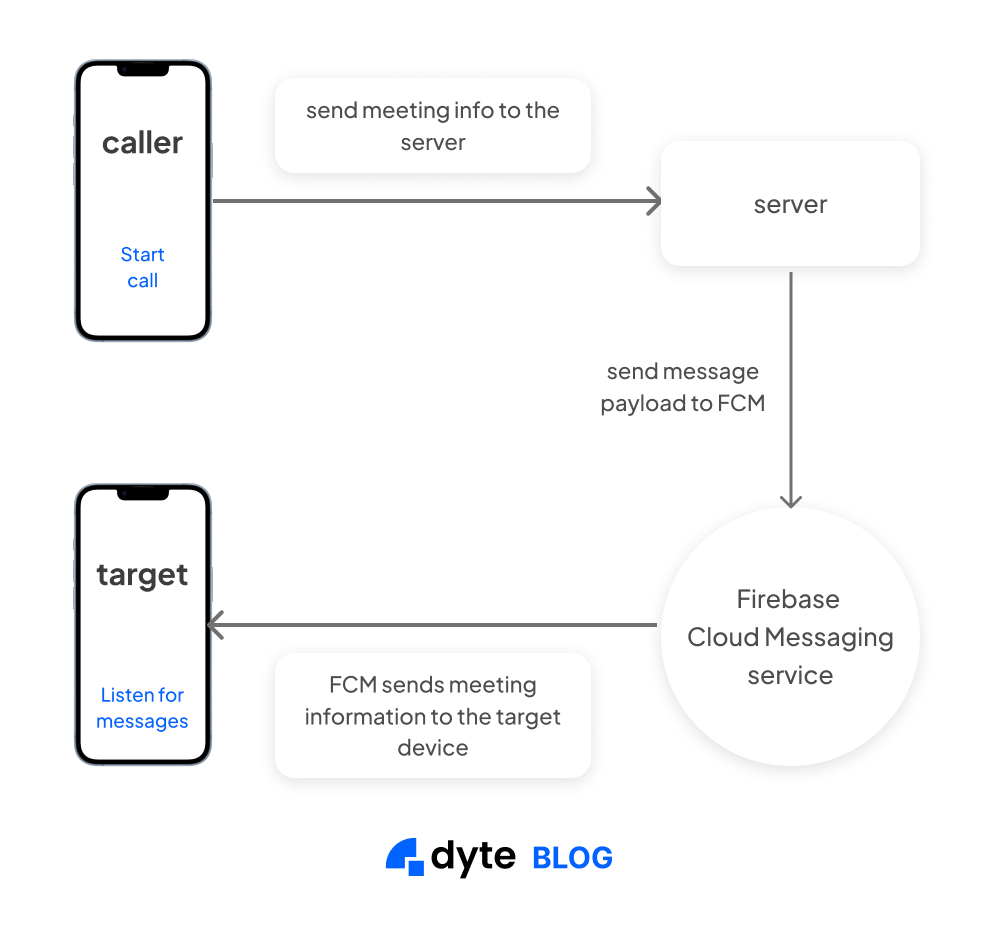
To enable device-to-device communication using Firebase, we can either generate a device token for each device, which is then saved in the server for future use. Or we can avoid the hassle of managing tokens by using topics.
Devices can subscribe to a topic, the server can push any incoming message to the relevant topic, and all the subscribed devices will receive the new message sent by the server. The code for this is as follows:
const express = require('express')
const bodyParser = require('body-parser')
const admin = require("firebase-admin");
const serviceAccount = require("./serviceAccountKey.json");

const app = express()
app.use(bodyParser.json());

admin.initializeApp({
  credential: admin.credential.cert(serviceAccount),
  databaseURL: "<-- Firebase DB url -->"
});

app.post("/onInitMeeting", (req, res) => {
  const {meeting, contact, caller} = req.body;
  const data = JSON.stringify({meeting, contact, caller});

  const message = {
    data: {
      payload: data
    },
    topic: 'activeMeeting',
  };

  admin
    .messaging()
    .send(message)
    .then(response => {
      console.log('Successfully sent message:', response);
      res.json({
        success: true
      });
    })
    .catch(error => {
      console.log('Error sending message:', error);
      res.json({
        success: false
      });
    });
})

app.listen(process.env.PORT || 3000)
To use the FCM service on the server, we will need Firebase credentials. This is a JSON file that can be downloaded from this link:
That’s it for the server.
Step 3: Working on the application
First, we need to configure our React Native app to use react-native-firebase. Follow the official docs to set up react-native-firebase for Android and iOS. Next, we need to subscribe to the topic that will receive meeting information from our HTTP server:
import messaging from '@react-native-firebase/messaging';
.
.
function App() {
  .
  .
  .
  useEffect(() => {
    messaging()
      .subscribeToTopic('activeMeeting')
      .then(() => console.log('Subscribed to topic!'));
  }, []);

  return (...)
}
.
.
.
Source: https://github.com/dyte-io/video-calling-app-with-ringer/blob/main/App.tsx
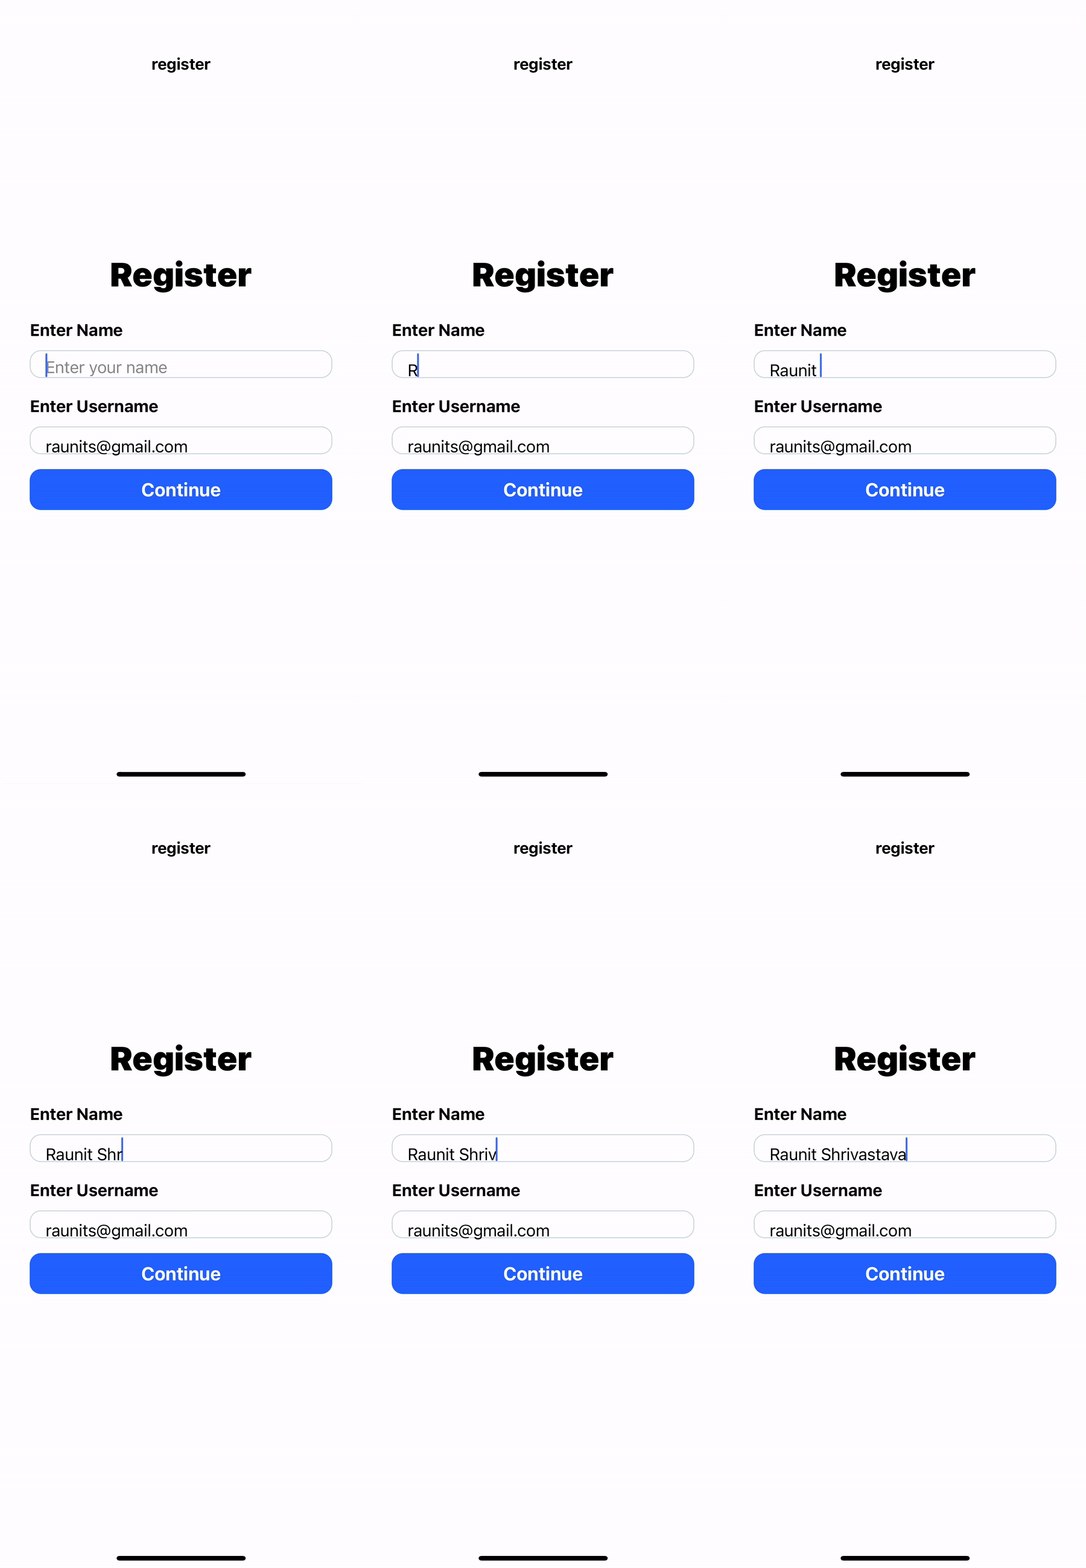
Now, our React Native app will intercept all messages that are sent to the specified topic by the server. Our app will have 3 screens: One register-now screen, one contacts screen, and a join-call screen that manages the active meeting.
Registration screen
This is the entry point to our application. The user has to provide a unique username and a display name for using the application:
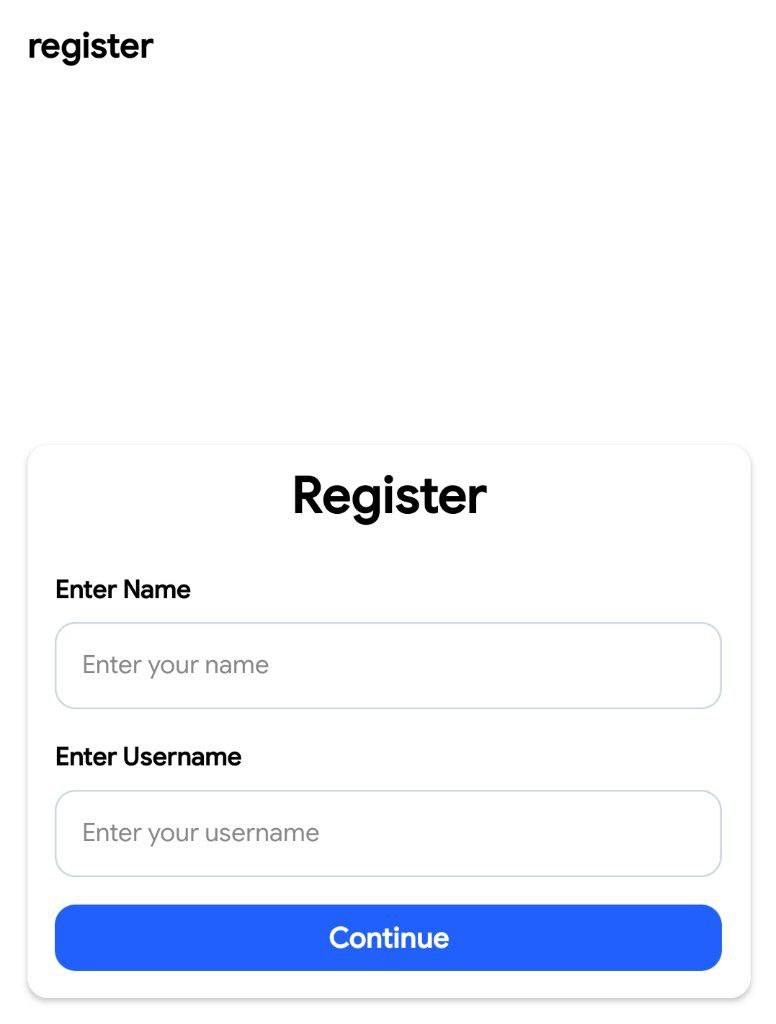
Source: https://github.com/dyte-io/video-calling-app-with-ringer/blob/main/src/pages/Register/index.tsx
The continue button will then redirect the user to the contacts page.
My contacts
This will hold a list of contacts with whom we can start a video call. The user can tap on any contact to start a video call with them.
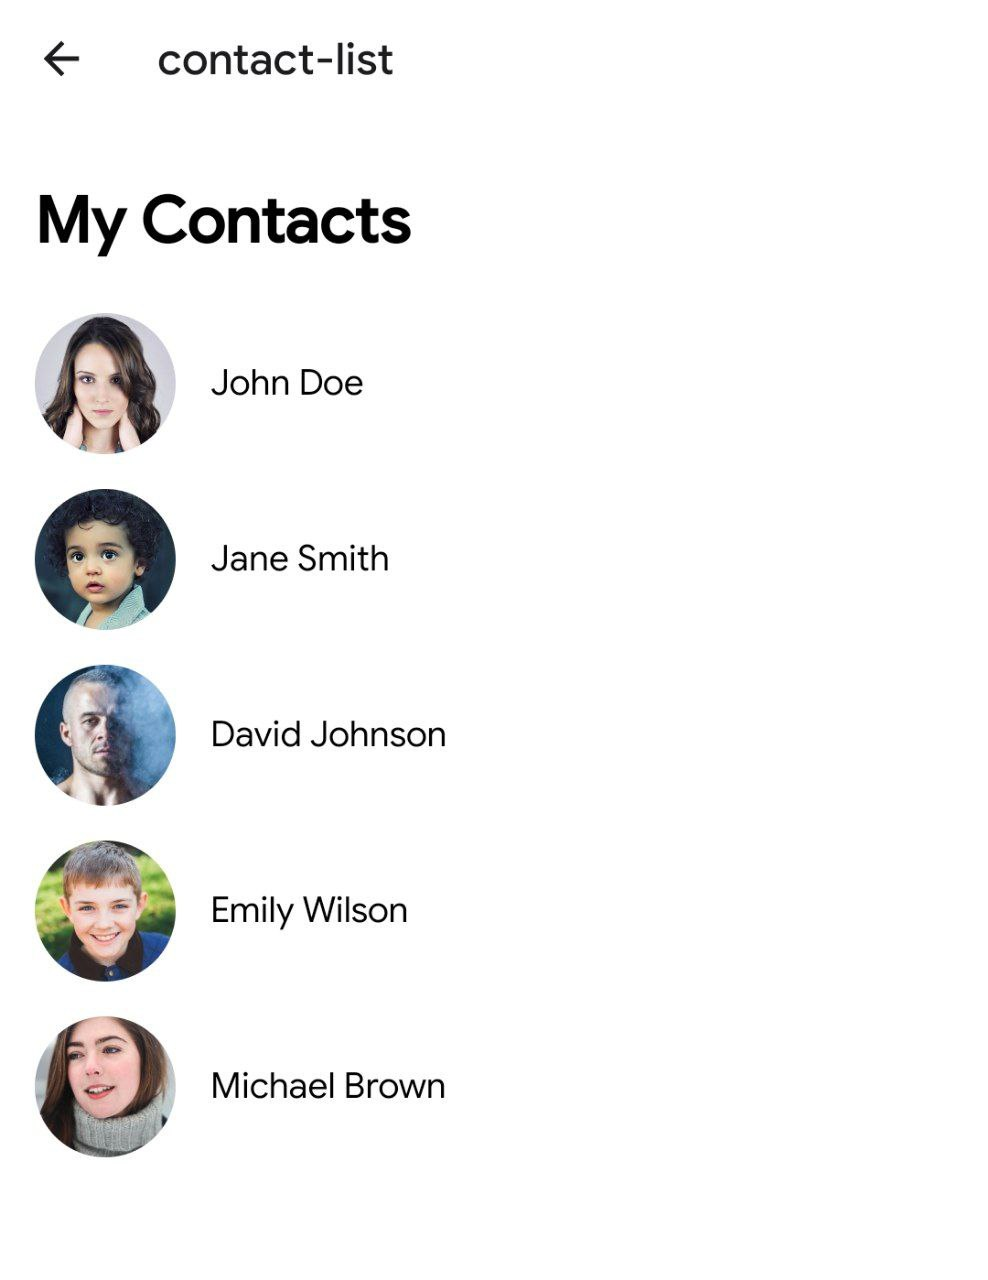
To start a call with the selected contact, we simply pass the selected contact to the join-call screen, which will handle the meeting connection:
function initiateCall(contact: Contact) {
  navigation.push('join-call', { contact });
}
We will also listen for any new messages from the FCM service on this screen. We can register a message listener in the useEffect hook as follows:
useEffect(() => {
    return messaging().onMessage(onPayload);
  }, [onPayload]);
The onMessage function accepts a callback function that is fired whenever a new message is received from the FCM service:
const onPayload = useCallback(
    (remoteMessage: FirebaseMessagingTypes.RemoteMessage) => {
      if (!remoteMessage.data) {
        console.log('empty data');
        return;
      }

      const payload = JSON.parse(
        remoteMessage.data.payload,
      ) as FirebaseSnapshot;
      const {meeting, contact, caller} = payload;

      log('payload: ', payload);

      if (contact.username === username) {
        setDetails({meeting, caller});
        RNCallKeep.displayIncomingCall(uuidv4(), caller.username, caller.name);
      } else {
        console.log('BAD USERNAME');
      }
    },
    [username],
  );
Source: https://github.com/dyte-io/video-calling-app-with-ringer/blob/main/src/pages/ContactList/index.tsx
Here, we first check if the message is valid and has a payload. Then we initiate the “incoming call” caller ui using the react-native-callkeep library. This is how it looks in action:
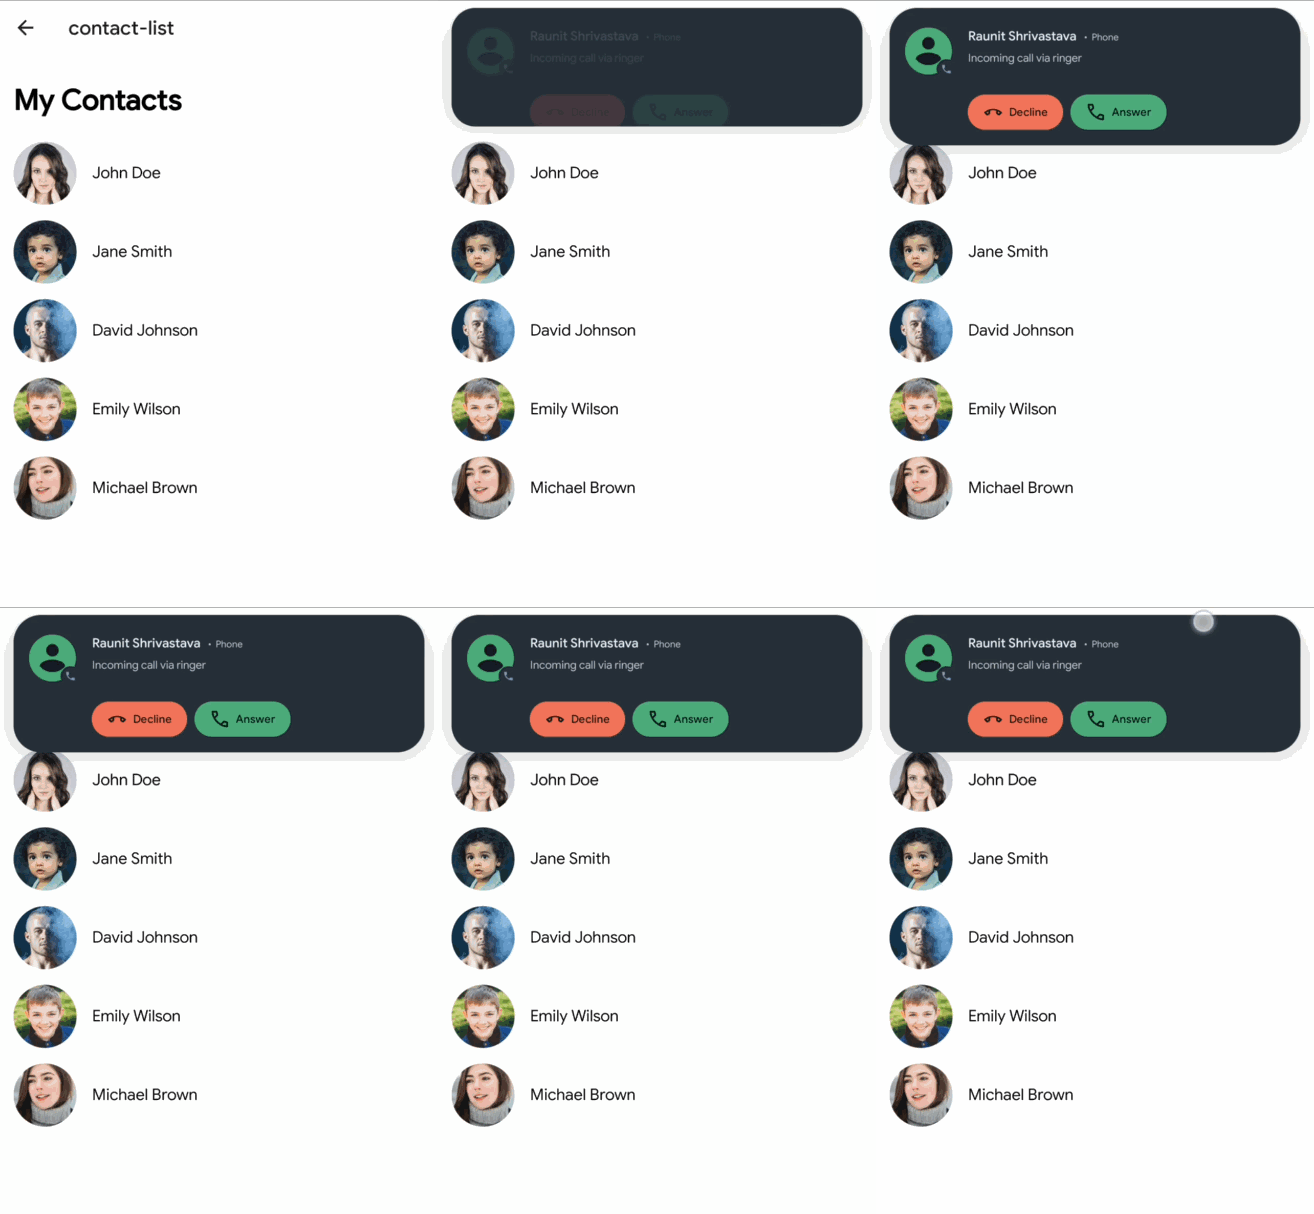
As you might have guessed, to make this work, we need to keep this screen open, i.e., the incoming call will not be intercepted if we exit the app. We will fix this using a Headless JS task in the next section.
The meeting screen
This screen is where we will manage meetings using Dyte’s SDK. Creating meetings with Dyte is really simple and easy. See the following tsx snippet:
// Add these imports and implement useDyteClient hook
import {DyteProvider, useDyteClient} from '@dytesdk/react-native-core';
import {DyteMeeting, DyteUIProvider} from '@dytesdk/react-native-ui-kit';
const [client, initClient] = useDyteClient();

// Return this component for Meeting Screen
<ScrollView className="bg-black">
  <View className="bg-black">
    <Text className="text-white text-xl bg-[#141414] p-4">
      Meeting with {activeMeeting?.id ? caller?.name : contact.name}
    </Text>
    {participant?.token && meeting?.title ? (
     <DyteProvider value={client}>
       <DyteUIProvider>
         <DyteMeeting meeting={client} />
       </DyteUIProvider>
     </DyteProvider>
    ) : (
      <Text>Loading...</Text>
    )}
  </View>
</ScrollView>;
Source: https://github.com/dyte-io/video-calling-app-with-ringer/blob/main/src/pages/JoinCall/index.tsx
Believe it or not, this is all it takes to create fully functional meetings using Dyte’s SDK. We only need to initialize the DyteMeeting component with the clientId, roomName, and authToken. Handling audio and video, managing meeting participants, etc, all functionalities are provided by this component out-of-the-box!!
To start a video call with the target contact, we have to follow the following steps:
- Create a new meeting
- Add the current user to that meeting
- Simultaneously, we notify the server that a new meeting has started, so that the target device can catch the call details
We can create a meeting as follows:
function _createMeeting() {
  return new Promise<Meeting>((resolve, reject) => {
    axios
      .post(
        'https://api.cluster.dyte.in/v2/meetings', {
          title: 'Meeting-' + Math.random().toString(8),
        }, {
          headers: {
            Authorization: `Basic ${basic_token}`,
          },
        },
      )
      .then(({ data }) => {
        if (data.success) {
          resolve(data.data);
        }
        reject('failed');
      })
      .catch(err => {
        log('cannot create meeting', err);
        reject('failed');
      });
  });
}
On success, this will return meeting details, which we can store for future use:
_createMeeting().then(meetInfo => {
  log('meeting info:-', meetInfo);
  setMeeting(meetInfo);
});
Next, to add new participants to the meeting:
function _addParticipant(meetId: string, username: string, fullName: string) {
  return new Promise<ParticipantDetails>((resolve, reject) => {
    axios
      .post(
        `https://api.cluster.dyte.in/v2/meetings/${meetId}/participants`,
        {
          name: fullName,
          preset_name: "group_call_host",
          custom_participant_id: username,
        },
        {
          headers: {
            Authorization: `Basic ${basic_token}`,
            "Content-Type": "application/json",
          },
        }
      )
      .then(({ data }) => {
        if (data.success) {
          resolve(data.data);
        }
        reject("failed");
      })
      .catch((_) => {
        reject("failed");
      });
  });
}
On success, this will return the new participants’ info. This information contains the authToken, which is a required prop for the DyteMeeting component we saw earlier, and then we initialize the DyteComponent by passing the:
addParticipant(meeting.id, localUsername, localFullName).then(
  (participantInfo) => {
    log("participant info:-", participantInfo);
    if (participantInfo?.token) {
      initClient({
        authToken: participantInfo?.token,
        defaults: {
         audio: true,
         video: true,
        },
      });
    }
    setParticipant(participantInfo);
  }
);
As mentioned in the docs, the DyteMeeting component provides a onInit prop, which expects a callback function that is fired when the meeting is started. This is where we notify our HTTP server about the new meeting:
function onInitMeeting (_meeting: Meeting) => {
  log('received meeting:-', _meeting);
  if (!meeting?.id) {
    return;
  }
  console.log('init');
  if (!client) {
    return;
  }
  client.self.on('roomLeft', () => {
     setParticipant(undefined);
     navigation.goBack();
   });
  notifyServer({
    meeting,
    contact,
    caller: {username: localUsername, name: localFullName, icon: ''},
   });
 };
The notifyServer function is a regular POST request that sends meeting info, target contact, and caller details to the server:
export function notifyServer(payload: {
  meeting?: Meeting;
  contact: Contact;
  caller: Contact;
}) {
  axios.post(server_url + "/onInitMeeting", payload).then(({ data }) => {
    console.log("sent to " + server_url + "/onInitMeeting");
    console.log(data);
  });
}
With that, the meeting screen is ready to use. Below is a demo from the caller’s point of view:
Step 4: Receiving calls when the app isn’t active
Currently, the app will receive incoming calls only when the app is active, i.e., it is in the foreground state. If we quit the application, then we won’t receive any incoming calls, which isn’t practical for a video calling application.
To fix this, we can use the Headless JS API from React Native. Headless JS is a way to run tasks in JavaScript while your app is in the background. It can be used, for example, to sync fresh data, handle push notifications, play music, or in our case, listen for incoming calls from the background.
To do this, we first need to register a background event listener for react-native-firebase as follows:
useEffect(() => {
  return messaging().setBackgroundMessageHandler(async (remoteMessage) => {
    onPayload(remoteMessage);
    return Promise.resolve();
  });
}, [onPayload]);
As mentioned in their documentation, when the application is in a background or quit state, the onMessage handler will not be called when receiving messages. Instead, we need to set up a background callback handler via the setBackgroundMessageHandler method.
This will enable us to process the incoming messages from the FCM service, but our app is still in the background. We need to bring the app back to the foreground once the call is accepted. To accomplish this, we modify the OnAnswerCallAction as follows:
function onAnswerCallAction(data: { callUUID: string }) {
  const { callUUID } = data;
  RNCallKeep.endCall(callUUID);
  reOpenApp();

  if (details) {
    log("details", details);
    navigation.push("join-call", {
      contact: { name: "", username: "", icon: "" },
      caller: details.caller,
      activeMeeting: details.meeting,
    });
  } else {
    console.log("DETAILS NULL");
  }
}
Notice the use of reOpenApp function above. This is the Headless JS task that will bring our app back to the foreground:
export const reOpenApp = async () => {
  console.log("opening ringer://");
  return Linking.openURL("ringer://open");
};
Here we basically make use of the Linking interface from React Native. Linking provides us with a general interface to interact with both incoming and outgoing app links. In order to bring our app back to the foreground, we will define a custom URL scheme for our app:
<intent-filter>
	<action android:name="android.intent.action.VIEW"/>
	<category android:name="android.intent.category.DEFAULT"/>
	<category android:name="android.intent.category.BROWSABLE"/>
	<data android:scheme="ringer" android:host="open"/>
</intent-filter>This will trigger our app whenever we try to open the URLs of the form ringer://open. So overall, we check for incoming calls using the background listener, then once we get the call notification, we will force the app to open a URL that matches the URL scheme for our application, so that our app can come back to the foreground from the quit state. This is known as Deep linking.
Lastly, we need to register our reOpenApp function as a Headless JS task as follows:
import { AppRegistry } from "react-native";
.
.
.
AppRegistry.registerHeadlessTask("reopen app", reOpenApp);
Source: https://github.com/dyte-io/video-calling-app-with-ringer/blob/main/index.js
This will allow us to execute code from the background state.
Thus, the app can now receive call notifications from the background. Below is a quick demo for the same:

Source: https://github.com/dyte-io/video-calling-app-with-ringer/blob/main/src/pages/ContactList/index.tsx.
With that, our app is complete!! The complete source code of this demo is kept at - https://github.com/dyte-io/video-calling-app-with-ringer/.
Conclusion
That’s how easy it is to create a live video call app with Dyte!!
Building a video call app with Dyte Video SDK and React Native offers a powerful and efficient solution for incorporating real-time communication into your mobile applications.
By harnessing the capabilities of Dyte SDK and the flexibility of React Native, developers can create seamless and high-quality video calling experiences for their users.
So why wait? Start building your own video call app today and unlock a world of possibilities in real-time communication with Dyte! 🚀

